
How to Make a Photo Background White Online
Learn how to make a photo background white online using simple photo editing tools. Remove distracting backgrounds, add a clean white background, and create professional-looking images without Photoshop.
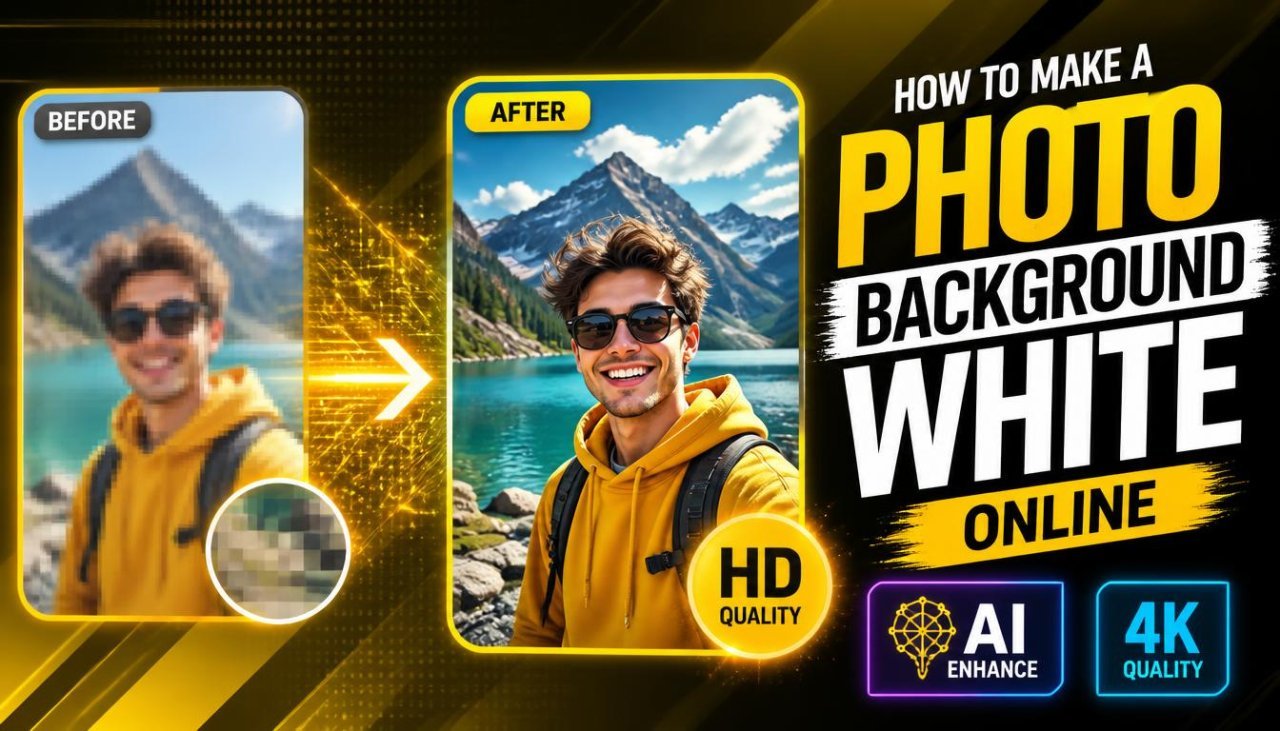
How to Make a Photo Background White Online
Introduction
A clean white background can make a photograph look simple, professional, and easy to use.
Whether you are preparing product photos for an online store, creating a profile image, designing a website graphic, or cleaning up a personal photograph, you may want to make a photo background white online without using complicated software.
The good news is that you can do this directly in a web browser. Online background-removal and photo-editing tools can separate the main subject from the original background and replace it with a solid white background.
You do not need to be an experienced designer for a basic edit.
In this guide, you will learn how to make a photo background white online, which types of images work best, how to get cleaner edges, common mistakes to avoid, and how to make the final image look natural.
Why Use a White Photo Background?
White is one of the simplest backgrounds for photography and graphic design.
A white background can help keep attention on the main subject without adding visual distractions.
It is particularly useful for:
- Product photographs
- Ecommerce images
- Website graphics
- Catalog images
- Profile pictures
- Marketplace listings
- Social media designs
- Portfolio images
- Simple promotional graphics
For example, a product photographed on a messy table may look less professional because the surrounding objects compete with the product.
Replacing that background with white can create a cleaner composition.
What Does a White Background Do to a Photo?
A white background removes many visual distractions and creates a neutral space around the subject.
It can make an image feel:
- Clean
- Simple
- Organized
- Professional
- Bright
- Minimal
However, a white background is not automatically better for every photograph.
The right background depends on the purpose of the image.
For a product listing, white may be ideal. For a creative portrait, a colorful or photographic background might communicate more personality.
Can You Make a Photo Background White Online?
Yes.
Online photo editors can help you remove the original background and replace it with a white one.
The basic process is usually:
- Upload your photo.
- Remove the original background.
- Check the subject's edges.
- Add a white background.
- Adjust the subject if necessary.
- Preview the final image.
- Download the edited photo.
Some tools can automatically detect the subject, while others provide manual selection and erasing controls.
How to Make a Photo Background White Online
Step 1: Choose a Good Original Photo
Start with the highest-quality version of the image you have.
A clear, high-resolution photograph generally gives an editing tool more information to work with.
Before uploading the image, look at the subject and its surroundings.
Ask yourself:
- Is the subject clearly visible?
- Does it have reasonably clear edges?
- Is there enough contrast between the subject and background?
- Are there overlapping objects?
- Is the image sharp enough?
A simple photograph with a clear subject is usually easier to edit than a crowded image.
Step 2: Upload the Photo
Open an online photo editor that supports background removal or replacement.
Upload the image and allow the tool to process it.
Depending on the editor, the background may be removed automatically or you may need to select the subject manually.
If the photograph contains private information, check the website's privacy and file-handling policies before uploading it.
Step 3: Remove the Existing Background
Look for a feature such as:
- Remove Background
- Background Remover
- Erase Background
- Cutout
- AI Background Removal
- Background Eraser
An automatic background-removal feature can save time.
After the removal is complete, do not immediately download the image.
First, inspect the edges.
Step 4: Check the Subject's Edges
This is one of the most important steps.
Look around:
- Hair
- Shoulders
- Hands
- Fingers
- Clothing
- Shoes
- Product corners
- Small accessories
- Thin objects
You may find small pieces of the original background still attached to the subject.
You may also notice that a portion of the subject has been removed accidentally.
If the editor provides erase and restore controls, use them to correct these areas.
Step 5: Add a White Background
Once the original background has been removed, choose the background option in your editor.
Select white as the background color.
In many editors, you can simply choose white from a color palette.
If the tool allows custom colors, a pure white background is commonly represented by the color value:
#FFFFFF
For most basic uses, this is all you need.
Step 6: Position the Subject
After adding the white background, check the subject's position.
Depending on the purpose of the image, you may want to:
- Center the subject
- Leave equal space around it
- Adjust its size
- Move it slightly upward or downward
- Keep enough empty space for text
For product images, consistent positioning can be particularly useful when you are preparing several photographs for the same website or catalog.
Step 7: Review the Final Image
Before downloading, look carefully at the entire image.
Check for:
- Background fragments
- Dark halos
- Rough edges
- Missing details
- Unnatural shadows
- Uneven white areas
- Incorrect subject proportions
A background may appear white at first glance while still containing gray or colored patches around the subject.
Zoom in if necessary.
Photos That Work Best With White Backgrounds
Some photographs are easier to convert than others.
Product Photos
Product images are one of the most common reasons people need a white background.
For example:
- Clothing
- Shoes
- Bags
- Electronics
- Home accessories
- Handmade products
- Small tools
- Beauty products
A white background can keep the focus on the product.
Portrait Photos
White backgrounds can also work for portraits.
They are useful for:
- Profile images
- Team pages
- Simple business graphics
- Portfolio photographs
- Creative designs
However, hair and small details can make portrait background removal more difficult.
Food Photos
Food photographs can sometimes work well with white backgrounds, particularly for menus, catalogs, and product packaging.
The subject should have enough contrast against the background so that its edges remain clear.
White Background for Ecommerce Photos
Online stores often need product images that are consistent in appearance.
Imagine a store where:
- Product A has a white background.
- Product B has a bedroom background.
- Product C has a dark wall.
- Product D has an outdoor background.
The product pages may look inconsistent.
Using a similar background style across product images can create a more organized visual presentation.
However, always check the requirements of the marketplace or sales platform where you plan to use the image. Different platforms may have their own image specifications.
White Background vs Transparent Background
These two options are often confused.
A white background means the final image actually contains a white area behind the subject.
A transparent background means there is no background color in that area.
| Feature | White background | Transparent background |
|---|---|---|
| Background color | White | None |
| Common format | JPG, PNG | Usually PNG |
| Easy to use on white pages | Yes | Yes |
| Can place over other backgrounds later | Limited | Yes |
| Useful for product listings | Often | Depends on platform |
| Good for logos/design assets | Sometimes | Often useful |
Choose white when you specifically need a finished white background.
Choose transparency when you want the freedom to place the subject over different backgrounds later.
How to Get a Clean White Background
Simply replacing the background color is not enough.
The edges around the subject also matter.
Use a High-Quality Original
Low-resolution photographs can have rough or blurry edges.
Starting with a larger, clearer image can make background removal easier.
Avoid Excessive Cropping
Do not crop the subject too tightly before removing the background.
Leave enough space around important details.
Check Thin Details
Thin elements such as:
- Hair strands
- Cables
- Jewelry
- Handles
- Fingers
- Plant stems
can be difficult for automatic background-removal tools.
Inspect them carefully.
Common Problems When Making a Background White
Problem 1: A Gray Halo Appears
Sometimes the edge of the subject contains pixels from the original background.
When placed against white, those pixels can appear as a gray or colored outline.
Solution: Use an edge-cleaning, erase, or refine tool if available.
Problem 2: Part of the Subject Disappears
This can happen when the subject and original background have similar colors.
For example, a white shirt against a light-colored wall can be difficult to separate.
Solution: Restore the missing area manually if the editor provides a restore feature.
Problem 3: The Background Is Not Completely White
Some areas may remain slightly gray or colored.
Solution: Check the background after removal and make sure the replacement layer or color is actually white.
Problem 4: The Subject Looks Like It Is Floating
If the original photo had a natural shadow and the background removal eliminates it, the subject may look disconnected from the surface.
Solution: Depending on the purpose of the image, consider adding a subtle, realistic shadow.
Simple Example: Product Photo
Suppose you have a photo of a pair of shoes sitting on a patterned floor.
You want to use the image for an online store.
A basic workflow would be:
- Upload the shoe photo.
- Remove the patterned floor.
- Check around the shoe edges.
- Restore any missing shoe details.
- Add a white background.
- Center the shoes.
- Check the sole and laces.
- Review the shadow.
- Export the final image.
The result should focus attention on the shoes rather than the original floor.
Simple Example: Portrait Photo
Imagine you have a portrait taken against a busy indoor background.
You want a clean profile image.
The process can be:
- Upload the portrait.
- Remove the room background.
- Check the hair and shoulders.
- Clean up the edges.
- Add a white background.
- Adjust the person's position.
- Review the image at normal size.
- Download the final version.
The most important part is preserving the person's natural appearance.
When a White Background May Not Be the Best Choice
White is versatile, but it is not always the right option.
You may prefer another background when:
- The subject is mostly white.
- The photograph is intended to look artistic.
- You need strong brand colors.
- The image requires environmental context.
- A lifestyle setting is important.
- The subject blends into white.
For example, a white product photographed against pure white may need a subtle shadow or outline to remain visually distinct.
Beginner-Friendly Workflow
If you are new to background editing, remember this simple process:
Upload → Remove → Inspect → Add White → Position → Review → Download
You do not need to master advanced photo editing to perform a basic background replacement.
The main skill is learning to inspect the edges and make small corrections when the automatic result is not perfect.
Final Thoughts for Part 1
Making a photo background white online is a practical way to create cleaner images without using complicated desktop software.
For product photos, portraits, ecommerce listings, website graphics, and many other uses, a white background can provide a simple and consistent appearance.
The best results come from starting with a good original photo, removing the background carefully, checking detailed edges, and reviewing the final image before downloading it.
In Part 2, we will cover more advanced techniques, difficult subjects, comparison tables, practical examples, common mistakes, pros and cons, and best practices for creating clean white-background photos.
How to Make a Photo Background White Online: Advanced Tips and Best Practices
How to Get a Professional-Looking White Background
Making the background white is only one part of the editing process.
A photograph can have a white background and still look poorly edited if the subject has rough edges, missing details, strange shadows, or an obvious outline.
For a cleaner result, pay attention to the relationship between the subject and the new background.
Here are practical techniques that can help.
1. Start With Good Lighting
The original photograph has a major effect on the final result.
A well-lit subject with clear edges is generally easier to separate from its background.
When possible, use photos where:
- The subject is clearly visible.
- The lighting is reasonably even.
- There is enough contrast between the subject and background.
- The subject is not heavily blurred.
- Important edges are visible.
This is particularly important for white or light-colored objects.
For example, a white shirt photographed against a very light wall may be difficult to separate because the colors are similar.
2. Pay Attention to the Subject's Edges
Edges are often the first place where an edited image reveals that a background has been replaced.
Look carefully around:
- Hair
- Ears
- Shoulders
- Hands
- Fingers
- Clothing
- Shoes
- Product corners
- Thin cables
- Jewelry
- Handles
If you notice a colored outline around the subject, the original background may not have been completely removed.
Use the available erase, restore, or refine controls to clean the area.
3. Use a Restore Tool When Necessary
Automatic background removal can occasionally remove parts of the subject.
For example, a tool may mistake:
- Loose hair
- A thin strap
- A small product detail
- A transparent section
- A narrow gap
for background.
If your editor provides a restore brush, use it to bring back missing details.
Work slowly instead of painting over a large area.
Small corrections usually give you more control.
4. Be Careful With White Objects
White backgrounds can create a special problem when the subject itself is white.
Imagine a white sneaker on a white background.
The shoe may blend into the background, particularly around its edges.
You can still use a white background, but the subject may need:
- A subtle natural shadow
- Good contrast in the original photograph
- Careful edge separation
- Appropriate exposure
- Slight visual definition
The goal is to keep the product clearly visible without changing its actual appearance.
5. Consider Adding a Natural Shadow
A completely shadow-free product can sometimes look as though it is floating.
A subtle shadow can help establish where the object sits.
For example, if you are editing a product photograph of a bottle, a soft shadow below the bottle can give the image a stronger sense of depth.
However, avoid creating a dark or exaggerated shadow.
The shadow should support the image rather than become the main visual element.
White Background for Different Types of Photos
The editing approach can vary depending on the type of photograph.
| Photo type | Main goal | Important detail |
|---|---|---|
| Product | Clean presentation | Preserve product details |
| Portrait | Simple appearance | Protect hair and facial edges |
| Clothing | Clear product view | Preserve thin fabric details |
| Jewelry | Clean display | Handle transparency and reflections carefully |
| Food | Focus on subject | Preserve natural texture |
| Electronics | Professional presentation | Keep edges and ports accurate |
| Handmade products | Ecommerce presentation | Preserve small details |
| Profile photo | Clean appearance | Keep hair and shoulders natural |
Product Photography: Best Practices
Product photos often benefit from consistent backgrounds.
If you are preparing several products, try to keep the following elements consistent:
- Background color
- Product size
- Product position
- Camera perspective
- Image dimensions
- Spacing around the product
For example, if one product is centered and another sits near the bottom edge, your product catalog may look inconsistent.
A repeatable editing workflow can help.
Recommended Product Workflow
Upload → Remove background → Inspect edges → Add white → Center product → Check shadow → Export
Repeat the same process for other products whenever possible.
White Background for Marketplace Listings
If you are preparing product images for an ecommerce marketplace, always check the marketplace's current image requirements before publishing.
Requirements can differ for:
- Background color
- Image dimensions
- File format
- Product positioning
- Margins
- Image quality
- Additional graphics or text
Do not assume that every platform uses identical image rules.
A white background may be useful, but compliance with the platform's requirements is still important.
Portrait Photos With a White Background
A white background can give portraits a clean and simple appearance.
It can work particularly well for:
- Professional profile pictures
- Team member pages
- Personal portfolios
- Business websites
- Simple social media graphics
What to Watch For
Hair is usually one of the most difficult areas.
Check for:
- Missing strands
- White halos
- Rough edges
- Background fragments
- Missing parts around the ears
Also make sure the person's clothing does not disappear into the white background.
Changing a Colored Background to White
Sometimes you do not need a complete background replacement.
If the original background is already relatively simple, you may be able to select it and change its color to white.
This can be faster than completely separating the subject.
For example, a product photographed against a solid blue backdrop may be easier to edit than a product photographed in a crowded room.
The method depends on the editor you are using.
White Background vs Other Background Colors
White is popular, but other colors can serve different purposes.
| Background | Common use | Visual effect |
|---|---|---|
| White | Products, profiles | Clean and neutral |
| Light gray | Products, portraits | Soft and understated |
| Black | Premium products | Strong contrast |
| Beige | Lifestyle products | Warm appearance |
| Brand color | Marketing | Consistent branding |
| Gradient | Creative graphics | Modern appearance |
| Original scene | Lifestyle photos | More context |
Choose the background based on the purpose of the image rather than using white automatically.
Pros and Cons of Making a Photo Background White Online
Pros
- Simple and clean appearance
- Useful for ecommerce images
- Can reduce background distractions
- Works well for many product photos
- Easy to understand visually
- Online tools can be beginner friendly
- No professional desktop software is necessarily required
- Free options may be available
Cons
- Hair can be difficult to separate
- White objects may blend into the background
- Shadows may disappear
- Automatic tools can make edge mistakes
- Free tools may limit image quality or features
- Complex images may require manual cleanup
- A white background may not suit every type of photograph
Common Mistakes to Avoid
Mistake 1: Using a Low-Quality Image
Starting with a tiny or heavily compressed image can make the subject's edges difficult to process.
Better approach: Use the original high-quality photograph whenever possible.
Mistake 2: Ignoring Small Background Fragments
A tiny piece of the original background around a product can be surprisingly noticeable against white.
Better approach: Zoom in and inspect the complete outline.
Mistake 3: Removing Important Product Details
An automatic tool may accidentally remove part of a product.
Better approach: Compare the edited version with the original before downloading.
Mistake 4: Making Everything Pure White Without Checking the Subject
A white background can cause white products or clothing to lose visual definition.
Better approach: Check contrast and use natural shadows or suitable positioning when needed.
Mistake 5: Over-Cropping
If you crop too closely around the subject, you may lose useful space for ecommerce layouts or graphic designs.
Better approach: Leave appropriate margins around the subject.
Mistake 6: Ignoring Image Dimensions
A background may look correct, but the final image may not have the dimensions required for your website or marketplace.
Better approach: Check the intended output size before exporting.
How to Make Multiple Photos Consistent
If you are editing several product images, consistency becomes important.
Suppose you have ten products.
If every product has:
- A different amount of empty space
- Different subject sizes
- Different positions
- Different image dimensions
the collection may look unorganized.
Instead, create a simple standard.
For example:
| Element | Standard |
|---|---|
| Background | White |
| Subject position | Center |
| Subject size | Similar across images |
| Image ratio | Same |
| Margins | Consistent |
| Export format | Same |
This can make a product catalog look much more professional.
How to Check Whether the Background Is Really White
Sometimes a background looks white on one screen but is actually slightly gray or colored.
If your editing tool provides a color picker or background color control, confirm that the background is set to white.
The common hexadecimal value for white is:
#FFFFFF
For basic use, this gives you a straightforward reference.
How to Handle Shadows on a White Background
Shadows can be useful rather than something you always need to remove.
A natural-looking shadow can:
- Ground the subject
- Add depth
- Separate the object from the background
- Make a product appear more realistic
But an overly dark shadow can make a supposedly clean product image look artificial.
When possible, keep shadows soft and consistent with the original lighting.
When an Online Tool May Not Be Enough
Online editors are useful for many everyday tasks, but there are situations where you may need more advanced controls.
Consider a professional editor when:
- The subject has complicated hair.
- The image contains transparent materials.
- The background and subject have similar colors.
- You need precise masking.
- The photograph will be used for high-end commercial work.
- The automatic result repeatedly damages important details.
- You need detailed color correction.
This does not mean an online tool cannot produce good results. It simply means more complicated images may benefit from greater editing control.
Practical Example: White Background for Shoes
Imagine you sell handmade shoes online.
Your original photo shows the shoes on a wooden floor.
Goal
Create a clean product image with a white background.
Process
- Upload the shoe photograph.
- Remove the wooden floor.
- Check the sole and laces.
- Restore any missing details.
- Add a white background.
- Center the shoes.
- Keep a suitable amount of empty space.
- Check whether the shoes blend into the white.
- Add or preserve a subtle natural shadow if appropriate.
- Export the final image.
The result should show the actual shoes clearly without unrelated background distractions.
Practical Example: White Background for a Portrait
Imagine you have a headshot photographed indoors.
The original background contains furniture and a wall.
You want a simple profile picture.
Process
- Upload the headshot.
- Remove the original background.
- Inspect the hair.
- Check around the ears and shoulders.
- Clean up unwanted background pixels.
- Add a white background.
- Adjust the subject's position.
- Review the image at normal size.
- Export the final image.
The white background should support the portrait rather than make the subject look cut out.
Best Practices for a Clean White Background
Keep these principles in mind:
Use the Best Original Image
A good source image gives you more information to work with.
Inspect Edges at High Zoom
Look carefully at hair, clothing, product corners, and small details.
Keep the Subject Accurate
Background editing should not accidentally change the subject.
Match the Image Dimensions
Prepare the final image for its intended use.
Use Consistent Positioning
This is particularly useful for product catalogs.
Keep Shadows Natural
A subtle shadow can provide depth.
Review Before Publishing
Always inspect the final image before using it commercially or publicly.
Quick Decision Guide
| Your situation | Recommended approach |
|---|---|
| Simple product on plain background | Automatic background removal |
| Product on a busy background | Background removal + manual cleanup |
| Portrait with simple background | Automatic removal + edge check |
| Portrait with detailed hair | Removal + careful hair refinement |
| White product | White background + contrast/shadow check |
| Transparent object | More careful manual editing |
| Multiple product photos | Consistent background and positioning |
| Professional commercial image | Advanced editing and quality review |
A Reusable Workflow
For most basic projects, remember this workflow:
Choose → Upload → Remove → Refine → Add White → Position → Review → Export
This approach works for many types of images and keeps the process manageable for beginners.
Final Advice for Part 2
The easiest way to create a clean white-background image is not to rush the process.
Automatic background removal can save time, but the final quality still depends on checking the result.
Pay particular attention to edges, shadows, white-colored subjects, and small details. If you are preparing multiple images, use the same dimensions, spacing, and positioning to create a consistent visual style.
A simple white background can look professional when the subject is carefully separated and presented. The goal is to make the background disappear visually while keeping the main subject clear and accurate.
Conclusion
Learning how to make a photo background white online is a simple way to create cleaner and more consistent images without relying on complicated desktop software.
The basic process is straightforward: upload your photo, remove the existing background, refine the subject's edges, add a white background, adjust the composition, and review the final image.
This technique can be useful for product photography, ecommerce listings, portraits, websites, catalogs, social media graphics, and many other projects.
However, getting a professional-looking result involves more than simply selecting the color white. You also need to pay attention to the subject's edges, hair, shadows, small details, image dimensions, and overall composition.
For product images, consistency is especially important. Keeping similar spacing, positioning, dimensions, and background treatment across multiple photographs can make a collection look much more organized.
If an automatic background remover produces a good result, it can save considerable editing time. When the photograph contains complicated hair, transparent objects, similar colors, or detailed edges, you may need to make additional manual corrections.
The best approach is to start with a high-quality original image, make the background change carefully, and always inspect the finished photograph before publishing it.
Key Takeaways
- You can make a photo background white online without advanced editing software.
- Start with the highest-quality original photograph available.
- Remove the existing background before adding white.
- Carefully inspect hair, hands, clothing, product edges, and other fine details.
- Use a restore tool when important parts of the subject are accidentally removed.
- White objects may need extra attention because they can blend into a white background.
- A subtle natural shadow can help ground a product or subject.
- Keep image dimensions and subject positioning consistent when editing multiple photos.
- Use #FFFFFF when you need a standard pure white background.
- Always compare the edited image with the original to make sure important details were preserved.
- Check the final image at both high zoom and normal viewing size.
- For complicated professional images, advanced editing tools may provide greater control.
Call to Action
Ready to create a cleaner image?
Use an online photo editor to make your photo background white. Upload your image, remove the original background, add a white background, refine the edges, and review the final result before downloading it.
Whether you're preparing a product image, profile photo, catalog picture, or website graphic, a clean white background can give your image a simple and polished appearance.
Frequently Asked Questions
1. How can I make a photo background white online?
Upload your photo to an online background-removal or photo-editing tool, remove the existing background, and replace it with a white background. Afterward, inspect the edges and download the finished image.
2. Can I make a photo background white for free?
Yes. Some online photo editors offer free background-removal and replacement features. However, available export quality, image limits, and advanced features can vary from one service to another.
3. What is the easiest way to make a white background for a photo?
The simplest method is usually automatic background removal followed by adding a solid white background. You can then make small corrections around the subject before exporting the image.
4. What color code is pure white for a photo background?
The commonly used hexadecimal color value for pure white is #FFFFFF. If an editor allows you to enter a custom color, you can use this value for a standard white background.
5. Can I make a product photo background white online?
Yes. Product photographs are a common use for white background editing. Remove the original background, preserve the product details, add white, and check the final image for shadows and edge artifacts.
6. Why does my product disappear against a white background?
White or very light-colored products can lose visual definition when placed against pure white. Careful edge separation, appropriate lighting, and a subtle natural shadow can help keep the product visible.
7. How do I make a portrait background white?
Upload the portrait to an online background-removal tool, remove the original background, inspect the hair and shoulder edges, and add a white background. Make any necessary corrections before downloading.
8. Why is there a gray or colored outline around my subject?
A gray or colored outline can occur when pixels from the original background remain around the subject. Use an erase, refine, or edge-cleaning tool to remove unwanted pixels where possible.
9. Should I use a white or transparent background?
It depends on your goal. A white background is useful when you need a finished image with a clean white backdrop. A transparent background is more flexible if you plan to place the subject over different backgrounds later.
10. How can I make a white background photo look professional?
Start with a high-quality image, remove the background carefully, refine the subject's edges, use a consistent white background, preserve natural shadows where appropriate, and check the final image before publishing.
Ready to optimize your images?
Every tool mentioned in this article is free to use. No upload, no signup, and no watermarks — ever.
Try our free toolsRelated articles
How to Remove a Person From a Photo With AI: Easy Online Guide
Learn how to remove a person from a photo with AI using simple online editing techniques. Discover how AI object removal works, when to use it, and how to get natural-looking results.
How to Add a White Background to a Transparent Image
Learn how to add a white background to a transparent image online. Convert transparent PNGs into clean white-background images for products, websites, and more.

How to Change the Background of a Photo Without Photoshop
Learn how to change the background of a photo without Photoshop using easy online tools. Follow this beginner-friendly guide to remove backgrounds and add new ones.