
How to Change the Background of a Photo Without Photoshop
Learn how to change the background of a photo without Photoshop using easy online tools. Follow this beginner-friendly guide to remove backgrounds and add new ones.
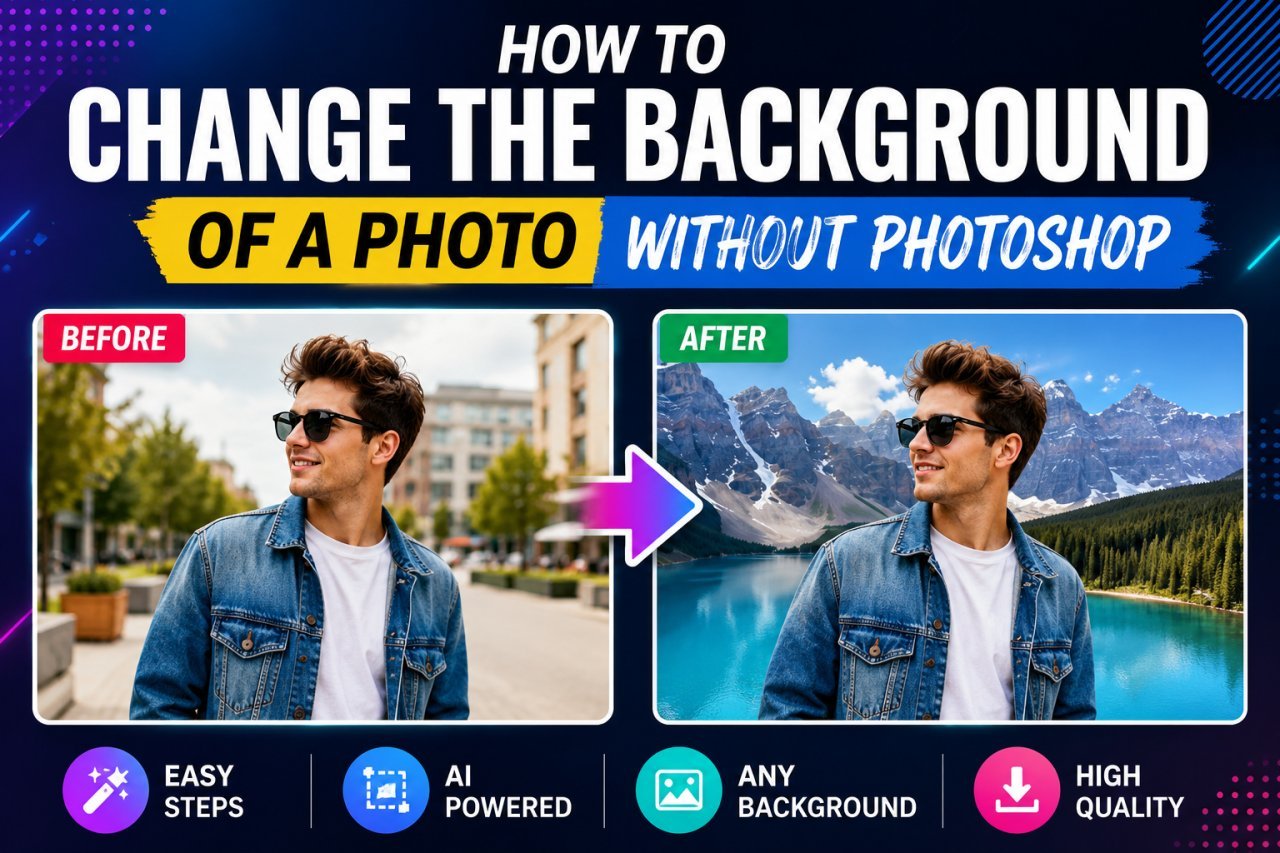
How to Change the Background of a Photo Without Photoshop
Introduction
Want to change the background of a photo but don't have Photoshop?
You don't need expensive or complicated software for many background-editing tasks. Today, you can change the background of a photo without Photoshop using online photo editors and background-removal tools that work directly in your web browser.
Whether you want to replace a messy background, put a product on a clean backdrop, create a professional profile picture, or give a travel photo a completely different setting, online tools can make the process much easier for beginners.
The basic idea is simple: first separate the main subject from the original background, then place that subject over a new background.
In this guide, you'll learn how the process works, what tools you need, how to choose a suitable background, and how to make the final image look natural.
Why Change the Background of a Photo?
The background can have a major effect on how a photograph looks.
Sometimes the subject is good, but the background contains distractions that take attention away from it.
For example, you may have:
- People walking behind your subject
- A cluttered room
- An untidy wall
- Unwanted objects
- Poor lighting
- A distracting street scene
- A plain background that feels boring
- A background that does not match your design
Changing the background can help create a cleaner and more focused image.
For businesses, background replacement can also be useful for product photography, ecommerce images, social media content, advertisements, and website graphics.
For personal photos, it can be a quick way to create a different visual style without retaking the photograph.
Can You Change a Photo Background Without Photoshop?
Yes. All Tools You can use browser-based photo editing tools to remove the original background and replace it with a new image, color, or design.
The exact features depend on the editor, but the general process is usually:
- Upload the original photo.
- Remove or erase the existing background.
- Check the subject's edges.
- Add a new background.
- Adjust the subject's size and position.
- Match the lighting and colors where possible.
- Download the finished image.
Some tools automate background removal, while others provide manual editing controls.
For a beginner, an automatic background-removal feature can be a convenient starting point.
What Is Background Replacement?
Background replacement means removing the original background from a photograph and putting a different background behind the main subject.
Imagine a portrait taken in a bedroom.
The person remains in the photograph, but the bedroom is removed and replaced with:
- A studio background
- A simple solid color
- A city scene
- A nature background
- A professional office
- A gradient
- Another photograph
The subject stays in the foreground while the new image becomes the background.
This is different from simply applying a filter because the original background is actually separated from the subject.
How Does Background Removal Work?
Before you can add a new background, the editing tool needs to identify which parts of the image belong to the subject and which parts belong to the background.
Modern online editors may use automatic or AI-assisted detection to identify the main subject.
For example, if you upload a portrait, the tool may detect:
- Face
- Hair
- Body
- Clothing
- Accessories
It then attempts to separate these areas from the surrounding background.
The quality of this separation matters.
If the tool removes part of the person's hair or leaves pieces of the old background around the shoulders, the final replacement can look unnatural.
That is why reviewing the edges is an important part of the editing process.
What Types of Photos Work Best?
Not every photograph is equally easy to edit.
Photos with a clear separation between the subject and background are generally easier to process.
Photos That Are Usually Easier
- Portraits with a simple background
- Product photos
- Objects photographed against plain surfaces
- People standing away from the background
- Images with good lighting
- Photos with clear subject outlines
Photos That Can Be More Difficult
- Hair blowing in the wind
- Transparent objects
- Glass
- Smoke
- Fine jewelry
- Complex clothing
- Subjects overlapping other objects
- Very busy backgrounds
- Low-resolution photographs
This does not mean difficult images cannot be edited. They may simply require more manual cleanup.
How to Change the Background of a Photo Without Photoshop
Step 1: Choose Your Original Photo
Start with the best-quality version of your photograph.
Avoid using a screenshot if you have access to the original file.
A high-resolution image gives you more detail around important edges such as hair, clothing, and product outlines.
Before editing, decide what you want the final image to look like.
For example:
“I want to keep the person exactly as they are but replace the messy room with a clean professional background.”
Having a clear goal makes it easier to choose the right background later.
Step 2: Upload the Photo to an Online Editor
Open an online photo editing tool that supports background removal or replacement.
Upload your image and wait for it to process.
Depending on the editor, the background may be removed automatically or you may need to select the subject manually.
If the photograph contains personal or confidential information, review the service's privacy and file-handling policies before uploading it.
Step 3: Remove the Original Background
Look for a feature such as:
- Remove Background
- Background Remover
- Cutout
- Erase Background
- Background Removal
- AI Background Remover
Automatic removal can save time, especially for portraits and product images.
Once the background has been removed, inspect the subject carefully.
Pay particular attention to:
- Hair
- Fingers
- Shoes
- Clothing edges
- Product corners
- Small accessories
- Gaps between arms and body
These areas can sometimes contain pieces of the old background.
Step 4: Clean Up the Edges
This step is easy to skip, but it can make a big difference.
If the editor provides an erase or restore brush, use it to correct areas that were incorrectly removed or preserved.
For example, if part of a person's hair disappeared during automatic background removal, a restore option may help bring that area back.
Likewise, if a small piece of the original wall remains around the shoulder, an eraser can help clean it up.
The goal is to create a clean outline around the subject.
Choosing a New Background
Once the original background has been removed, you can add a replacement.
Your choice should depend on the purpose of the image.
Solid Color Background
A plain color can work well for:
- Profile pictures
- Product images
- ID-style creative photos
- Website graphics
- Simple promotional designs
White, light gray, or other neutral backgrounds can create a clean appearance.
Nature Background
A landscape or outdoor image can work for:
- Travel photos
- Personal portraits
- Creative projects
- Social media posts
However, the lighting should make sense.
A person photographed indoors under soft artificial light may look unnatural when placed directly onto a bright outdoor background.
Professional Office Background
For business-oriented portraits, an office or studio-style background may be appropriate.
Keep the background subtle enough that it does not compete with the person.
Custom Image Background
You can also use another photograph as the background.
This gives you more creative control, but it requires careful attention to:
- Perspective
- Lighting
- Scale
- Color
- Shadows
- Subject placement
Background Replacement Example
Imagine you have a portrait taken against a messy bedroom wall.
You want to use the photograph for a professional profile.
A simple workflow would be:
| Step | Action |
|---|---|
| 1 | Upload the portrait |
| 2 | Remove the bedroom background |
| 3 | Check the hair and shoulders |
| 4 | Add a clean office or studio background |
| 5 | Resize the subject if necessary |
| 6 | Position the subject naturally |
| 7 | Adjust the image if needed |
| 8 | Download the final photo |
The important part is not simply replacing the background. The new background should look like it belongs with the original subject.
How to Make the New Background Look Natural
Simply placing a person over another image can sometimes create a cut-and-paste appearance.
To make the result more believable, consider these factors.
Match the Lighting
Look at where the light is coming from in the original photo.
If the subject is illuminated from the left but the new background suggests strong lighting from the right, the composition may look inconsistent.
Try to choose a background with similar lighting.
Match the Perspective
The background should have a perspective that makes sense with the subject.
For example, placing a person photographed at eye level onto a background taken from a very high camera angle can look unusual.
Match the Scale
A person can look too large or too small if the subject and background are not scaled correctly.
Resize the subject so that the surrounding environment appears believable.
Consider the Colors
Color temperature also matters.
A warm indoor photograph may look strange against a very cool blue background.
You do not always need perfect color matching, but large differences can make the edit more obvious.
Background Replacement for Product Photos
Changing backgrounds is particularly useful for product images.
For example, an online store may want to place a product against:
- White
- Light gray
- Brand colors
- A simple studio backdrop
- A lifestyle setting
A clean background can make the product easier to focus on.
However, the product itself should remain accurate.
Avoid changing genuine product characteristics in a way that could mislead customers.
For ecommerce use, the final image should represent the actual item being sold.
Background Replacement for Social Media Photos
Social media images often benefit from a background that matches the purpose of the post.
For example:
- A fitness photo could use a gym-style setting.
- A travel image could use a scenic background.
- A business portrait could use a simple office.
- A creative post could use a colorful graphic background.
The key is consistency.
If you are creating several images for a brand or social account, using similar background styles can make the content feel more organized.
Common Beginner Questions
Do I Need to Install Software?
Not necessarily.
Many online editors work directly in a browser, so you can perform basic background editing without installing a desktop application.
Do I Need Editing Experience?
For simple background replacement, usually not.
Automatic background-removal tools are designed to reduce the amount of manual work required.
However, more complicated photographs may still require some editing knowledge.
Can I Use a New Background From My Own Photo?
Yes, if the editing tool allows you to upload a custom background.
This can be useful when you want to create a specific scene instead of using a preset background.
What to Remember Before Editing
A successful background replacement depends on more than the removal tool.
The original image, subject edges, replacement background, lighting, perspective, and final composition all matter.
A good workflow is:
Choose a good photo → Remove the background → Clean the edges → Add a suitable background → Match the composition → Review → Download
Taking time to inspect the final image can prevent obvious editing mistakes.
How to Change the Background of a Photo Without Photoshop: Advanced Tips and Best Practices
Advanced Tips for Better Background Replacement
Changing a photo background is easy when the subject has a clear outline and the background is simple. The process becomes more challenging when you are working with hair, transparent objects, shadows, or complicated surroundings.
A few practical techniques can make the final image look much more natural.
1. Pay Extra Attention to Hair
Hair is one of the hardest parts of a photo to separate from a background.
Loose strands can easily be removed along with the background, while small pieces of the old background can remain between the strands.
When editing a portrait:
- Zoom in around the hair.
- Check the outline carefully.
- Use a restore brush if available.
- Remove leftover background pixels.
- Avoid making the hair outline unnaturally smooth.
A slightly imperfect but natural hair edge can look better than an overly sharp artificial cutout.
2. Check Small Gaps Around the Subject
Look carefully at areas such as:
- Between arms and the body
- Between fingers
- Around glasses
- Between objects
- Around clothing
- Between legs
- Inside handles or openings
Automatic background removal may occasionally leave unwanted pixels in these spaces.
Cleaning these areas can significantly improve the final result.
3. Do Not Ignore Shadows
A subject's original shadow may disappear when you remove the background.
This can make the subject appear to float on the new background.
For example, imagine a product photographed on a table. If the original background is removed completely and the product is placed on a new surface without any shadow, it may look like it has been pasted onto the image.
Depending on the editor, you may be able to add a subtle shadow manually.
The shadow should generally support the direction and softness of the lighting rather than look like a separate graphic element.
4. Match the Background's Depth
The subject and background should appear to exist in the same space.
A sharply focused person placed on an extremely blurred background can sometimes look artificial if the effect is too strong.
Likewise, a heavily detailed background can compete with a softly focused subject.
Consider the original photograph's depth of field when choosing the replacement background.
5. Match Camera Height and Perspective
Perspective is easy to overlook.
Suppose the original photo was taken with the camera approximately at eye level. If you place the subject against a background photographed from a dramatically different height, the composition may feel wrong.
Try to choose backgrounds with a similar:
- Camera height
- Viewing angle
- Horizon position
- Perspective
- Sense of depth
This is especially important for full-body photographs and product images.
Choosing Between Different Types of Backgrounds
Not every background is appropriate for every purpose.
Plain Background
Best for:
- Product photography
- Profile images
- Simple portraits
- Website graphics
- Professional presentations
Advantages:
- Clean appearance
- Easy to match
- Keeps attention on the subject
- Usually easier to edit
Potential drawback:
A completely plain background can sometimes feel less natural for personal photography.
Office Background
Best for:
- Business portraits
- Professional profiles
- Company websites
- Presentation graphics
Advantages:
- Professional appearance
- Works well for business content
- Can create context
Potential drawback:
A busy office can distract from the person.
Outdoor Background
Best for:
- Travel images
- Lifestyle photographs
- Creative portraits
- Social media content
Advantages:
- More visual interest
- Can completely change the mood
- Useful for creative projects
Potential drawback:
Matching lighting and perspective can be harder.
Gradient Background
Best for:
- Portraits
- Product images
- Promotional graphics
- Social media designs
Advantages:
- Simple
- Modern appearance
- Easy to combine with a subject
Potential drawback:
It may not look appropriate for every type of photograph.
Background Replacement Comparison
| Background type | Best use | Difficulty | Main consideration |
|---|---|---|---|
| Solid color | Products, profiles | Easy | Choose a suitable color |
| Studio | Portraits, products | Easy | Match lighting |
| Office | Business photos | Moderate | Avoid excessive clutter |
| Nature | Creative portraits | Moderate | Match lighting and perspective |
| City | Travel and lifestyle | Moderate | Match scale and viewpoint |
| Custom photo | Creative projects | Moderate to difficult | Match the overall composition |
| Detailed scene | Complex edits | Difficult | Edges, lighting, and perspective |
Free Online Tools vs Photoshop
You can accomplish many basic background-replacement tasks without Photoshop, but the two approaches are not identical.
| Feature | Online background editor | Photoshop |
|---|---|---|
| Installation | Usually not required | Required |
| Beginner friendly | Generally easier | Requires learning |
| Automatic background removal | Often available | Available through editing tools |
| Manual precision | Depends on the tool | Extensive |
| Layers | Depends on the editor | Extensive |
| Advanced masking | May be limited | Strong |
| Complex retouching | Limited in some tools | More capable |
| Quick background replacement | Very convenient | Can take more steps |
| Cost | Free options available | Paid software |
For a quick personal edit, an online tool may be enough.
For professional compositing, detailed masking, and advanced retouching, Photoshop or similar professional software can provide greater control.
Pros and Cons of Changing a Photo Background Online
Pros
- No Photoshop required
- Can work directly from a browser
- Beginner friendly
- Fast for simple edits
- Useful for portraits and products
- Free options may be available
- No advanced design skills required for basic tasks
Cons
- Free versions may have feature limitations
- Complex hair can be difficult
- Transparent objects may require extra work
- Some tools have export restrictions
- Automatic removal is not always perfect
- Advanced editing controls may be limited
The right option depends on the complexity of your photograph and the quality you need.
Common Mistakes to Avoid
Mistake 1: Choosing a Background That Does Not Match
A common beginner mistake is selecting a background simply because it looks attractive.
For example, a subject photographed in soft indoor lighting may look strange against a bright outdoor scene with strong sunlight.
Better approach: Consider lighting before choosing the replacement.
Mistake 2: Ignoring the Subject's Size
If the subject is too large or too small compared with the new environment, the image can immediately look unrealistic.
Better approach: Resize and position the subject based on objects around it.
Mistake 3: Leaving a White or Colored Halo
A visible outline around the subject often happens when the original background is not completely removed.
Better approach: Zoom into the edges and clean up leftover pixels.
Mistake 4: Over-Sharpening the Subject
Sometimes the subject appears much sharper than the replacement background.
This difference can make the edit obvious.
Better approach: Keep the visual characteristics of the subject and background reasonably consistent.
Mistake 5: Forgetting the Shadow
Without an appropriate shadow, a person or object can appear to float.
Better approach: Consider whether the new scene needs a subtle shadow or other grounding effect.
Mistake 6: Using a Low-Quality Background
A high-resolution subject placed over a blurry or heavily compressed background can look inconsistent.
Better approach: Use a background with suitable quality and dimensions for the final image.
Practical Example: Changing a Portrait Background
Suppose you have a portrait taken at home and want to create a professional-looking profile image.
Original Situation
The person is standing against:
- A cluttered room
- Household objects
- Uneven lighting
Desired Result
You want:
- A clean studio-style background
- The person to remain unchanged
- A professional appearance
Recommended Workflow
- Upload the original portrait.
- Automatically remove the background.
- Zoom in around the hair.
- Clean up the shoulders and clothing edges.
- Check gaps around the arms.
- Add a simple studio background.
- Adjust the subject's size.
- Position the subject naturally.
- Compare the lighting.
- Review the final image at normal size.
This workflow can work well for a simple professional profile image.
Practical Example: Changing a Product Background
Suppose you have a photograph of a handmade product taken on a kitchen table.
You want to use it on an online store.
Original Background
The photograph contains:
- A kitchen surface
- Household objects
- A distracting container
- Uneven background colors
New Background
You choose a simple neutral background.
Workflow
- Upload the product photo.
- Remove the original background.
- Inspect the product edges.
- Correct any missing product details.
- Add the neutral background.
- Position the product.
- Add a subtle shadow if appropriate.
- Check the product's actual appearance.
- Export the final image.
The important point is that the background can change, but the actual product should remain accurately represented.
How to Make Background Changes Look Professional
Professional-looking composites usually depend on consistency.
Match Light Direction
If the subject's strongest light comes from the left, a background with obvious light coming from the opposite direction may create a visual mismatch.
Match Color Temperature
Warm and cool tones can create different moods.
A warm subject against a very cold background can look disconnected unless the contrast is intentional.
Match Blur
If the original subject has shallow depth of field, an extremely sharp background can compete with it.
A suitable amount of background blur can help maintain visual consistency.
Match Perspective
Objects in the background should appear to have the correct relative size.
For example, a doorway, table, or building behind a person should not look disproportionately large or small.
When Automatic Background Removal May Fail
Automatic tools can struggle with certain subjects.
Fine Hair
Loose strands can blend with the original background.
Transparent Objects
Glass, clear plastic, and other transparent materials can be difficult to separate.
Similar Colors
If the subject and background have similar colors, the tool may have difficulty identifying the boundary.
Motion Blur
A moving subject with blurred edges can be harder to isolate cleanly.
Complex Overlapping Objects
When several objects overlap, deciding where one ends and another begins becomes more difficult.
When this happens, manual cleanup can improve the result.
Best Practices for Background Replacement
Follow these practices for more consistent results:
- Start with the original high-quality photo.
- Choose a background appropriate for the purpose.
- Remove the background carefully.
- Inspect hair and small details.
- Clean up unwanted edges.
- Match lighting where possible.
- Match perspective and scale.
- Consider shadows.
- Avoid overly complicated backgrounds.
- Keep a copy of the original image.
- Review the final image before publishing.
- Avoid editing images in a way that could mislead viewers.
A Simple Background Replacement Checklist
Before downloading your final image, ask:
| Question | Check |
|---|---|
| Is the entire original background removed? | Yes / No |
| Is any unwanted halo visible? | Yes / No |
| Does the hair look natural? | Yes / No |
| Are important subject details preserved? | Yes / No |
| Does the subject have the correct size? | Yes / No |
| Does the lighting make sense? | Yes / No |
| Does the perspective look believable? | Yes / No |
| Does the background distract from the subject? | Yes / No |
| Is the final image sharp enough? | Yes / No |
| Does the overall image look natural? | Yes / No |
Privacy and Responsible Editing
When using an online photo editor, consider what you are uploading.
For ordinary public photographs, this may not be a major concern. However, private or sensitive images deserve additional care.
Before uploading, review the service's:
- Privacy policy
- File retention information
- Terms of use
- Account requirements
- Download and storage practices
Also remember that changing a background can alter the context of a photograph.
For example, moving a person into a location where they were never photographed can create a misleading impression if the edited image is presented as an original photograph.
Creative editing is fine, but important visual information should not be changed deceptively.
Best Workflow for Beginners
If you are completely new to background editing, keep the process simple:
1. Choose a clear photo
Use a high-quality image where the subject is easy to identify.
2. Remove the background
Start with an automatic background-removal feature.
3. Inspect the edges
Pay special attention to hair, hands, clothing, and small gaps.
4. Choose a suitable background
Pick one that matches the purpose of the photograph.
5. Adjust the composition
Resize and position the subject so it fits naturally.
6. Check lighting and perspective
Make sure the subject does not look pasted onto the background.
7. Review the complete image
Zoom out and look at the image as a whole.
8. Export the final version
Save the edited image only after checking the result.
Final Advice
You do not need Photoshop to create a useful background replacement.
For simple portraits, product images, social media graphics, and personal photographs, online editing tools can provide a much easier workflow.
The biggest difference between a basic edit and a convincing edit is usually attention to detail.
Removing the original background is only one part of the process. Choosing the right replacement background, matching the subject to the new environment, and cleaning up the edges are equally important.
Conclusion
You don't need Photoshop to change the background of a photo.
With an online background-removal and photo-editing tool, you can remove an existing background, clean up the subject, and add a new background directly from your browser.
The process is especially useful for portraits, product photos, social media images, website graphics, and creative projects.
For the best results, start with a high-quality photograph and choose an image where the main subject is clearly separated from the background. After removing the background, take a little time to inspect the edges around hair, hands, clothing, and other detailed areas.
The replacement background also matters. Try to match the subject's lighting, perspective, scale, colors, and overall visual style. A suitable background can make the final image look natural, while a poorly matched background can make the subject appear pasted into the scene.
Free online tools can be enough for straightforward edits. If you are working with complicated hair, transparent objects, detailed backgrounds, or professional composites, you may need more advanced editing controls.
The most important thing is to review the final image before publishing or sharing it.
Key Takeaways
- You can change the background of a photo without Photoshop.
- Online background-removal tools can simplify the editing process.
- Start with the highest-quality original photo available.
- Remove the original background before adding a replacement.
- Carefully inspect hair, hands, clothing, and other detailed edges.
- Choose a new background that fits the purpose of the image.
- Match the subject's lighting, perspective, scale, and colors where possible.
- Consider shadows so the subject does not appear to float.
- Simple backgrounds are usually easier to work with.
- Keep the original image as a backup.
- Review the complete composition before downloading.
- For complicated professional work, advanced editing software may provide greater control.
Call to Action
Ready to give your photo a new look?
You can change the background of a photo without Photoshop by using an online photo editor. Upload your image, remove the existing background, choose a suitable replacement, adjust the composition, and review the final result.
Start with a simple photo and experiment with different backgrounds until you find one that fits your image naturally.
Frequently Asked Questions
1. Can I change the background of a photo without Photoshop?
Yes. You can use online photo-editing tools to remove the original background and replace it with a new image, solid color, gradient, or other background. Many tools are designed for beginners and work directly in a web browser.
2. What is the easiest way to change a photo background?
The easiest method is usually to upload your image to an online background-removal tool, automatically remove the original background, add a new background, adjust the subject's position, and download the result.
3. Can I change a photo background for free?
Yes. Some online photo editors offer free background-removal and replacement features. However, features such as export resolution, editing limits, or advanced tools can vary between services.
4. Can I change the background of a portrait online?
Yes. Portraits are a common use for background replacement. You can remove a distracting background and replace it with a studio, office, solid-color, nature, or other suitable background.
5. How do I remove the background without losing hair details?
Use a tool that provides automatic background removal along with manual edge controls when possible. Zoom in around the hair and carefully check for missing strands or leftover background pixels.
6. Why does my new background look fake?
The most common reasons are differences in lighting, perspective, scale, color, or sharpness. Choosing a background that visually matches the original photograph can make the result more convincing.
7. Can I use my own image as the new background?
Yes, if the online editor supports custom background uploads. You can use another photograph, a graphic, a solid color, or another image as the replacement background.
8. Can I change a product photo background without Photoshop?
Yes. Background replacement is commonly used for product images. Remove the original background and add a clean backdrop while keeping the actual product details accurate.
9. Do I need photo-editing experience to replace a background?
Not for basic edits. Many online tools automate background removal, so beginners can complete simple background replacements with minimal editing experience. More complicated images may require manual adjustments.
10. What should I check before downloading a background-edited photo?
Check the subject's edges, hair, hands, shadows, lighting, scale, perspective, and overall composition. Make sure no unwanted parts of the original background remain and that the new background looks natural.
Ready to optimize your images?
Every tool mentioned in this article is free to use. No upload, no signup, and no watermarks — ever.
Try our free toolsRelated articles
How to Make a Photo Background White Online
Learn how to make a photo background white online using simple photo editing tools. Remove distracting backgrounds, add a clean white background, and create professional-looking images without Photoshop.

Best Free AI Image Editors in 2026 (Top 10 Tools Compared)
Discover the best free AI image editors in 2026. Compare features, pricing, pros, cons, and use cases to find the perfect AI photo editing tool for beginners, designers, marketers, and businesses.
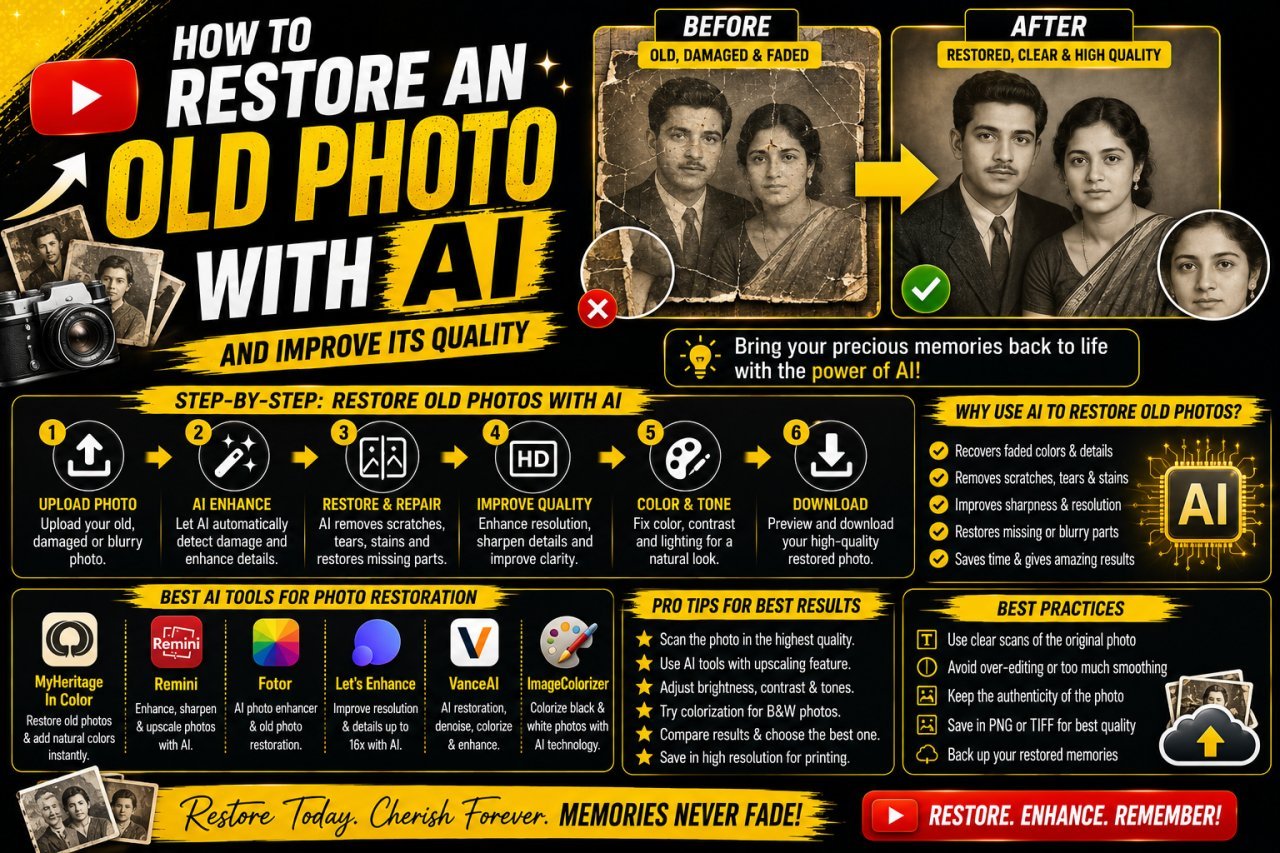
How to Restore an Old Photo With AI: Complete Beginner's Guide
Learn how to restore an old photo with AI by repairing damage, improving clarity, reducing noise, and bringing faded photographs back to life with simple techniques.