
How to Make a Picture Square Without Cropping It
Learn how to make a picture square without cropping it. Add space around your photo, change the canvas size, and keep the entire image visible.
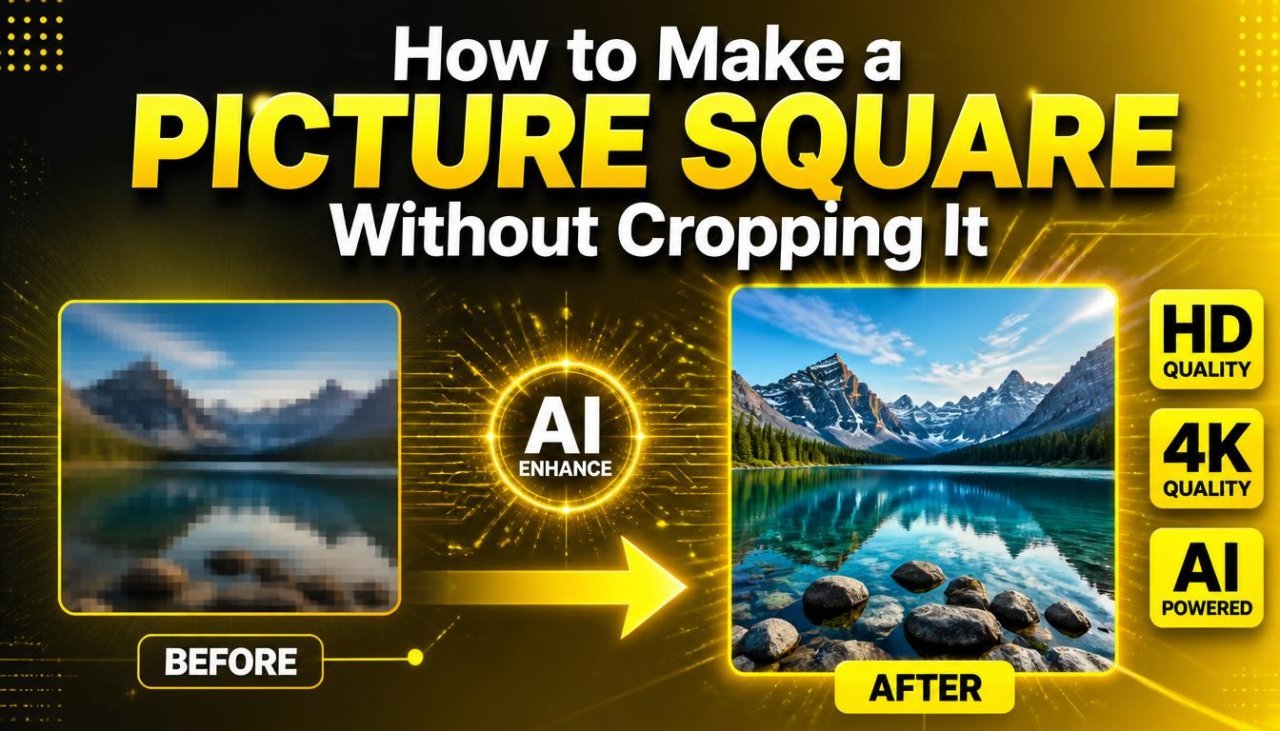
How to Make a Picture Square Without Cropping It
Introduction
Sometimes you need a square picture, but your original photo is landscape or portrait. The obvious solution is to crop it, but cropping can remove important parts of the image.
If you want to make a picture square without cropping it, there is a better option: change the canvas or add extra space around the original photo.
Instead of cutting anything out, you place the complete picture inside a square canvas. The extra space can be white, black, transparent, blurred, or another color depending on how you want the finished image to look.
This method is useful when preparing photos for social media, profile pictures, product images, websites, online listings, presentations, and other projects where a square format is required.
In this guide, you will learn what a square image is, why cropping is not always the best solution, and how to turn a rectangular photo into a square image while keeping the entire picture visible.
Why Make a Picture Square Without Cropping It?
A square image has the same width and height.
For example:
- 500 × 500 pixels = square
- 1000 × 1000 pixels = square
- 1500 × 1500 pixels = square
A rectangular photo might be:
- 1200 × 800 pixels
- 1600 × 900 pixels
- 800 × 1200 pixels
If you crop the rectangular photo into a square, some of the original image will be removed.
That may not be a problem for every photo, but it can be frustrating when the entire image matters.
Examples of What Cropping Can Remove
Cropping may cut off:
- A person's head
- Shoes or feet
- Product edges
- Text
- Important background details
- A building
- A pet's body
- Objects near the edge of the photo
Instead of removing those areas, you can expand the canvas and keep the complete photograph.
The Basic Idea
The easiest way to understand this technique is to think of the photo as sitting inside a larger frame.
Suppose your original image is:
1200 × 800 pixels
The image is wider than it is tall.
To make it square without cropping, you could create a:
1200 × 1200 pixel canvas
Then place the original 1200 × 800 image in the center.
The remaining 400 pixels of vertical space can be divided between the top and bottom.
The original image remains unchanged.
Simple Illustration
+------------------------+
|                        |
|    Original Photo      |
|                        |
+------------------------+
|                        |
+------------------------+
The complete photo remains visible while the canvas becomes square.
Square Canvas vs Cropping
These two methods are different.
| Method | What happens to the original image? | Entire photo preserved? |
|---|---|---|
| Crop to square | Parts are removed | No |
| Resize to square by stretching | Image proportions change | Technically yes, but distorted |
| Add canvas space | Extra space is added | Yes |
| Add borders | Space is added around the image | Yes |
| Use a background | Extra area is filled | Yes |
If your priority is keeping the complete photograph intact, adding canvas space is usually the better approach.
How to Make a Picture Square Without Cropping It Online
You can use an online image editor that supports canvas resizing or image padding.
The general process is:
- Upload your photo.
- Check the original dimensions.
- Choose a square canvas.
- Increase the canvas without reducing the original image.
- Center the photo.
- Choose a background or border color.
- Check the result.
- Export the square image.
The names of these tools can differ between editors. You may see options such as:
- Canvas Size
- Resize Canvas
- Expand
- Padding
- Border
- Background
- Fit to Square
- Square Format
The important feature is canvas expansion, not simple image cropping.
Step 1: Upload Your Original Photo
Start with the highest-quality version of your photograph.
If possible, use the original image rather than a screenshot or a heavily compressed copy.
A higher-quality source gives you more flexibility when preparing the final image.
Before editing, check the image dimensions.
For example:
Original: 1600 × 1000 pixels
Because the width is larger than the height, you need to add vertical space to make it square.
Step 2: Check the Image Dimensions
The image dimensions determine how much space you need to add.
A square image has:
Width = Height
If your image is wider than it is tall, the final square canvas can use the existing width.
If your image is taller than it is wide, the final square canvas can use the existing height.
Example
Original:
1200 × 800
Square canvas:
1200 × 1200
You add:
400 pixels of extra vertical space.
Another example:
Original:
800 × 1200
Square canvas:
1200 × 1200
You add:
400 pixels of extra horizontal space.
The original photo does not need to be cropped.
Step 3: Choose a Square Canvas
Set the canvas to equal dimensions.
For example:
- 800 × 800
- 1000 × 1000
- 1200 × 1200
- 1500 × 1500
- 2000 × 2000
The exact size depends on where you plan to use the image.
If the platform has a specific recommended size, follow that requirement.
Otherwise, choose a square dimension that gives you enough quality for your intended use.
Step 4: Keep the Original Photo at the Correct Proportion
This is important.
Do not simply force a 1200 × 800 image into a 1200 × 1200 shape by changing both dimensions independently.
That can stretch the photograph.
A person's face could become wider.
A circular object could become oval.
A product could look distorted.
Instead, keep the original image at its natural proportions and expand the canvas around it.
Step 5: Add Space Around the Photo
Once the square canvas is created, position the original photo inside it.
If the original image is landscape, there will usually be extra space above and below.
If the original image is portrait, there will usually be extra space on the left and right.
This extra area is sometimes called:
- Padding
- Canvas space
- Border
- Margin
The terminology depends on the editing tool.
What Background Should You Use?
You have several options.
White Background
White is a simple and neutral choice.
It works well for:
- Product images
- Documents
- Catalogs
- Profile images
- Clean website designs
Black Background
Black can create stronger contrast, particularly with bright subjects.
It may work well for:
- Creative portraits
- Product photography
- Dark-themed designs
- Certain promotional graphics
Transparent Background
If your editor supports transparency, you can leave the added canvas transparent.
This can be useful when the square image will later be placed over another design.
However, remember that some image formats or platforms may not preserve transparency.
Blurred Background
A blurred version of the original image can fill the additional space.
This can create a more visually connected result than a plain border.
It is often useful for portraits and social media graphics.
Matching Color
You can choose a color that matches the image or your brand.
For example, a product photo with a blue design theme could use a subtle blue background.
The goal is to make the added space feel intentional.
White Border vs Background
There is a small but useful distinction between a border and a background.
A border usually appears as a visible frame around the original image.
A background can be treated as the larger canvas behind the image.
In practical editing, both approaches can create additional space around the photograph.
What matters most is that the original image remains intact.
Example: Landscape Photo
Imagine you have a landscape photo measuring:
1600 × 1000 pixels
You want a square image.
Instead of cropping the left and right sides, create a:
1600 × 1600 pixel canvas
Then place the original photo in the center.
The extra:
600 pixels
are added vertically.
You could use:
- 300 pixels above
- 300 pixels below
This keeps the photograph unchanged.
Example: Portrait Photo
Now imagine a portrait image measuring:
1000 × 1500 pixels
To make it square without cropping, create a:
1500 × 1500 pixel canvas
The extra:
500 pixels
are added horizontally.
You could place:
- 250 pixels on the left
- 250 pixels on the right
The entire portrait remains visible.
Why You Should Not Stretch a Photo
Stretching may appear to be a quick way to create a square image, but it changes the proportions of the original photograph.
Consider a person standing in a photo.
If you stretch the image horizontally, the person may look wider than they actually are.
Likewise, stretching a landscape can make buildings, cars, or other objects appear unnaturally wide.
For a natural-looking result:
Keep the photo's original aspect ratio.
Change the canvas around it instead.
Aspect Ratio Explained Simply
Aspect ratio describes the relationship between an image's width and height.
Examples:
| Dimensions | Aspect ratio | Shape |
|---|---|---|
| 1000 × 1000 | 1:1 | Square |
| 1200 × 800 | 3:2 | Landscape |
| 1600 × 900 | 16:9 | Wide |
| 800 × 1200 | 2:3 | Portrait |
| 1080 × 1350 | 4:5 | Portrait |
A square image always has a 1:1 aspect ratio.
When you make a picture square without cropping, you are changing the canvas to a 1:1 format while keeping the original photo's aspect ratio intact.
Common Uses for Square Images
Social Media
Square images can be useful for certain social media layouts and profile-related designs.
However, platform specifications can change, so check the current requirements of the platform before publishing.
Profile Pictures
A square canvas can make it easier to prepare a rectangular portrait for platforms that use square profile images.
Instead of cutting off the person's head or shoulders, you can add space around the photo.
Product Images
A square format can make product catalogs more consistent.
You can place different products inside similarly sized square canvases without cropping important product details.
Online Stores
Many ecommerce designs use consistent image dimensions.
A square canvas can help different product photographs appear more uniform even when the original photographs have different shapes.
Website Graphics
Square images can fit neatly into cards, grids, galleries, and other website layouts.
Beginner-Friendly Method
If you only remember one process from this guide, use this:
Upload → Check Size → Create Square Canvas → Keep Original Photo → Add Space → Center → Export
You are not cutting the image.
You are changing the area around it.
Quick Checklist
Before exporting your square image, check:
- Width and height are equal.
- The entire original photo is visible.
- Nothing important has been cropped.
- The photo has not been stretched.
- The subject looks natural.
- The added space looks intentional.
- The background color works with the photo.
- The final image has enough resolution.
- The image is saved as a separate copy.
Final Advice for Part 1
When you need a square image but do not want to lose any part of the original photo, do not start by cropping.
Crop Image Online — Free, Private, In Your Browser
Instead, create a square canvas and place the complete photograph inside it.
This preserves the original composition while giving you the 1:1 format you need.
You can use a simple white background, a matching color, a blurred version of the image, or another design treatment to fill the additional space.
The key principle is simple:
Change the canvas, not the photograph.
How to Make a Picture Square Without Cropping It: Advanced Tips and Best Practices
How to Make a Square Image Look Natural
Making the dimensions square is easy. Making the finished image look intentional takes a little more care.
The added space should complement the original photo rather than make it look like a random border was placed around it.
Before exporting, consider:
- Where the subject sits
- How much space is added
- Which background works best
- Whether the image needs a shadow
- Whether the subject should be centered
- Whether the final image will be used with text or other graphics
A simple square canvas can often look better than an aggressive crop because the original composition remains intact.
1. Choose the Right Square Canvas Size
The best canvas size depends on the original image and its intended use.
For example, if your original photo is 1200 pixels wide, you can create a 1200 × 1200 canvas.
If you are preparing several images, using the same canvas dimensions can make them easier to manage.
| Original image | Possible square canvas |
|---|---|
| 1200 × 800 | 1200 × 1200 |
| 1600 × 900 | 1600 × 1600 |
| 800 × 1200 | 1200 × 1200 |
| 1000 × 1500 | 1500 × 1500 |
| 2000 × 1200 | 2000 × 2000 |
The important point is that the square canvas should be large enough to contain the entire original image.
2. Use Padding Instead of Cropping
Padding is extra space added around an image.
It is one of the easiest ways to create a square format without removing anything.
For example:
Original: 1200 × 800
Final: 1200 × 1200
The extra 400 pixels can be distributed vertically.
You could have:
- 200 pixels at the top
- 200 pixels at the bottom
Or you could intentionally position the photo slightly higher or lower.
Padding gives you control over the final composition.
3. Center the Image Automatically
Most square-image layouts look balanced when the original photograph is centered.
For a landscape photo, this generally means equal or nearly equal space above and below.
For a portrait photo, it generally means equal space on both sides.
However, perfect mathematical centering is not always necessary.
If the subject is already positioned toward one side of the original photo, visual balance may be more important than exact centering.
4. Use a Blurred Background
A plain white or colored border is not your only option.
You can create a background using an enlarged or duplicated version of the original image and blur it.
For example:
- Duplicate the original photo.
- Place the duplicate behind the original.
- Enlarge the background version until it fills the square canvas.
- Apply a blur effect.
- Keep the original photo sharp in front.
This can work particularly well for:
- Portraits
- Travel photographs
- Food photos
- Lifestyle images
- Event photos
The blurred background fills the additional space while keeping attention on the original photograph.
5. Use a Solid Color Background
A solid color is often the easiest option.
White works well when you want a clean appearance.
Other options include:
- Light gray
- Beige
- Black
- Navy
- Pastel colors
- Brand colors
Choose a color that does not make the subject difficult to see.
Example
If the photograph contains a mostly white product, a white background may reduce contrast.
A very light gray background could provide slightly more separation while maintaining a clean appearance.
6. Match the Background to Your Brand
If the image is being used for a business website or social media account, the additional space can become part of your visual identity.
For example, a brand might consistently use:
- White backgrounds
- A specific neutral color
- A particular pastel shade
- A subtle brand color
Using the same treatment across multiple images can create a more consistent visual style.
Do not choose a bright background simply because it is noticeable. The background should support the subject.
7. Use a Transparent Square Canvas
Sometimes you want the final canvas to be square but do not want a visible background.
If your editing tool supports transparency, you can create a square transparent canvas around the image.
This can be useful when the image will be placed into another design later.
For example:
Original photo → Square transparent canvas → Export PNG
However, transparency may not be supported or preserved by every file format or platform.
Always check the requirements of your final destination.
8. Add a Border Instead of Filling the Canvas
A border can create a deliberate framed appearance.
For example:
+------------------------+
|                        |
|    +------------+      |
|    |            |      |
|    |   PHOTO    |      |
|    |            |      |
|    +------------+      |
|                        |
+------------------------+
The border can be:
- White
- Black
- Gray
- Colored
- Minimal
- Thick
The best choice depends on the design.
Square Image vs Square Crop
These terms are often confused.
A square crop removes parts of the original photograph until only a square area remains.
A square canvas changes the outer dimensions while keeping the photograph intact.
| Feature | Square crop | Square canvas |
|---|---|---|
| Original image preserved | No | Yes |
| Extra space added | No | Yes |
| Important edges can be lost | Yes | No |
| Subject proportions preserved | Usually | Yes |
| Good for complete compositions | Sometimes | Yes |
If preserving every part of the photograph is your priority, square canvas expansion is generally the safer approach.
Pros and Cons of Making a Picture Square Without Cropping
Pros
- Keeps the complete photograph visible
- Prevents important subjects from being cut off
- Preserves the original composition
- Avoids stretching or distortion
- Works well for portraits and products
- Gives you control over the added space
- Allows different background styles
- Useful for consistent image layouts
Cons
- Adds empty space around the photograph
- May require a background or border
- The final image can look unusual if the padding is poorly designed
- Some platforms may still display or crop images differently
- A square canvas can increase the final pixel dimensions
- Blurred backgrounds may require additional editing
The technique is most useful when preserving the complete image matters more than filling every pixel with the original photograph.
Common Mistakes to Avoid
Mistake 1: Cropping Before Making the Canvas Square
If your goal is to preserve the entire photograph, cropping first defeats the purpose.
Better approach: Expand the canvas instead.
Mistake 2: Stretching the Photo
Changing a rectangular image directly into a square can distort the subject.
Better approach: Keep the original aspect ratio and add space around it.
Mistake 3: Making the Canvas Too Small
If the square canvas is smaller than one of the original image dimensions, something will have to be removed or resized.
Better approach: Make the square canvas at least as large as the longer side of the original image.
Mistake 4: Adding Random Padding
Uneven spacing can make the image look accidental.
Better approach: Center the photo or use intentional positioning.
Mistake 5: Choosing a Distracting Background
A bright or complicated background can take attention away from the subject.
Better approach: Use a simple color, white, transparency, or a subtle blur.
Mistake 6: Enlarging a Small Photo Too Much
If you enlarge a low-resolution image significantly, it may become soft or pixelated.
Better approach: Start with the highest-quality original available.
Mistake 7: Forgetting the Final Platform
A square image may still be displayed differently by a particular website or app.
Better approach: Check the current image specifications of the platform where you plan to use it.
Practical Example: Making a Portrait Square
Suppose you have a portrait photo measuring:
900 × 1200 pixels
You want to make it square without cutting off the person's head or shoulders.
Process
- Open the original portrait.
- Create a 1200 × 1200 square canvas.
- Place the portrait in the center.
- Add 150 pixels of space on each side.
- Choose white or another suitable background.
- Check the person's head and shoulders.
- Make sure nothing is stretched.
- Export the final square image.
The portrait remains 900 × 1200 within the square canvas.
No part of the original photograph needs to be removed.
Practical Example: Making a Product Photo Square
Imagine you have a product photograph measuring:
1600 × 1000 pixels
The product extends close to the left and right edges.
Cropping it to 1000 × 1000 could cut off part of the product.
Instead:
- Create a 1600 × 1600 canvas.
- Keep the product photograph at 1600 × 1000.
- Add 300 pixels above and below.
- Use a white background.
- Check the product edges.
- Export the square version.
This keeps the complete product visible.
Practical Example: Making a Landscape Photo Square
Suppose your landscape photo is:
1800 × 1200 pixels
Cropping it to 1200 × 1200 would remove 600 pixels of width.
If the photograph contains a building, mountain, person, or other important detail near either side, that crop could remove something important.
Instead, create:
1800 × 1800
and place the original photo inside it.
The extra space can be filled with:
- White
- Black
- A matching color
- A blurred version of the photograph
- Transparency
Best Practices for Social Media
If you are preparing an image for social media, avoid assuming that every platform uses exactly the same image treatment.
Specifications can change, and different areas of a platform may display images differently.
Before publishing:
- Check the platform's current recommendations.
- Make sure the subject remains visible.
- Keep important details away from the extreme edges.
- Preview the image if the platform provides a preview.
- Keep a high-quality original copy.
A square canvas can help protect the composition, but it does not guarantee that every platform will display the image identically.
Best Practices for Product Images
For product photography, consistency is particularly valuable.
If you have 20 products, try to keep:
| Element | Recommended approach |
|---|---|
| Canvas size | Same |
| Background | Same or coordinated |
| Product scale | Similar |
| Position | Consistent |
| Margins | Similar |
| Image quality | Consistent |
| File format | Appropriate for the destination |
This can make a product collection appear more organized.
How to Choose the Best Background
Use the purpose of the image as your guide.
Choose White When:
- You want a clean look.
- You are preparing product images.
- The website design is light.
- You want a neutral background.
Choose Black When:
- The subject is bright.
- You want strong contrast.
- The design has a dark visual style.
Choose a Brand Color When:
- The image is part of marketing material.
- Brand consistency matters.
- The color provides enough contrast.
Choose Blur When:
- The original image has an attractive environment.
- You want the image to feel visually connected.
- You are creating a portrait or lifestyle graphic.
Choose Transparency When:
- You will place the image over another design.
- You need maximum flexibility.
- Your final format supports transparency.
How to Make the Added Space Look Intentional
The biggest visual mistake is making the additional space look like an accident.
To avoid this:
- Keep the spacing balanced.
- Use a background that complements the subject.
- Avoid unnecessary decorations.
- Maintain consistent margins.
- Consider visual weight.
- Do not place important details too close to the canvas edge.
Sometimes a simple white background looks more professional than a complicated design.
Actionable Workflow
Use this workflow whenever you need to make a picture square without cropping:
Step 1: Open the original image.
Step 2: Check its dimensions.
Step 3: Identify the longer side.
Step 4: Create a square canvas using that longer dimension.
Step 5: Place the original image on the canvas without stretching it.
Step 6: Center or intentionally position the photo.
Step 7: Add a suitable background, border, or transparent space.
Step 8: Check the entire photograph.
Step 9: Confirm that the final width and height are equal.
Step 10: Export a separate copy.
Quick Decision Guide
| Your goal | Recommended method |
|---|---|
| Keep the whole photo | Expand canvas |
| Remove unwanted areas | Crop |
| Avoid distortion | Preserve aspect ratio |
| Create a clean product image | Square canvas + simple background |
| Create a social graphic | Square canvas + suitable background |
| Keep maximum flexibility | Square transparent canvas |
| Make a portrait fit a square | Add side padding |
| Make a landscape fit a square | Add top and bottom padding |
| Create a creative look | Use a blurred background |
| Keep editing simple | Use a solid-color canvas |
Final Advice for Part 2
The most reliable way to make a picture square without cropping it is to expand the canvas rather than change the shape of the original photograph.
Keep the original aspect ratio, use the longer side as a guide for the square canvas, and fill the additional space with a suitable background or border.
For a simple professional result, white or another neutral color is often enough. For portraits and lifestyle images, a blurred background can provide a more connected appearance.
Whatever method you choose, always check the final dimensions and make sure the complete original photo remains visible.
Conclusion
Learning how to make a picture square without cropping it is useful whenever you need a 1:1 image but want to keep the complete original photograph.
Instead of cutting away parts of the image, you can expand the canvas and add space around the photo. The original image stays intact while the overall dimensions become square.
This approach works particularly well for portraits, product photos, landscape images, profile pictures, catalogs, social media graphics, and website layouts.
The most important rule is to change the canvas rather than stretch the photograph. Stretching can distort faces, products, buildings, and other objects. Expanding the canvas keeps the original proportions intact.
You can fill the extra space with a white background, another solid color, a blurred version of the original photo, a border, or transparency if the final format supports it.
For the best result, always check the final dimensions, keep the entire subject visible, use balanced spacing, and save the edited image as a separate copy.
The basic workflow is simple:
Upload → Check Dimensions → Create Square Canvas → Add Space → Position → Review → Export
This gives you a square image while preserving the photograph you started with.
Key Takeaways
- You can make a picture square without cropping it by expanding the canvas.
- A square image has equal width and height.
- A square image uses a 1:1 aspect ratio.
- Do not stretch a rectangular photo to force it into a square.
- Keep the original photograph's aspect ratio.
- Use the longer side of the original image as a guide for the square canvas.
- Add padding around the photograph instead of removing important areas.
- White is a simple background option for many projects.
- A blurred background can work well for portraits and lifestyle photographs.
- Transparency can be useful when the square image will be used in another design.
- Keep the original image as a separate file.
- Use consistent canvas sizes when preparing multiple product images.
- Check the final image at normal viewing size before publishing.
- Always verify the current requirements of the platform where the image will be used.
Call to Action
Need to turn a rectangular photo into a square image without losing anything?
Open your image in an online editor, expand the canvas to equal width and height, keep the original photo at its natural proportions, and fill the additional space with a background that suits your design.
Do not crop what you need. Expand the canvas and keep the complete picture.
Frequently Asked Questions
1. How can I make a picture square without cropping it?
You can make a picture square without cropping it by expanding the canvas around the original photo. Set the canvas to equal width and height, keep the photo's original proportions, and add space around it.
2. Can I make a rectangular photo square online?
Yes. Many online image editors provide canvas resizing, padding, borders, or square-format tools. These features allow you to create a square canvas while keeping the original rectangular photo intact.
3. What is the easiest way to make a photo square without losing anything?
The easiest method is to create a square canvas that is large enough to contain the entire original photo. Then center the photo and use a background color or another design treatment to fill the empty space.
4. What size is a square picture?
A square picture has the same width and height. Examples include 500 × 500, 1000 × 1000, and 2000 × 2000 pixels. The appropriate size depends on how and where you plan to use the image.
5. What aspect ratio is a square image?
A square image has a 1:1 aspect ratio because its width and height are equal.
6. How do I make a portrait photo square without cutting off the head?
Expand the canvas instead of cropping the portrait. If the original photo is taller than it is wide, add space to the left and right sides until the canvas becomes square. This keeps the complete portrait visible.
7. How do I make a landscape photo square without cropping?
Create a square canvas using the original image's longer dimension. For a landscape photo, this usually means adding space above and below the image while keeping the entire photograph unchanged.
8. Can I make a photo square without stretching it?
Yes. Keep the original image's aspect ratio and expand the canvas around it. Avoid changing the width and height independently because that can distort the photograph.
9. What should I use to fill the extra space around a square photo?
You can use a white background, another solid color, a border, a blurred version of the original photo, or transparency. The best choice depends on the purpose of the image.
10. Is making a picture square the same as cropping it?
No. Cropping removes parts of the original image, while expanding the canvas adds space around it. If you want to keep the entire photograph, expanding the canvas is the better approach.
Ready to optimize your images?
Every tool mentioned in this article is free to use. No upload, no signup, and no watermarks — ever.
Try our free toolsRelated articles
How to Restore an Old Photo With AI: Complete Beginner's Guide
Learn how to restore an old photo with AI by repairing damage, improving clarity, reducing noise, and bringing faded photographs back to life with simple techniques.
How to Remove a Person From a Photo With AI: Easy Online Guide
Learn how to remove a person from a photo with AI using simple online editing techniques. Discover how AI object removal works, when to use it, and how to get natural-looking results.
How to Remove Unwanted Objects From Photos With AI: Easy Guide
Learn how to remove unwanted objects from photos with AI using simple editing techniques. Discover how AI object removal works, useful tips, common mistakes, and ways to get natural-looking results.