
How to Make GTA 6 Screenshots Clearer and Sharper
Learn how to make GTA 6 screenshots clearer and sharper using AI upscaling, sharpening, noise reduction, cropping, and better export settings.
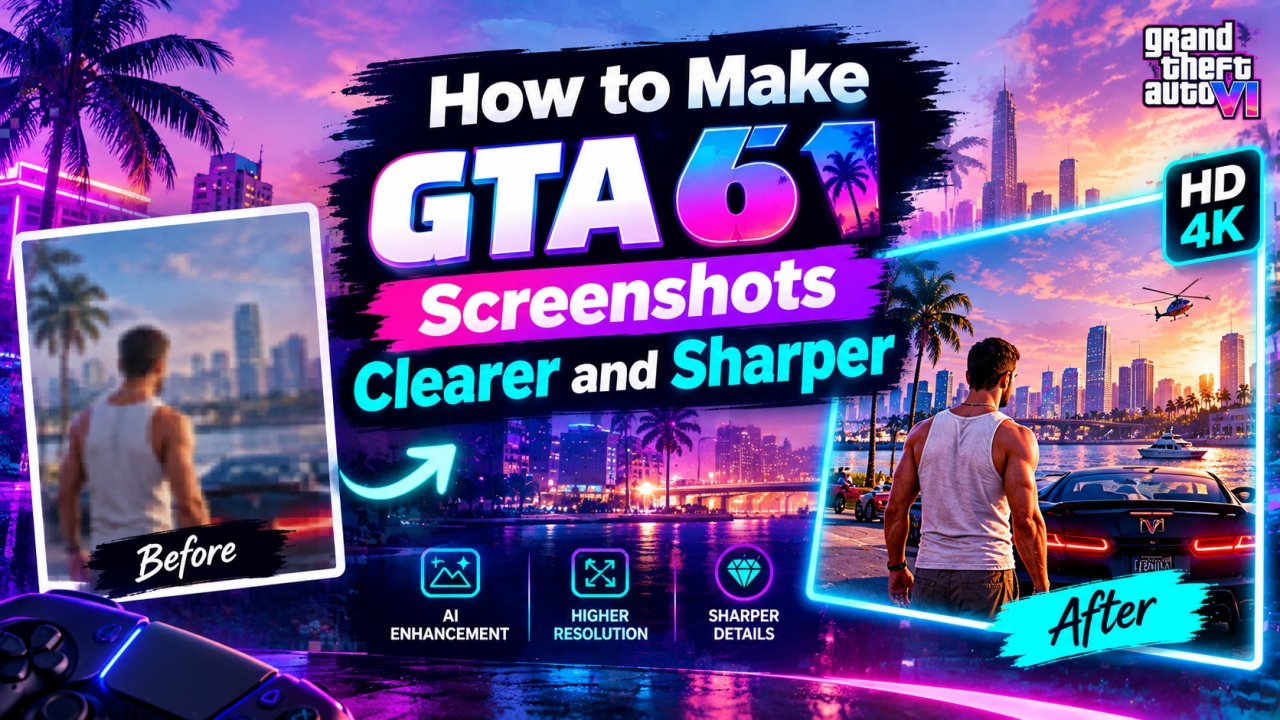
How to Make GTA 6 Screenshots Clearer and Sharper
If your GTA 6 screenshots look blurry, soft, compressed, or less detailed than expected, you can improve their appearance with the right editing workflow.
Learning how to make GTA 6 screenshots clearer and sharper can help you create better images for social media posts, YouTube thumbnails, gaming blogs, wallpapers, and gaming communities.
The process does not always require complicated editing skills. You can start with a good original screenshot, crop it carefully, use an AI image upscaler when needed, apply moderate sharpening, and export the final image correctly.
This guide explains how to improve GTA 6 screenshot quality without making the image look overly processed.
Why GTA 6 Screenshots Can Look Blurry
A screenshot can lose visible quality for several reasons.
Common causes include:
- All Tools
- Ecommerce Photo Optimizer
- How to Change the Background of a YouTube Thumbnail
- Low-resolution screenshots
- Excessive cropping
- Image compression
- Resizing the screenshot multiple times
- Motion during gameplay
- Dark scenes
- Fast camera movement
- Upload compression
- Heavy sharpening or editing
Sometimes the screenshot itself is perfectly fine, but it looks soft because it has been resized for another platform.
Before editing, try to identify the actual problem.
Start With the Highest-Quality GTA 6 Screenshot
The easiest way to improve a screenshot is to begin with the best source available.
If possible, use the original screenshot rather than:
- A screenshot of a screenshot
- A compressed social media image
- A tiny thumbnail
- An image downloaded from a low-quality preview
- An image that has already been heavily edited
The original file contains more image information.
That gives your editing or AI enhancement tool more information to work with.
Check the Screenshot Resolution
Before trying to make your GTA 6 screenshot sharper, check its pixel dimensions.
For example, suppose your screenshot is:
1920 × 1080 pixels
and you want a larger image for a wallpaper or graphic.
You could use a moderate upscale to create a larger version.
However, simply increasing the dimensions does not automatically create new real detail.
A larger image can still look blurry if the original contains limited information.
That is why AI upscaling can sometimes be useful.
Use AI Upscaling for GTA 6 Screenshots
AI image upscaling can increase the resolution of a screenshot while attempting to improve visible details.
Depending on the tool, you may find options such as:
- 2× upscale
- 4× upscale
- Super resolution
- Detail enhancement
- Noise reduction
- Sharpening
- Texture enhancement
Start with a moderate setting.
A 2× enlargement is often a useful first test because aggressive enlargement can introduce artificial-looking details.
How to Make GTA 6 Screenshots Clearer With AI
A simple workflow is:
- Select the original GTA 6 screenshot.
- Check its resolution.
- Crop it if necessary.
- Upload it to an AI image upscaler.
- Start with moderate enhancement.
- Check characters and objects.
- Inspect the background.
- Apply mild sharpening if needed.
- Export the final image.
- Compare it with the original.
The goal is to improve clarity without changing the appearance of the game scene unnecessarily.
Use Moderate Sharpening
Sharpening can make edges look more defined.
This can help with:
- Buildings
- Vehicles
- Characters
- Road markings
- Signs
- Clothing
- Weapons
- Environmental details
However, too much sharpening can create:
- Bright halos
- Jagged edges
- Excessive noise
- Artificial textures
- Harsh outlines
Use sharpening as a finishing adjustment rather than relying on it to fix a very low-quality screenshot.
How to Make a GTA 6 Screenshot Less Blurry
If your screenshot is slightly soft, try this workflow:
Original screenshot → Moderate upscale → Mild sharpening → Final resize → Export
Avoid repeatedly resizing the image.
For example, do not:
Resize → Save → Resize again → Save → Sharpen → Resize again
Instead, perform most of your editing from the original file.
Crop Before or After Upscaling?
This depends on what you are trying to create.
If you want to focus on one character or vehicle, make the important crop from the highest-quality original screenshot.
Then upscale the crop.
For example:
Full screenshot → Character crop → AI upscale
This allows the available image information to be concentrated on the subject.
If you upscale the entire screenshot first and then make a small crop, you may end up processing a lot of background information that you do not need.
How to Make GTA 6 Character Screenshots Clearer
Character-focused screenshots often need special attention.
Look at:
- Face
- Hair
- Clothing
- Hands
- Accessories
- Body edges
- Skin texture
AI enhancement may try to invent details when the original character is small.
If the face changes noticeably, reduce the enhancement strength.
For gaming screenshots, preserving the original visual appearance is usually more important than creating an extremely sharp face.
How to Make GTA 6 Vehicle Screenshots Sharper
Vehicles contain many straight lines and small details.
After enhancement, inspect:
- Body edges
- Windows
- Headlights
- Wheels
- Tires
- Mirrors
- Grille
- Reflections
Heavy sharpening can create unnatural outlines around vehicles.
Use moderate enhancement and check the vehicle at 100% zoom.
How to Improve GTA 6 Night Screenshots
Night scenes can be difficult because they contain dark areas and bright lights.
You may notice:
- Digital noise
- Soft shadows
- Bright light halos
- Dark details
- Color noise
- Low-contrast areas
A useful workflow is:
Noise reduction → AI upscale → Mild sharpening → Color correction
Avoid aggressive sharpening around bright lights.
Otherwise, headlights, streetlights, and neon signs may develop unnatural halos.
How to Improve GTA 6 Screenshots With Dark Areas
If a screenshot contains large dark areas, slightly increasing shadows can reveal more detail.
However, avoid lifting shadows too much.
Excessive shadow adjustment can make the image look flat and reveal unwanted noise.
A better approach is to make small adjustments to:
- Shadows
- Highlights
- Contrast
- Exposure
Always compare the edited screenshot with the original.
How to Preserve GTA 6 Colors
Color is an important part of a gaming screenshot.
Avoid excessive saturation.
Too much saturation can make:
- Neon lights look unrealistic
- Cars look overly bright
- Skin tones appear unnatural
- Grass look artificial
- Buildings lose realistic color
Make small color adjustments instead.
The original game screenshot should remain recognizable.
How to Improve GTA 6 Screenshot Details
When enhancing a screenshot, focus on the details that are actually visible in the original.
Useful areas include:
- Character edges
- Vehicles
- Buildings
- Roads
- Signs
- Trees
- Streetlights
- Reflections
- Textures
Do not expect an AI enhancer to perfectly recover tiny details that were never captured clearly in the source.
AI can improve the appearance of an image, but it cannot guarantee an exact recovery of missing information.
Example AI Prompt for GTA 6 Screenshots
If your AI image enhancement tool accepts text instructions, you can use a preservation-focused prompt such as:
Enhance and upscale this GTA 6 gameplay screenshot while preserving the original game scene, characters, vehicles, buildings, lighting, colors, textures, composition, and visual style. Improve resolution and clarity while keeping the image natural and faithful to the original screenshot. Reduce mild noise and blur without inventing unrealistic details, changing character features, distorting vehicles, creating excessive sharpening, or adding artificial textures.
Advanced Ways to Make GTA 6 Screenshots Clearer and Sharper
Once you understand the basic enhancement process, you can improve your GTA 6 screenshots even further. The main goal is not simply to make the image look sharper. You also want to keep faces, cars, buildings, signs, lighting, and background details looking natural.
A good enhancement should make the screenshot look cleaner without making it look heavily edited.
Make GTA 6 Character Screenshots Clearer
Character screenshots can be difficult to enhance because faces contain many small details.
When you increase sharpness too much, skin can start looking rough or unnatural. Hair can also develop strange edges.
For character screenshots, use a gentle enhancement process:
- Crop the character if necessary.
- Increase the image resolution with an AI upscaler.
- Apply moderate sharpening.
- Reduce noise.
- Adjust brightness and contrast slightly.
- Check the face at 100% zoom.
- Export the final image in high quality.
Try to preserve natural skin texture instead of creating artificial details.
Close-Up Character Screenshots
If your GTA 6 screenshot already contains a reasonably clear face, you can crop closer before enhancing it.
For example, you may want to create:
- A character profile image
- A close-up face shot
- A social media post
- A gaming wallpaper
- A YouTube thumbnail
However, avoid extreme cropping if the original screenshot has very little detail.
Upscaling can increase the size of an image, but it cannot perfectly recreate information that was never captured.
Make GTA 6 Vehicle Screenshots Sharper
Cars and other vehicles can benefit from sharpening because they contain many hard edges.
Pay attention to:
- Headlights
- Body lines
- Wheels
- Windows
- Mirrors
- Grilles
- License plate areas
- Reflections
- Vehicle badges
A useful workflow is:
Crop → Upscale → Reduce noise → Sharpen → Adjust contrast → Export
Do not apply maximum sharpening to the entire image.
Strong sharpening can create bright outlines around the vehicle and make the screenshot look artificial.
Improve Car Details Without Over-Sharpening
If the car is the main subject, apply most of your enhancement to the vehicle area.
Keep the background slightly softer.
This can make the car stand out without making the whole screenshot look overprocessed.
Make GTA 6 Night Screenshots Clearer
Night screenshots are usually more difficult to enhance because they contain dark areas, shadows, headlights, street lights, and neon signs.
Increasing brightness too much can make the image look washed out.
Instead, make small adjustments.
You can try:
- Slightly increasing exposure
- Raising shadow detail
- Keeping highlights under control
- Adding moderate contrast
- Reducing digital noise
- Applying light sharpening
The goal is to reveal hidden details while keeping the night atmosphere.
How to Improve Dark GTA 6 Screenshots
If your screenshot is very dark, do not immediately increase brightness to the maximum.
Start with the shadows.
Increasing shadows can reveal buildings, roads, cars, and characters while keeping bright lights under control.
Then adjust contrast carefully.
A good night screenshot should still look like a night scene.
Make GTA 6 Neon Screenshots Look Cleaner
Neon lights can look impressive, but they can also become messy after aggressive sharpening.
This is especially noticeable around:
- Neon signs
- Street lights
- Storefronts
- Vehicle lights
- Reflections
- Bright advertisements
If bright lights have a glowing effect, use less sharpening around those areas.
Noise reduction can also help clean up dark areas around neon lights.
After enhancement, zoom into the brightest areas and check whether the edges still look natural.
Improve GTA 6 Screenshots With Rain and Wet Roads
Rainy scenes contain reflections, water, headlights, and dark surfaces.
These details can become noisy when you increase sharpness.
For rainy screenshots, focus on:
- Road reflections
- Water droplets
- Vehicle lights
- Wet surfaces
- Character outlines
- Building lights
Use moderate sharpening and avoid trying to make every reflection extremely sharp.
Some softness is natural in a rainy scene.
Fix GTA 6 Screenshots With Motion Blur
Action screenshots can contain motion blur from camera movement or fast-moving objects.
Examples include:
- Cars moving quickly
- Characters running
- Driving scenes
- Explosions
- Camera movement
- Fast action sequences
Sharpening can sometimes improve a mildly soft image, but heavy motion blur is more difficult to correct.
If the original screenshot is heavily blurred, AI enhancement may create details that were not actually visible in the original.
Always compare the enhanced version with the original.
If the enhanced image starts looking unrealistic, reduce the enhancement level.
Use 2× Upscaling Before Trying 4×
A common mistake is immediately choosing the highest available upscaling level.
For many screenshots, 2× enlargement can be enough.
For example:
Original → 2× upscale → sharpening → final export
If you need a much larger image, you can consider 4× enlargement.
However, a larger output does not automatically mean a better image.
The final result depends heavily on the quality of the original screenshot.
When 2× Can Be Useful
2× enlargement can work well when:
- The screenshot is already reasonably sharp.
- You only need a larger image.
- You want a social media post.
- You want to reduce minor softness.
- You want a thumbnail-sized image.
When 4× Can Be Useful
4× enlargement may be useful when:
- The original image is relatively small.
- You need a larger wallpaper.
- You need more room for cropping.
- The image contains enough original detail to support enlargement.
Always inspect the final result instead of choosing 4× simply because it produces a larger file.
Reduce AI Artifacts
AI image enhancement can sometimes introduce unwanted details.
Common artifacts include:
- Strange facial details
- Artificial hair
- Unnatural textures
- Extra lines
- Oversharpened edges
- Strange vehicle details
- Distorted signs
- Repeated patterns
If you notice these problems, reduce the enhancement strength.
You can also try processing the original screenshot again with a lower enhancement setting.
A natural-looking image is usually better than an extremely sharp image with visible artifacts.
Improve GTA 6 Screenshot Colors
Sharpness is only one part of image quality.
Color can have a major effect on how clear a screenshot feels.
You can make small adjustments to:
- Exposure
- Contrast
- Highlights
- Shadows
- Saturation
- Temperature
- Vibrance
Do not increase saturation too much.
Over-saturated GTA 6 screenshots can lose the natural appearance of the game scene.
Keep the original color mood whenever possible.
Make GTA 6 Text and Signs More Readable
Some GTA 6 screenshots may contain signs, shop names, advertisements, road signs, or other text.
If the text is already visible, careful upscaling and sharpening can make it easier to see.
However, if the original text is extremely small or blurred, enhancement may not recover the exact original letters.
This is important when working with AI tools.
Do not assume that newly generated letters are accurate.
If the exact text matters, compare the enhanced version with the original screenshot.
Improve the Background Without Making It Too Sharp
Background details can include:
- Buildings
- Palm trees
- Roads
- Street signs
- Shops
- Cars
- Street lights
- Landscapes
You do not always need to sharpen everything equally.
If the character or vehicle is the main subject, keep the main subject clearer and allow the background to remain slightly softer.
This creates better visual separation.
It can also make the screenshot feel more natural.
Crop GTA 6 Screenshots for Social Media
Before enhancing a screenshot, think about where you will use it.
Different platforms may require different image shapes.
For example, you may want:
- A square social media post
- A vertical post
- A landscape image
- A YouTube thumbnail
- A desktop wallpaper
- A mobile wallpaper
Do your main crop before the final enhancement whenever possible.
This prevents you from spending time enhancing parts of the image that will later be removed.
Example Social Media Workflow
For a social media post:
Original screenshot → Crop → Upscale → Sharpen → Color correction → Export
For a vertical post:
Original screenshot → Vertical crop → Upscale → Detail enhancement → Final adjustment → Export
Always check the final image at the size people will actually see it.
Make GTA 6 Screenshots Better for YouTube Thumbnails
If you are creating a GTA 6 YouTube thumbnail, clarity is especially important.
The main subject should be easy to recognize even when the thumbnail is displayed at a smaller size.
A useful workflow is:
- Choose the clearest screenshot.
- Crop around the main subject.
- Upscale the image.
- Sharpen important details.
- Adjust brightness and contrast.
- Add text separately if needed.
- Export the final thumbnail.
Do not make the entire screenshot extremely sharp.
Focus on the character, vehicle, or other main subject.
Make GTA 6 Screenshots Better for Wallpapers
Wallpapers require a different approach because they are usually viewed at a larger size.
Start with the highest-resolution screenshot available.
If you need to crop the image, leave enough space around the main subject.
Then upscale the image and inspect important areas.
For a wallpaper, check:
- Faces
- Cars
- Buildings
- Sky
- Road textures
- Lighting
- Reflections
If the screenshot contains a very small subject, aggressive enlargement may expose artifacts.
AI Prompts for GTA 6 Screenshot Enhancement
Some AI image tools allow you to describe the type of enhancement you want.
Instead of asking the tool to completely recreate the image, use a preservation-focused instruction.
General Enhancement Prompt
"Enhance this GTA 6 screenshot by improving clarity, fine details, sharpness, and resolution while preserving the original composition, characters, vehicles, colors, lighting, and environment. Keep the image realistic and avoid changing important details."
Character Screenshot Prompt
"Improve the clarity and resolution of this GTA 6 character screenshot. Preserve the original face, hairstyle, clothing, skin texture, lighting, and background. Add natural detail without changing the character's appearance."
Vehicle Screenshot Prompt
"Enhance this GTA 6 vehicle screenshot with cleaner edges, sharper vehicle details, improved reflections, and higher resolution. Preserve the original vehicle design, colors, lighting, environment, and composition."
Night Screenshot Prompt
"Improve this GTA 6 night screenshot by reducing noise and increasing natural clarity while preserving the original dark atmosphere, neon lighting, shadows, reflections, and colors."
Avoiding Unwanted Changes
You can also tell the AI tool what not to change.
For example:
"Do not change the character's face, clothing, vehicle design, environment, signs, colors, or composition. Only improve image clarity and resolution."
This type of instruction can help keep the enhancement focused on image quality.
Check the Image at 100% Zoom
One of the easiest ways to catch problems is to inspect the image at 100% zoom.
Look closely at:
- Faces
- Hair
- Hands
- Vehicle edges
- Wheels
- Text
- Signs
- Building details
- Shadows
- Bright lights
If you see strange textures or artificial details, reduce the enhancement.
Do not judge the image only when it is zoomed out.
An image can look impressive from a distance but show obvious artifacts when viewed closely.
A Complete Advanced GTA 6 Screenshot Workflow
Here is a simple advanced workflow you can follow.
Step 1: Start With the Best Screenshot
Choose the clearest original screenshot you have.
Avoid starting with a screenshot that is already heavily compressed or blurry.
Step 2: Crop the Image
Remove unnecessary areas and keep the main subject.
Step 3: Upscale the Screenshot
Use a suitable image upscaling tool.
Start with 2× if you are unsure.
Step 4: Reduce Noise
Clean up visible digital noise, especially in dark scenes.
Step 5: Sharpen Carefully
Apply moderate sharpening.
Focus on important edges and details.
Step 6: Adjust Lighting
Make small changes to exposure, shadows, highlights, and contrast.
Step 7: Check Colors
Make sure skin tones, vehicle colors, sky colors, and lighting still look natural.
Step 8: Inspect AI Details
Zoom in and look for strange textures or invented details.
Step 9: Export Correctly
Save the final image in a suitable high-quality format.
Step 10: Compare With the Original
Place the original and enhanced versions side by side.
Ask yourself:
- Is the image actually clearer?
- Are the details still accurate?
- Does the character still look natural?
- Does the vehicle still look correct?
- Are the colors preserved?
- Did sharpening create unwanted outlines?
- Did AI enhancement add strange details?
If the answer is yes to most of these questions, your enhancement is ready.
Common Advanced Mistakes to Avoid
Sharpening Everything
Too much sharpening can make the image look harsh.
Using Maximum AI Enhancement
More enhancement does not always produce a better result.
Ignoring the Original Image
Always keep the original screenshot.
You may need it if the enhanced version introduces unwanted changes.
Increasing Saturation Too Much
Bright colors can quickly become unnatural.
Cropping Too Aggressively
Extreme cropping reduces the amount of original information available.
Trusting AI-Generated Details
AI tools can create details that look realistic but may not match the original screenshot.
Always compare important details with the source image.
Best Settings Depend on the Screenshot
There is no single setting that works for every GTA 6 screenshot.
A bright daytime vehicle screenshot may need different adjustments from a dark rainy street scene.
For example:
Daytime character:
Upscaling + light sharpening + small color adjustment
Vehicle screenshot:
Upscaling + moderate sharpening + contrast adjustment
Night scene:
Noise reduction + shadow adjustment + gentle sharpening
Rainy scene:
Noise reduction + moderate sharpening + controlled highlights
Action screenshot:
Careful sharpening + artifact checking
The best workflow is the one that improves clarity while keeping the original scene recognizable.
Final Advanced Tip
The goal of enhancing a GTA 6 screenshot is not to make every pixel extremely sharp.
The goal is to create a cleaner, larger, more detailed version of the original screenshot while preserving what was actually captured.
Start with a high-quality screenshot, crop carefully, upscale gradually, sharpen moderately, control noise, and always compare the final result with the original.
This approach works well for character screenshots, vehicle shots, night scenes, wallpapers, social media posts, and gaming thumbnails.
How to Make GTA 6 Screenshots Clearer and Sharper
Conclusion
Learning how to make GTA 6 screenshots clearer and sharper is mostly about using the right combination of resolution, cropping, upscaling, sharpening, noise reduction, and careful editing.
Start with the highest-quality screenshot available. Then crop it for your intended use, upscale it gradually, and apply sharpening only when necessary.
For character screenshots, pay close attention to faces, hair, clothing, and skin texture. For vehicle screenshots, focus on edges, wheels, lights, reflections, and body details. For night scenes, control noise, shadows, highlights, and bright lights instead of simply increasing brightness.
Most importantly, do not try to make every screenshot extremely sharp.
A natural-looking image with clean details is usually better than an image that has heavy sharpening and obvious AI artifacts.
Final GTA 6 Screenshot Enhancement Checklist
Before publishing your enhanced screenshot, check the following:
- Started with the highest-quality original screenshot
- Cropped the image carefully
- Used suitable image upscaling
- Checked whether 2× or 4× enlargement is appropriate
- Applied sharpening moderately
- Reduced visible noise
- Adjusted brightness only when needed
- Controlled highlights in bright areas
- Improved shadows without making them look artificial
- Preserved the original colors
- Checked character faces and details
- Checked vehicle edges and reflections
- Checked signs and small text
- Looked for AI-generated artifacts
- Compared the final version with the original
- Exported the image at suitable quality
Frequently Asked Questions
How can I make GTA 6 screenshots clearer?
Start with the highest-resolution screenshot you can get. Crop it carefully, upscale it with an image enhancement tool, reduce noise, and apply moderate sharpening. Avoid excessive sharpening because it can create unnatural edges.
Can I make a blurry GTA 6 screenshot HD?
You can often improve a blurry screenshot by upscaling and sharpening it, but the result depends on the original image. If important details were never captured, an enhancement tool cannot reliably recover the exact original information.
What is the best way to sharpen GTA 6 screenshots?
Use moderate sharpening after upscaling. Check faces, vehicles, signs, and other detailed areas at 100% zoom. If you see halos, rough textures, or artificial details, reduce the sharpening level.
Should I use 2× or 4× upscaling for GTA 6 screenshots?
It depends on the original screenshot and the final use. 2× can be enough for many social media images and thumbnails. 4× can be useful when you need a much larger image, but aggressive enlargement can also make artifacts more noticeable.
How do I make GTA 6 screenshots clearer without losing quality?
Use the original high-quality screenshot, avoid unnecessary compression, upscale gradually, reduce noise carefully, and use moderate sharpening. Always compare the enhanced image with the original before publishing it.
How can I improve GTA 6 night screenshots?
For night screenshots, focus on reducing noise and improving shadow detail. Keep bright lights and neon signs under control. Increasing brightness too much can remove the natural nighttime appearance.
Can AI make GTA 6 screenshots sharper?
AI image enhancement tools can upscale images and improve perceived clarity. However, AI may sometimes create details that were not present in the original, so important areas should always be compared with the source screenshot.
How do I make GTA 6 screenshots better for YouTube thumbnails?
Choose a clear screenshot, crop around the main subject, upscale it, improve clarity, and adjust contrast carefully. Make sure the main character or vehicle remains easy to recognize at thumbnail size.
How do I make GTA 6 screenshots better for social media?
Choose the final image shape first, crop the screenshot, upscale it, apply moderate sharpening, adjust colors if needed, and export at good quality. Avoid excessive editing that makes the screenshot look artificial.
Can sharpening fix motion blur in GTA 6 screenshots?
Sharpening can improve mild softness, but it cannot reliably restore details that were completely lost because of heavy motion blur. AI enhancement may help visually, but it can also introduce inaccurate details.
Ready to optimize your images?
Every tool mentioned in this article is free to use. No upload, no signup, and no watermarks — ever.
Try our free toolsRelated articles
How to Make GTA 6 Images HD and how to make GTA 6 images HD and clear using upscali...
Learn how to make GTA 6 images HD and clear using upscaling, sharpening, AI enhancement, noise reduction, and better image-editing techniques.
How to Download GTA 6 Images in HD Learn how to download GTA 6 images in HD from....
Learn how to download GTA 6 images in HD from reliable sources, find official screenshots and artwork, save high-quality images, and avoid low-resolution or misleading downloads.
How to Upscale Cricket Photos Without Losing Quality
Learn how to upscale cricket photos without losing quality using AI upscalers, sharpening, noise reduction, and the right export settings.