
How to Extract the Best Frame From a Video for a YouTube Thumbnail
Learn how to extract the best frame from a video for a YouTube thumbnail, choose a sharp frame, improve its quality, and create a more effective thumbnail.

How to Extract the Best Frame From a Video for a YouTube Thumbnail
Introduction
Sometimes the perfect YouTube thumbnail is already inside your video.
You may have a great facial expression, an exciting moment, a useful demonstration, or a product shot that looks much better than any separate photo you have. The challenge is finding that exact moment and turning it into a clean thumbnail image.
Learning how to extract the best frame from a video for a YouTube thumbnail can save time and help you create thumbnails that feel connected to the actual video.
You do not necessarily need an expensive editing program. A video player, video editor, screenshot tool, or frame-extraction feature can often do the job.
The important part is not simply capturing any frame. You need to find a frame that is sharp, well-composed, visually clear, and useful at YouTube thumbnail size.
This guide explains how to find the right frame, extract it without unnecessary quality loss, improve it when needed, and prepare it for your final YouTube thumbnail.
Why the Right Video Frame Matters for a YouTube Thumbnail
A thumbnail is often the first visual a potential viewer sees before deciding whether to watch a video.
That makes frame selection important.
A random screenshot from the video may contain motion blur, a strange facial expression, closed eyes, poor lighting, or too much empty space.
A carefully selected frame can give you a much stronger starting point.
For example, imagine you uploaded a cooking video. During the video, there may be one moment when the finished dish is clearly visible, the lighting is good, and your expression shows excitement.
That single frame could work much better than a random screenshot taken from the middle of the video.
The same applies to:
- Tutorials
- Gaming videos
- Product reviews
- Vlogs
- Reaction videos
- Educational videos
- Fitness videos
- Travel videos
- Interviews
- How-to videos
- Tools
What Is a Video Frame?
A video is made up of individual still images called frames.
When these frames are displayed one after another quickly, they create the appearance of motion.
For example, a video recorded at 30 frames per second contains roughly 30 individual frames for every second of footage.
This means a 10-second section can contain hundreds of possible images.
That gives you plenty of choices when looking for a thumbnail.
However, not every frame is equally useful. Two frames captured only a fraction of a second apart can look completely different.
One may have a clear face and sharp subject, while the next may show motion blur or a partially closed eye.
That is why finding the best frame is usually more important than simply taking a screenshot.
- Blogs
- How to Make a YouTube Thumbnail HD: Size, Resolution & Quality Guide
- How to Improve YouTube Thumbnail Quality on a Low-Resolution Image
- How to Turn a Video Screenshot Into a YouTube Thumbnail
What Makes a Good Frame for a YouTube Thumbnail?
The best frame usually has several useful qualities.
1. Sharp Subject
The main person, product, or object should be reasonably sharp.
Avoid frames where movement has created noticeable blur.
2. Strong Facial Expression
For videos featuring people, an expressive face can make the thumbnail more visually interesting.
Look for moments showing:
- Surprise
- Happiness
- Confusion
- Excitement
- Curiosity
- Shock
- Concentration
The expression should also make sense for the video's topic.
3. Good Lighting
Choose a frame where the subject is properly visible.
Extremely dark frames or frames with blown-out highlights may require more editing.
4. Useful Composition
The subject should have enough space around it for thumbnail editing.
A frame with the person's face pressed against the edge of the image can be difficult to work with.
5. Clear Main Subject
The viewer should be able to understand what matters in the frame.
Avoid frames where several objects compete for attention unless that is intentional.
6. Minimal Motion Blur
Fast movement can produce blurry frames.
If possible, move through nearby frames until you find a sharper moment.
How to Find the Best Frame From a Video
Before extracting anything, watch the relevant part of your video.
You do not need to watch the entire video repeatedly if you already know approximately where the best moment occurs.
Start by identifying moments that visually communicate the video's main idea.
For example:
- A phone being shown clearly in a review
- A finished project in a tutorial
- A dramatic reaction in a reaction video
- A character or action moment in gaming content
- A finished dish in a recipe video
- A beautiful location in a travel video
Once you find a promising section, move through it frame by frame if your video player or editor allows it.
Compare several nearby frames instead of choosing the first one that looks good.
Frame Selection vs. Screenshot: What's the Difference?
People often use the words "screenshot" and "frame extraction" interchangeably, but there can be a practical difference.
A normal screenshot captures whatever is currently displayed on your screen.
A frame extraction feature works directly with the video and can give you a still image from the video itself.
This can be useful because a video editor or frame extractor may give you more control over the exact frame.
| Method | Ease | Control | Useful For |
|---|---|---|---|
| Screen screenshot | Very easy | Low | Quick captures |
| Video player snapshot | Easy | Medium | Simple frame extraction |
| Video editor | Easy to moderate | High | Precise frame selection |
| Dedicated frame extractor | Moderate | High | Exact still-frame exports |
For a quick thumbnail, a screenshot may be sufficient. For better control, use a tool that lets you move through the video frame by frame.
How to Extract a Frame From a Video Online
Online tools can be convenient when you do not want to install video editing software.
The basic process is usually:
- Open a trusted video frame extraction tool.
- Upload your video.
- Find the section containing the moment you want.
- Move through the video until you find the best frame.
- Preview the selected frame.
- Export or download the still image.
- Open the image in your thumbnail editor.
- Resize or enhance it if necessary.
- Add your thumbnail text and other design elements.
Before uploading a video to an online service, check its privacy policy and make sure you are comfortable with how uploaded files are handled.
How to Extract a Frame From a Video on a Computer
You can also extract a frame using desktop video software.
A typical workflow looks like this:
Open the video → find the right moment → move frame by frame → choose the sharpest image → export the frame → edit the thumbnail.
Video editors are especially useful because they provide a timeline.
You can zoom into the timeline, move the playhead precisely, and compare several frames around the same moment.
This is helpful when the subject is moving quickly.
For example, if someone throws an object toward the camera, one frame may show the object too close, another may be blurry, and another may show the perfect position.
The best thumbnail might be only a few frames away from the first frame you considered.
How to Extract the Best Frame From a Video on Your Phone
If you create YouTube content using a smartphone, you can also select a frame directly from your phone.
One simple method is to open the video, pause at the desired moment, and use the device's screenshot function.
However, do not immediately accept the first paused frame.
Move slightly backward and forward around the moment and compare the available frames.
Pay particular attention to:
- Facial expressions
- Eye position
- Motion blur
- Hand position
- Product placement
- Background distractions
- Lighting
If your phone or editing application provides a frame-export option, that can give you more precise control than a normal screenshot.
Why You Should Avoid Random Screenshots
A random screenshot may technically give you an image from your video, but it may not be a good thumbnail.
Common problems include:
- Closed eyes
- Half-open mouth
- Motion blur
- Awkward body position
- Poor composition
- Distracting background
- Someone looking away
- Important objects being partially hidden
The solution is simple: search around the moment instead of accepting the first usable frame.
A few extra seconds of frame selection can save you from spending much more time trying to fix a poor image later.
How Video Quality Affects the Extracted Frame
The quality of the extracted frame depends heavily on the original video.
If your video was recorded in high resolution with good lighting, the extracted frame will generally give you a better starting point.
A low-resolution or heavily compressed video may produce a frame that looks soft when enlarged.
For example, taking a small frame from an old low-quality video and enlarging it significantly can reveal:
- Soft details
- Compression artifacts
- Noise
- Blocky textures
- Blurry edges
You can sometimes improve these problems with image enhancement tools, but there is a limit to how much missing detail can be recovered.
Whenever possible, extract the frame from the original high-quality video file, rather than from a compressed copy downloaded or re-recorded from another source.
What Resolution Should the Extracted Frame Have?
For a YouTube thumbnail, starting with a sufficiently large source image gives you more flexibility during editing.
A higher-resolution video provides more pixels in every frame than a lower-resolution video.
For example, a frame extracted from a 4K video contains substantially more image information than one extracted from a 720p video.
However, resolution alone does not guarantee a good thumbnail.
A sharp 1080p frame can be more useful than a blurry 4K frame.
Therefore, consider both:
- Resolution
- Sharpness
- Lighting
- Composition
- Subject clarity
Do not choose a frame simply because it comes from the highest-resolution video. Choose the frame that actually looks best.
Quick Beginner Workflow
If you want the simplest possible process, use this workflow:
- Open your original video.
- Find a visually important moment.
- Move through several nearby frames.
- Pick the sharpest frame.
- Check the subject's expression or position.
- Export the frame at the available quality.
- Open it in your thumbnail editor.
- Crop and compose the image for YouTube.
- Add text or other visual elements.
- Check the finished thumbnail at a small size.
This approach works for most beginner thumbnail projects.
Part 1 Summary
The best frame for a YouTube thumbnail is not necessarily the most dramatic moment in the video. It should also be sharp, clearly composed, well lit, and easy to understand.
Start with the original video whenever possible. Find the relevant section, compare several nearby frames, and choose the image with the strongest combination of clarity, expression, composition, and subject visibility.
Once you have the frame, you can improve it and turn it into a complete YouTube thumbnail.
How to Choose the Best Frame When Several Frames Look Good
Sometimes you may find five or ten frames that could work as a thumbnail. Instead of choosing randomly, compare them using a simple checklist.
Look at each frame and ask:
- Is the main subject sharp?
- Is the facial expression strong?
- Are the eyes open and clearly visible?
- Is the subject positioned well?
- Is there enough space for thumbnail text?
- Is the background distracting?
- Does the frame communicate the video's topic?
- Will it still look good when displayed small?
You can even export two or three candidates and compare them side by side.
The best frame is usually the one that communicates the video's main idea most clearly, not necessarily the frame with the most dramatic action.
Look for the Peak Moment
When searching through a video, pay attention to the moment immediately before, during, and after an important action.
Suppose you are making a thumbnail from a reaction video.
The exact moment of the reaction might last only a fraction of a second. One frame could show a neutral expression, the next could show surprise, and another could already show the person looking away.
The middle frame may be the strongest choice.
The same principle works for:
- Sports actions
- Gaming reactions
- Product demonstrations
- Cooking
- Unboxing
- Tutorials
- Travel scenes
- Before-and-after demonstrations
Move through the footage frame by frame around the peak moment rather than relying on a single pause.
How to Avoid Motion Blur When Extracting a Video Frame
Motion blur is one of the biggest problems when using a video frame as a thumbnail.
It happens when the subject moves while the camera captures the image. Fast movements can make faces, hands, products, or other important details look soft.
If you notice blur, move backward or forward by a few frames.
You may find that:
- One frame has a blurry hand.
- The next frame has a blurry face.
- Another frame has both the face and hand relatively sharp.
Choose the frame with the clearest important subject.
Do not automatically choose the frame where the action looks most dramatic if that frame is too blurry to understand.
Check Facial Expressions Carefully
For thumbnails featuring people, facial expression can make a major difference.
A frame that looks ordinary inside a moving video may look awkward when frozen as a still image.
Before selecting the frame, check:
- Eyes
- Eyebrows
- Mouth
- Head position
- Face angle
- Overall expression
For example, a person speaking may look natural while the video is playing, but a randomly captured frame could show an unusual mouth position.
Compare nearby frames until you find a natural and expressive moment.
Leave Space for Thumbnail Text
A good frame can become difficult to use if the subject fills the entire image.
Think about your thumbnail layout before choosing the final frame.
If you plan to put text on the left, a frame with the subject positioned toward the right may be useful.
If you want text on the right, look for a frame with useful negative space on the right side.
This gives you more flexibility when designing the final thumbnail.
Example
Imagine a video about testing a new smartphone.
A frame showing the creator holding the phone on the right side of the image may leave enough empty space on the left for short thumbnail text.
That can be more useful than a close-up where the person's face fills the entire frame.
How to Crop an Extracted Video Frame for a YouTube Thumbnail
After extracting the frame, you may need to crop it for your thumbnail design.
Do not crop automatically just because the frame contains empty space.
First decide what the viewer should notice.
For a person-focused thumbnail, you may want to emphasize:
- Face
- Upper body
- Important object
- Relevant action
For a product thumbnail, you may want the product to occupy more of the available space.
Keep enough context to help explain the video, but remove unnecessary visual distractions.
How to Improve the Quality of an Extracted Frame
Sometimes the selected frame looks slightly soft even though it is the best moment in the video.
You can try basic image adjustments such as:
- Mild sharpening
- Contrast adjustment
- Exposure correction
- Noise reduction
- Upscaling
- Color correction
Use these adjustments carefully.
Heavy sharpening can create unnatural edges and make compression artifacts more visible. Excessive noise reduction can also remove useful detail.
The goal is to make the frame look cleaner, not artificially processed.
Extracted Video Frame vs. Original Photo
If you have both a high-quality photograph and a video frame of the same subject, compare them before deciding which one to use.
| Factor | Video Frame | Original Photo |
|---|---|---|
| Easy to capture | Yes | Depends on availability |
| Captures a specific video moment | Excellent | Usually no |
| Potential motion blur | Higher | Usually lower |
| Resolution | Depends on video | Depends on camera |
| Facial expression | Useful for spontaneous moments | Often more controlled |
| Thumbnail context | Directly connected to video | May require more editing |
A video frame is especially useful when the moment itself is important to the video's story.
Example: Extracting a Frame From a Gaming Video
Imagine you have recorded a gaming video and want to create a thumbnail from the footage.
Instead of choosing a random screenshot, find the most visually interesting part of the gameplay.
You might look for:
- A major in-game event.
- A strong player reaction.
- An important character or object.
- A visually clear game scene.
- A moment with strong contrast.
Then move through the surrounding frames.
Choose the frame that shows the important action clearly without excessive motion blur.
You can then crop the frame, enhance it slightly, add text, and use additional graphic elements if needed.
Example: Extracting a Frame From a Product Review
Suppose you recorded a smartphone review.
During the video, you hold the phone in different positions. Some frames show your hand covering the display, while others show the phone clearly.
The best thumbnail frame might be the one where:
- The phone is facing the camera.
- The product is sharp.
- Your expression is clear.
- The phone is large enough to recognize.
- There is enough space for text.
You may need to compare several seconds of footage to find this combination.
The best frame does not have to be the most visually complicated one. A clear product and strong composition can be more useful.
Example: Extracting a Frame From a Tutorial
For a tutorial video, look for a frame that visually represents the result or key step.
For example, if the video teaches viewers how to edit an image, you could use a frame showing the edited image on screen along with the creator's reaction.
Avoid frames where:
- Menus cover the important content.
- The screen is too dark.
- The cursor blocks the subject.
- The interface is too small to recognize.
- The creator is looking away.
The thumbnail should give the viewer a quick visual clue about what the tutorial teaches.
Pros and Cons of Using a Video Frame for a Thumbnail
| Pros | Cons |
|---|---|
| No separate photo shoot required | Some frames may be blurry |
| Captures authentic moments | Video resolution limits image detail |
| Directly connected to the video | Facial expressions can look awkward |
| Easy to find multiple options | Compression may reduce quality |
| Useful for reactions and demonstrations | Some frames have poor composition |
| Can save editing time | May require enhancement or cropping |
For many creators, the biggest advantage is convenience. Your video may already contain exactly the image you need.
Common Mistakes When Extracting a Video Frame
Choosing the First Good-Looking Frame
The first usable frame is not always the strongest one. Compare nearby frames.
Ignoring Motion Blur
A dramatic frame is not useful if the main subject is too blurry.
Using a Compressed Video
Extracting from a low-quality copy can produce a softer result than using the original video.
Forgetting Thumbnail Composition
A beautiful frame may leave no room for text or other important elements.
Over-Editing the Frame
Too much sharpening, saturation, or contrast can make the image look unnatural.
Choosing a Frame That Does Not Match the Video
The thumbnail should accurately represent the video's subject. Avoid using a visually attractive frame that gives viewers the wrong impression.
Best Practices for Extracting YouTube Thumbnail Frames
For consistent results, follow these practices:
- Use the original video file whenever possible.
- Search around important moments rather than random timestamps.
- Compare multiple nearby frames.
- Prioritize sharpness and subject clarity.
- Look for natural facial expressions.
- Leave useful space for text.
- Avoid distracting backgrounds when possible.
- Make only moderate image-quality adjustments.
- Check the final thumbnail at a small viewing size.
- Make sure the thumbnail accurately represents the video.
A few minutes of careful frame selection can make the rest of the thumbnail design process much easier.
Which Frame Extraction Method Should You Use?
| Method | Best For | Difficulty | Control |
|---|---|---|---|
| Phone screenshot | Quick thumbnail ideas | Easy | Low |
| Desktop screenshot | Simple captures | Easy | Medium |
| Video player snapshot | Better frame selection | Easy | Medium |
| Video editor | Precise frame selection | Moderate | High |
| Dedicated frame extractor | Frequent frame extraction | Moderate | High |
If you only need an occasional frame, a simple screenshot or video-player snapshot may be enough.
If you create thumbnails regularly, using a video editor or dedicated frame-extraction workflow can give you much better control.
Part 2 Summary
Extracting a frame is only half the job. The real improvement comes from choosing the right moment.
Compare several nearby frames, avoid motion blur, look for strong expressions, consider where your thumbnail text will go, and use the highest-quality video source available.
After extraction, make moderate adjustments rather than trying to completely rebuild a poor-quality frame.
The strongest workflow is simple:
Find the important moment → compare nearby frames → choose the sharpest frame → crop for composition → improve quality carefully → build the final thumbnail.
Conclusion
Learning how to extract the best frame from a video for a YouTube thumbnail can save time and give you a strong starting point for your thumbnail design.
The key is to avoid treating every video frame as equally useful. Look for a moment where the subject is sharp, the expression or action is clear, the lighting works well, and the composition leaves enough room for your design.
Whenever possible, extract the frame from the original high-quality video. Compare several frames around the important moment instead of selecting the first one that looks acceptable.
Once you have your frame, crop it carefully, improve the image quality if necessary, and add your thumbnail elements without over-editing the original image.
A good thumbnail does not always require a separate photoshoot. Sometimes the best thumbnail image is already hidden inside the video—you simply need to find the right frame.
Key Takeaways
- Use the original video file whenever possible.
- Search around important moments instead of taking a random screenshot.
- Compare several nearby frames before making your final choice.
- Prioritize sharpness, facial expression, lighting, and composition.
- Avoid frames with excessive motion blur.
- Consider where your thumbnail text will be placed.
- Use the highest-quality frame available.
- Crop the image around the most important subject.
- Use image enhancement carefully and avoid excessive sharpening.
- Make sure the thumbnail accurately represents the video.
- Check the finished thumbnail at a small size before publishing.
CTA
Have a video with a great moment but no suitable thumbnail image?
Go through your footage and look for the frame that best represents the video's main idea. Compare a few nearby frames, choose the sharpest one, and turn it into your thumbnail.
If you create YouTube videos regularly, making frame extraction part of your editing workflow can give you a steady source of thumbnail images without needing a separate photoshoot for every video.
Frequently Asked Questions
1. How do I extract the best frame from a video for a YouTube thumbnail?
Find an important moment in your video, move through the surrounding frames, and choose the sharpest frame with the clearest subject, expression, lighting, and composition. Export that frame and edit it for your thumbnail.
2. Can I use a screenshot from my video as a YouTube thumbnail?
Yes. A screenshot can work as a thumbnail source, especially when the video is high quality. For better control, use a video player or editing tool that lets you select and export an exact frame.
3. What makes a good video frame for a thumbnail?
A good frame is usually sharp, well lit, visually clear, and relevant to the video's topic. For people-focused thumbnails, a natural and expressive facial expression can also make the frame more useful.
4. Why is my extracted video frame blurry?
The frame may be blurry because of camera movement, subject movement, low video resolution, compression, or the way the original video was recorded. Try checking several frames before and after the blurry moment.
5. Can I extract a frame from a 4K video?
Yes. A 4K video can provide a high-resolution source for extracting a still frame. However, the sharpest frame is more important than resolution alone. A sharp lower-resolution frame can be more useful than a blurry high-resolution frame.
6. How can I get a sharp thumbnail from a video?
Use the original high-quality video, select a frame with minimal motion blur, and avoid enlarging the extracted image excessively. You can also apply moderate sharpening or image enhancement after extraction.
7. Should I use a video frame or a separate photo for my thumbnail?
It depends on the content. A separate photo may provide better image quality and control, while a video frame can capture an authentic expression, action, or moment that directly relates to the video.
8. How many frames should I compare before choosing a thumbnail?
There is no fixed number. Compare enough nearby frames to find the strongest combination of sharpness, expression, subject position, and composition. Even checking several frames around an important moment can make a noticeable difference.
9. Can I extract a thumbnail frame from a video on my phone?
Yes. You can pause the video and take a screenshot, or use a mobile video-editing application that supports frame selection or still-image export. Compare nearby frames rather than using the first paused image.
10. Can I improve a low-quality video frame for a YouTube thumbnail?
You can improve some aspects using cropping, sharpening, noise reduction, color correction, or image upscaling. However, editing cannot reliably recreate detail that was never captured in the original video.
Suggested Internal Links
- How to Make a YouTube Thumbnail the Right Size Without Cropping
- How to Make a YouTube Thumbnail HD: Size, Resolution & Quality Guide
- How to Improve YouTube Thumbnail Quality on a Low-Resolution Image 4. How to Fix a Pixelated YouTube Thumbnail Online
- How to Make a YouTube Thumbnail Look Professional Online
- How to Make a YouTube Thumbnail More Eye-Catching
- How to Make YouTube Thumbnail Text Clear and Sharp
- How to Remove a Background From a YouTube Thumbnail
Ready to optimize your images?
Every tool mentioned in this article is free to use. No upload, no signup, and no watermarks — ever.
Try our free toolsRelated articles
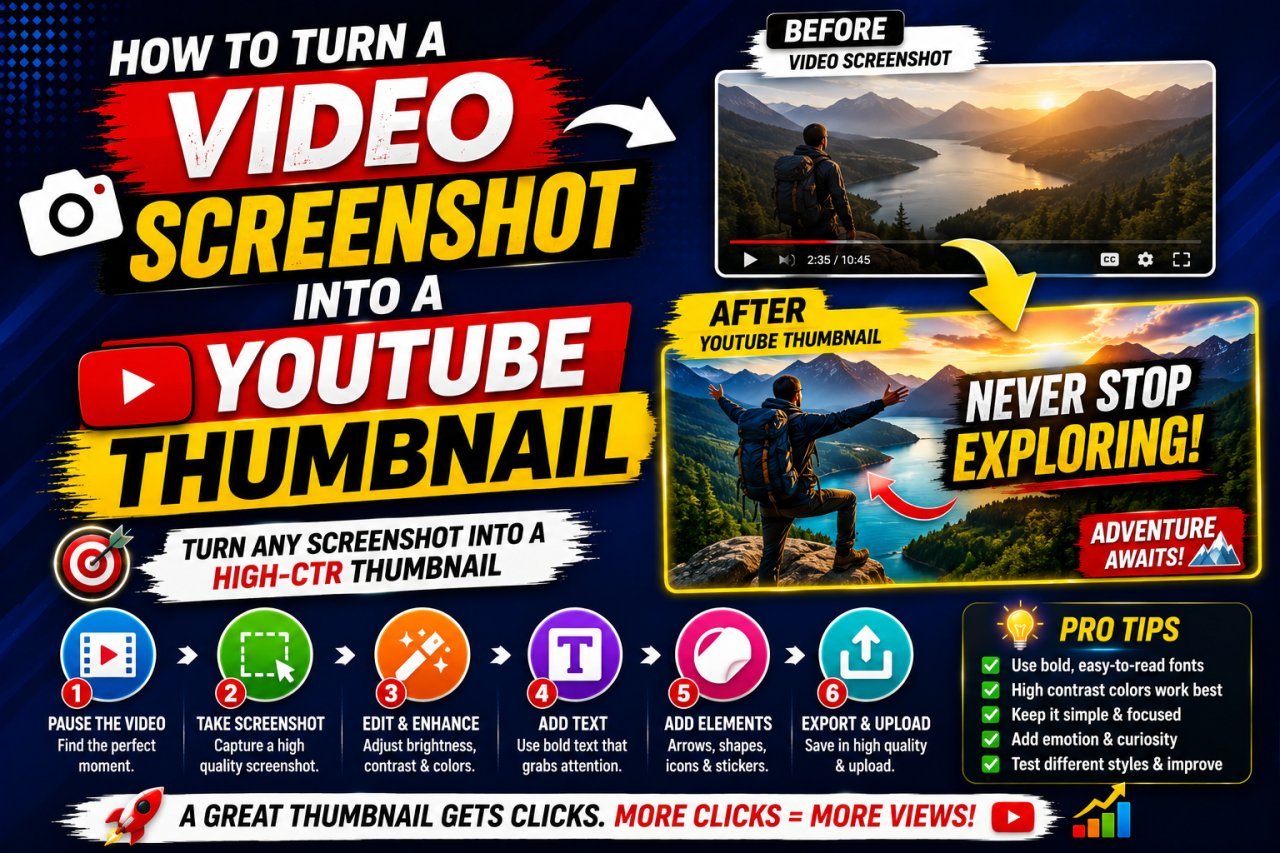
How to Turn a Video Screenshot Into a YouTube Thumbnail
Learn how to turn a video screenshot into a YouTube thumbnail using the right frame, cropping, sharpening, text, contrast, and image optimization techniques.

How to Remove a Background From a YouTube Thumbnail Easily
Learn how to remove a background from a YouTube thumbnail using online tools, AI background removers, and simple editing techniques for cleaner thumbnails.

How to Make a YouTube Thumbnail That Gets More Clicks
Learn how to make a YouTube thumbnail that gets more clicks with better design, readable text, strong visuals, color contrast, and simple thumbnail optimization techniques.