
How to Fix a Blurry Photo: 8 Ways to Sharpen Images
Learn how to fix a blurry photo with 8 practical methods. Discover how to sharpen blurry images, improve low-resolution photos, reduce motion blur, and make pictures clearer without over-editing.
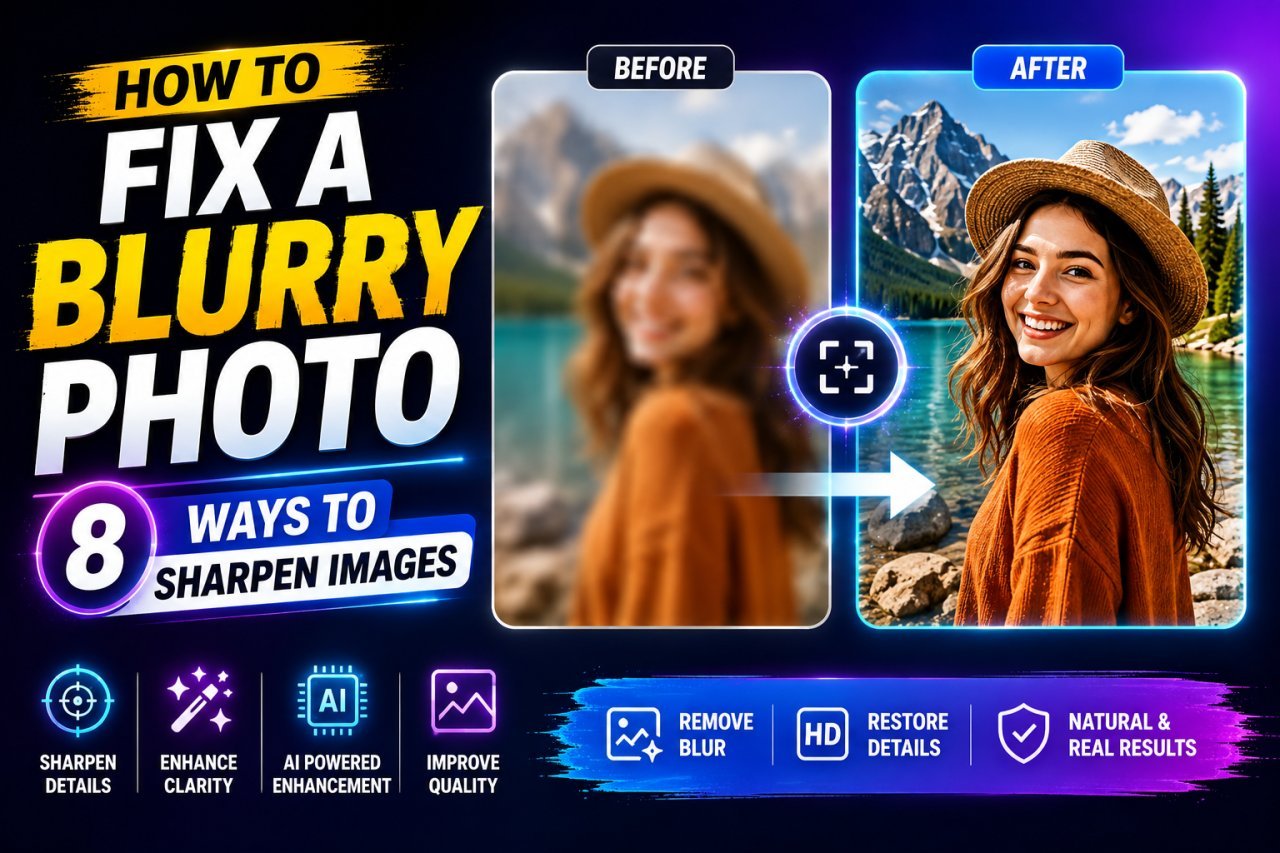
How to Fix a Blurry Photo: 8 Ways to Sharpen Images
Introduction
A blurry photo can be frustrating, especially when the original moment cannot be captured again.
Maybe someone moved while you were taking the picture. Maybe the camera focused on the wrong object. Perhaps the photo was taken in low light, saved at a small resolution, or compressed too heavily.
The good news is that some blurry photos can be improved.
However, there is an important limitation to understand:
Sharpening can improve existing details, but it cannot magically recreate information that was never captured.
A slightly soft photograph may become noticeably clearer with the right editing technique. A severely out-of-focus or heavily motion-blurred photograph may only improve to a limited degree.
In this guide, you will learn 8 practical ways to fix a blurry photo and sharpen images, including simple editing methods, online tools, resizing techniques, and ways to avoid making blur worse.
Why Do Photos Become Blurry?
Before trying to fix a blurry image, it helps to understand what caused the blur.
Different types of blur require different approaches.
The most common causes include:
- Camera shake
- Subject movement
- Incorrect focus
- Low-light photography
- Low image resolution
- Digital zoom
- Heavy compression
- Excessive resizing
- Lens problems
- Poor-quality source images
A photo can also appear blurry because of editing.
For example, repeatedly resizing and compressing an image can gradually remove fine details.
Understanding the cause helps you choose a more suitable sharpening method.
The 4 Common Types of Photo Blur
Not all blur looks the same.
1. Focus Blur
Focus blur happens when the camera focuses on the wrong part of the scene or fails to lock focus correctly.
For example, you may want a person's face to be sharp, but the camera focuses on the background instead.
Can It Be Fixed?
Mild focus softness can sometimes be improved with sharpening or AI-based enhancement.
Severe focus errors are much harder to correct because the missing detail was not properly captured.
2. Motion Blur
Motion blur occurs when the camera or subject moves while the shutter is capturing the image.
It can appear as:
- Streaks
- Ghosting
- Directional blur
- Soft edges
- Double-looking details
Can It Be Fixed?
Some software can reduce certain types of motion blur.
The results depend heavily on how severe the movement was and how much useful detail remains in the original image.
3. Camera Shake
Camera shake happens when the camera moves during exposure.
It is particularly common when:
- Shooting handheld
- Using a slow shutter speed
- Taking photos in low light
- Using a long focal length
The entire image may look slightly smeared or soft.
4. Resolution-Related Softness
Sometimes the photo is not technically out of focus.
Instead, it is simply too small.
For example, enlarging a small image significantly can make edges look soft and details disappear.
Upscaling can make the image larger and sometimes improve its appearance, but it cannot guarantee recovery of the original missing detail.
How to Tell If a Photo Is Actually Blurry
Before editing, zoom into the image and inspect important areas.
Look at:
- Eyes
- Hair
- Text
- Building edges
- Product details
- Clothing textures
- Object outlines
If edges look soft but recognizable, sharpening may help.
If details are completely smeared or missing, aggressive sharpening may not produce a natural result.
A Useful Test
Compare the image at:
100% viewing size
and
Normal viewing size
An image can look slightly soft when heavily zoomed in but perfectly acceptable at its intended display size.
Do not over-edit an image simply because it does not look perfect at extreme zoom.
8 Ways to Fix a Blurry Photo
There are several ways to improve a blurry photo.
The best method depends on the type and severity of the blur.
Here are the eight methods covered in this guide:
- Use basic sharpening
- Adjust clarity and texture
- Reduce noise before sharpening
- Use deblur tools
- Try AI image enhancement
- Upscale a low-resolution image
- Improve contrast around important edges
- Start again from the best available original
Each method has a different purpose.
Method 1: Use Basic Image Sharpening
The simplest way to improve a soft photo is to apply sharpening.
Most image-editing applications provide a sharpening control or related settings.
Sharpening generally works by increasing the visual contrast around edges.
This can make details appear more defined.
Common Sharpening Controls
Depending on the software, you may see controls such as:
- Amount
- Radius
- Detail
- Threshold
- Sharpness
The names and available controls vary between applications.
Start Gently
Do not immediately push sharpening to the maximum.
Excessive sharpening can create:
- Halos
- Harsh edges
- Grain
- Noise
- Artificial-looking details
- Rough textures
A small adjustment can often look more natural than aggressive sharpening.
Method 2: Adjust Clarity and Texture
Some photo editors provide controls such as:
Clarity
Texture
Structure
These tools can make certain details appear more defined without applying traditional sharpening alone.
They can be useful when a photograph looks slightly flat or soft.
For example, a landscape may benefit from a modest increase in texture.
However, applying strong clarity or texture to a portrait can make skin look unnatural.
Use Selectively
Different parts of an image may require different treatment.
For example:
- Clothing → more texture may be acceptable
- Buildings → stronger detail may work well
- Hair → moderate sharpening
- Skin → gentle adjustments
- Background → often less sharpening
This is why selective editing can produce better results than applying one strong setting to the entire photo.
Method 3: Reduce Noise Before Sharpening
Noise and blur often appear together, particularly in low-light photos.
If you sharpen a noisy photograph aggressively, you may make the noise even more obvious.
A useful workflow can be:
Noise reduction → Sharpening → Final inspection
The goal is to reduce distracting noise without removing the details you are trying to preserve.
Example
Imagine a low-light portrait.
The image contains:
- Visible noise
- Slight softness
- Fine facial details
If you sharpen it heavily before dealing with the noise, the result may look rough.
A moderate noise-reduction step followed by controlled sharpening may produce a cleaner result.
Method 4: Use a Deblur Tool
Some image editors and online photo-enhancement tools include dedicated deblur functions.
These tools attempt to analyze the blur and improve edge definition.
They can be particularly useful when the photo has:
- Mild motion blur
- Slight camera shake
- General softness
However, results vary.
A deblur tool cannot always recover information that was never captured.
Before Using Deblur
Ask:
What type of blur does the image have?
If the problem is severe motion blur, a simple sharpness slider may not be enough.
If the image is only slightly soft, a moderate sharpening adjustment may be better.
Method 5: Try AI Image Enhancement
AI-powered image enhancement tools can be useful for low-resolution or blurry images.
Depending on the tool, AI enhancement may attempt to:
- Improve edge definition
- Upscale the image
- Reduce noise
- Enhance facial details
- Improve textures
- Reconstruct plausible detail
This can be helpful when a normal sharpening filter is not enough.
However, there is an important distinction between enhancement and recovery of original detail.
An AI tool may generate visually plausible details that were not clearly present in the original.
For important images, compare the enhanced version carefully with the source.
Method 6: Upscale a Low-Resolution Image
Sometimes the biggest problem is that the original image is too small.
For example, you may have a tiny image that becomes blurry when enlarged.
An image upscaler can increase the pixel dimensions and improve the visual appearance.
Example
Original:
640 × 480 pixels
Desired use:
1600 × 1200 pixels
Simply stretching the image may make it look soft.
An advanced upscaling tool can produce a better-looking result by analyzing edges and patterns.
But remember:
Upscaling increases image dimensions; it does not guarantee recovery of the exact original detail.
Method 7: Improve Contrast Around Edges
Sometimes an image looks soft because the edges lack sufficient local contrast.
Careful adjustments to contrast or tonal separation can make objects appear more defined.
For example, increasing local contrast slightly around a building can make architectural edges appear clearer.
However, too much contrast can produce an unnatural appearance.
Use this method as a supporting adjustment rather than relying on it to fix severe blur.
Method 8: Start With the Best Available Original
This is one of the most overlooked ways to improve a blurry photo.
If you are editing a compressed or resized copy, search for the original.
You may have:
- Original camera file
- Higher-resolution backup
- Cloud copy
- Unedited version
- RAW file
- Original phone photo
The best source gives you more information to work with.
Avoid Editing a Screenshot If Possible
If someone sends you a photo through a messaging app, the shared version may have been resized or compressed.
If possible, ask for the original file rather than editing a heavily compressed copy.
Starting with a better source can make a bigger difference than applying stronger sharpening.
Sharpening vs Deblurring vs Upscaling
These techniques solve different problems.
| Technique | Best For | Main Limitation |
|---|---|---|
| Sharpening | Slight softness | Cannot restore missing detail |
| Deblurring | Certain motion/camera blur | Results depend on blur severity |
| Upscaling | Small or low-resolution images | Does not guarantee original detail |
| AI enhancement | Complex softness and low resolution | May create plausible rather than original details |
| Noise reduction | Noisy images | Too much can remove fine detail |
| Clarity/texture | Mildly flat or soft images | Can look unnatural when overused |
Understanding the difference can help you avoid using the wrong tool.
How Much Sharpening Should You Use?
There is no single setting that works for every image.
A portrait may need very different sharpening from a landscape or product photograph.
Start with a small adjustment.
Then inspect the result.
Watch for These Warning Signs
If you see:
- Bright halos around objects
- Excessive grain
- Harsh skin
- Jagged edges
- Artificial textures
- Strong outlines
the image may be over-sharpened.
Reduce the sharpening until the result looks natural.
Should You Sharpen Before or After Resizing?
It depends on the workflow.
If you are preparing an image for a specific final size, sharpening is often best judged at the final output dimensions.
A photo that looks good at one size may look too sharp or too soft after resizing.
A practical workflow is:
Edit → Resize for final use → Apply or fine-tune output sharpening → Inspect
The exact order can vary depending on the software and workflow.
How to Fix a Blurry Face in a Photo
Faces require special care.
If a face is slightly soft, moderate sharpening or enhancement may improve visible details.
Focus on:
- Eyes
- Eyebrows
- Hair
- Facial contours
- Clothing edges
Avoid aggressive sharpening on skin.
Strong sharpening can emphasize:
- Skin texture
- Noise
- Compression artifacts
- Unwanted facial details
If an AI enhancement tool is used, compare the result carefully with the original to make sure the person's appearance has not been changed unnaturally.
How to Fix a Blurry Text Image
Images containing text need a different approach.
If text is slightly soft, increasing clarity and edge definition may help.
However, if the original text is heavily blurred, sharpening cannot reliably reconstruct every character.
For screenshots and documents, it may be better to:
- Find the original screenshot
- Re-export the document
- Capture the text again
- Use a higher-resolution source
If the content is important, do not assume that aggressive sharpening makes unreadable text accurate.
Can a Completely Blurry Photo Be Fixed?
Not always.
This is one of the most important expectations to set.
If a photo is only mildly blurry, sharpening or enhancement may make a noticeable difference.
If the image is severely out of focus, heavily motion-blurred, extremely compressed, or very low resolution, the result may remain limited.
Editing software can improve the appearance.
It cannot guarantee recovery of information that was never recorded by the camera.
What Not to Do When Fixing a Blurry Image
Avoid these common mistakes:
- Maximum sharpening
- Repeated JPG compression
- Excessive clarity
- Extreme noise reduction
- Enlarging the image repeatedly
- Editing a low-quality copy when the original exists
- Judging quality only at extreme zoom
- Expecting AI to recover exact missing details
A controlled workflow usually produces a more natural result.
A Simple Blurry Photo Repair Workflow
If you are not sure where to start, use this process:
Step 1
Find the highest-quality original available.
Step 2
Identify the type of blur.
Step 3
Reduce distracting noise if necessary.
Step 4
Apply moderate sharpening.
Step 5
Try deblur or AI enhancement if normal sharpening is insufficient.
Step 6
Upscale only when the image needs larger dimensions.
Step 7
Inspect faces, text, edges, and important details.
Step 8
Export the final version at the required dimensions and quality.
This approach avoids unnecessary editing and gives you a better chance of producing a natural-looking result.
Final Tip
The best way to fix a blurry photo is not always to add more sharpness.
First determine why the image looks blurry.
Then choose the technique that matches the problem.
For mild softness, basic sharpening may be enough.
For motion blur, a dedicated deblur tool may be more appropriate.
For low-resolution images, upscaling or enhancement may help.
And if the original file is available, always start there.
The best result usually comes from small, controlled adjustments rather than extreme editing.
Advanced Ways to Fix a Blurry Photo
A blurry image does not always need the strongest sharpening filter.
In many cases, the best result comes from combining several small improvements. The right workflow depends on whether the problem is focus blur, motion blur, camera shake, low resolution, noise, or compression.
The following techniques can help you get more natural-looking results.
1. Identify the Type of Blur Before Editing
Before changing any settings, look closely at the image.
Ask yourself:
- Are the edges soft?
- Is the entire image smeared?
- Does the blur have a direction?
- Is only the subject out of focus?
- Does the image look pixelated?
- Is there a lot of digital noise?
- Did the image become blurry after resizing?
Quick Diagnosis Table
| What You See | Likely Problem | Technique to Try |
|---|---|---|
| Soft overall image | Focus softness | Sharpening |
| Directional streaks | Motion blur | Deblur |
| Entire image slightly smeared | Camera shake | Deblur + sharpening |
| Small and pixelated | Low resolution | Upscaling |
| Grainy and soft | Low-light noise | Noise reduction + sharpening |
| Blocky details | Compression | Better source + gentle sharpening |
| Edges look weak | Low local contrast | Clarity/contrast |
Correct diagnosis prevents you from using a tool that makes the image worse.
2. Use Selective Sharpening Instead of Sharpening Everything
One of the most useful advanced techniques is selective sharpening.
Instead of applying strong sharpening to the entire photograph, sharpen only the areas that need additional definition.
For a portrait, you might sharpen:
- Eyes
- Eyelashes
- Hair
- Clothing edges
while keeping skin relatively smooth.
For a product photo, you may sharpen:
- Product edges
- Labels
- Logos
- Important textures
This can produce a more natural result than applying the same amount of sharpening everywhere.
3. Use Masks or Local Adjustments
Many advanced photo editors allow you to apply adjustments to selected parts of an image.
This gives you much more control.
For example, imagine a portrait where the eyes are slightly soft but the skin already contains visible texture.
Applying strong sharpening globally could make the skin look rough.
Instead:
Select eyes → Sharpen gently → Leave skin mostly untouched
This is often better than increasing the global sharpness.
4. Reduce Noise Carefully
Noise can make an image appear less clear.
This is especially common in photos taken in:
- Dark rooms
- Night scenes
- Indoor environments
- High ISO conditions
Noise reduction can make the image cleaner.
However, too much noise reduction can remove the fine details you want to preserve.
Better Workflow
Moderate noise reduction
↓
Sharpen important details
↓
Inspect at 100%
↓
Adjust if necessary
The goal is not to remove every tiny grain.
The goal is to create a cleaner image while keeping useful detail.
5. Use Smart Sharpening or Advanced Sharpening Controls
Some editing programs provide more advanced sharpening controls than a basic "Sharpness" slider.
You may find options for:
- Amount
- Radius
- Detail
- Masking
- Noise reduction
- Blur type
These controls allow you to target sharpening more carefully.
Amount
Controls how strongly the sharpening effect is applied.
Radius
Controls how wide the sharpening effect appears around edges.
Detail
Controls how much fine texture is emphasized.
Masking
In some applications, masking helps restrict sharpening to stronger edges.
The names and behavior vary by software, so use the preview rather than relying on a fixed number.
6. Avoid Over-Sharpening
More sharpness does not automatically mean a better photograph.
Heavy sharpening can create visible artifacts.
Common signs include:
- White or dark halos
- Rough skin
- Excessive noise
- Jagged edges
- Artificial-looking textures
- Strong outlines around objects
If you notice these problems, reduce the sharpening.
A Good Rule
If you immediately notice the sharpening effect before noticing the photograph itself, the setting may be too strong.
The final image should usually look naturally clearer rather than obviously processed.
7. Try Deblurring for Motion Blur
Motion blur is different from simple softness.
If an object moved during exposure, its edges may appear stretched or repeated.
Traditional sharpening may only make the blurred edges more noticeable.
A dedicated deblur tool can sometimes do a better job.
When Deblur May Help
Deblur is worth testing when you see:
- Directional streaks
- Slight camera shake
- Moving subjects
- Smearing around edges
The result depends heavily on the severity of the blur.
A mild blur may be improved substantially.
A severe blur may remain visible even after processing.
8. Correct Camera Shake When Possible
Camera shake usually affects a large portion of the image.
It can happen when:
- The shutter speed is too slow
- The camera is handheld
- A long lens is used
- The photographer moves during exposure
Some software includes stabilization or shake-reduction features.
These tools attempt to estimate the direction and amount of movement.
After correction, you can apply moderate sharpening if necessary.
Do not rely on sharpening alone to correct strong camera movement.
9. Use AI Enhancement Carefully
AI photo enhancement has become popular because it can improve images that traditional filters struggle with.
Depending on the tool, AI enhancement may combine:
- Upscaling
- Noise reduction
- Sharpening
- Detail enhancement
- Face enhancement
- Texture reconstruction
This can be useful for old, small, or slightly blurry photographs.
But AI enhancement has an important limitation.
It may create plausible details rather than recover the exact details originally captured.
For example, if a person's face is extremely blurred, an enhancement tool may produce a cleaner-looking face but some fine features may be estimated.
For ordinary creative work, this may be acceptable.
For important records, documents, or evidence, do not treat generated details as guaranteed original information.
10. Upscale Before or After Sharpening?
There is no single rule for every workflow.
If the image is very small, you may want to upscale it before making final sharpening adjustments.
For example:
Small original → Upscale → Fine-tune → Sharpen for final output
This lets you judge the image at the size you actually intend to use.
However, some software combines upscaling and enhancement in a single process.
In that situation, follow the tool's workflow and inspect the final result carefully.
11. Use the Correct Output Size
An image can look sharp at one size and soft at another.
For example, a photograph may look excellent on a phone but appear soft when enlarged significantly.
Likewise, an image may look over-sharpened when viewed very close but appear normal at its intended display size.
Always judge the final image at the size where it will actually be used.
Before Exporting
Check:
- Final dimensions
- File format
- Compression level
- Image quality
- Important details
- Overall appearance
12. Fixing a Blurry Photo Online
Online image-enhancement tools can be convenient because you do not need professional desktop software.
A typical workflow is:
- Upload the image.
- Select sharpening, enhancement, or deblur.
- Adjust the available settings.
- Preview the result.
- Compare it with the original.
- Download or export the improved version.
Before uploading personal or sensitive images, review the service's privacy policy and understand how uploaded files are handled.
For private documents or identity images, an offline editor may be preferable if available.
13. How to Fix a Blurry Photo on a Phone
You do not always need a desktop computer.
Many mobile photo editors provide tools for:
- Sharpness
- Structure
- Details
- Clarity
- Noise reduction
- Contrast
- AI enhancement
A simple mobile workflow is:
Open photo → Adjust details → Reduce noise if needed → Sharpen gently → Save a copy
Avoid replacing the original.
Save the edited version separately so you can return to the source if the result is not satisfactory.
14. How to Make a Blurry Picture Clearer
If the photo is only slightly blurry, try this sequence:
Step 1: Increase Sharpness Slightly
Do not use the maximum setting.
Step 2: Adjust Texture or Clarity
Use a small amount if the image looks flat.
Step 3: Reduce Noise
Only if noise is interfering with detail.
Step 4: Inspect the Important Area
Look at the subject rather than the entire image.
Step 5: Compare Before and After
If the difference looks unnatural, reduce the adjustment.
This simple workflow can work well for mildly soft photographs.
15. How to Fix a Blurry Face
Faces are one of the most common reasons people search for photo sharpening.
The safest approach is to make small adjustments.
For a Slightly Soft Face
Try:
- Moderate sharpening
- Mild texture adjustment
- Small contrast improvement
- Noise reduction if necessary
For a Very Blurry Face
You can test AI enhancement or specialized deblurring.
But remember that severe blur may not contain enough original information to recreate the person's exact facial details.
Do not assume an AI-generated enhancement is an exact representation of the original image.
16. How to Sharpen a Blurry Screenshot
Screenshots can become blurry after being resized or compressed.
If you still have access to the original webpage, document, or application, taking a new screenshot at the correct resolution is usually better than trying to repair a heavily degraded copy.
If the original is unavailable:
- Avoid enlarging it excessively.
- Apply mild sharpening.
- Improve contrast carefully.
- Reduce compression artifacts where possible.
- Inspect text at 100%.
For important text, manually recreating or obtaining the original source is safer than relying on aggressive sharpening.
17. How to Sharpen a Product Photo
Product images need controlled sharpening because excessive processing can make edges look artificial.
Focus on:
- Product outline
- Logo
- Label
- Buttons
- Important textures
Avoid excessive sharpening on backgrounds.
A clean product image usually benefits more from controlled edge definition than from maximum sharpness.
18. How to Fix an Old Blurry Photo
Old photographs can have multiple problems at the same time.
You may see:
- Blur
- Scratches
- Dust
- Fading
- Noise
- Low resolution
- Color shifts
A useful restoration workflow may be:
Clean up → Reduce noise → Repair major damage → Upscale → Sharpen → Adjust tone
Trying to sharpen everything first can make scratches and noise more obvious.
If the original photograph is physically important, always preserve the original scan or digital copy before editing.
19. How to Fix a Blurry Photo Without Making It Look Fake
Natural-looking editing is usually better than maximum detail.
Use these principles:
Compare Before and After
Keep switching between the original and edited image.
Use Small Adjustments
Several small improvements can work better than one extreme adjustment.
Protect Skin
Avoid excessive sharpening on faces.
Watch Edges
Halos are a common sign of over-processing.
Preserve Natural Texture
Do not turn every surface into an artificial high-detail texture.
Keep the Original
Never overwrite your only source.
Sharpening vs AI Enhancement: Which Is Better?
Both can be useful.
| Feature | Traditional Sharpening | AI Enhancement |
|---|---|---|
| Simple softness | Very useful | Useful |
| Mild blur | Useful | Often useful |
| Low resolution | Limited | Often more useful |
| Severe motion blur | Limited | May help |
| Fine control | High | Depends on tool |
| Predictability | Generally higher | Can vary |
| Artificial detail risk | Lower | Higher |
| Ease of use | Usually simple | Usually simple |
If the photo only needs a little extra definition, traditional sharpening may be enough.
If it is very small or lacks visible detail, an AI enhancement workflow may be worth testing.
What Is the Best Way to Fix a Blurry Photo?
There is no single best method for every image.
Slightly Soft Photo
Use:
Sharpening + small clarity adjustment
Noisy and Soft Photo
Use:
Noise reduction + sharpening
Motion Blur
Use:
Deblur + controlled sharpening
Low-Resolution Photo
Use:
Upscaling + enhancement
Very Old Photo
Use:
Restoration + noise reduction + enhancement + sharpening
Heavily Blurred Photo
Set realistic expectations.
You may improve its appearance, but perfect recovery may not be possible.
Before and After: What Should You Compare?
When evaluating a sharpened image, compare these areas:
| Area | What to Look For |
|---|---|
| Eyes | Natural detail, no harsh edges |
| Skin | No excessive texture or noise |
| Hair | Defined but not crunchy |
| Text | Improved readability |
| Buildings | Cleaner edges |
| Product edges | Defined without halos |
| Background | No excessive noise |
| Overall image | Natural appearance |
The purpose of sharpening is not to make every pixel extremely strong.
It is to improve useful visual detail.
Common Mistakes When Sharpening Images
Mistake 1: Maximum Sharpness
Maximum sharpness often creates artifacts.
Better: Increase it gradually.
Mistake 2: Sharpening Noise
Noise can become more obvious.
Better: Reduce distracting noise first.
Mistake 3: Editing a Compressed Copy
A low-quality copy contains less useful information.
Better: Find the highest-quality original.
Mistake 4: Excessive Upscaling
Making a tiny image extremely large can expose its limitations.
Better: Upscale only as much as the final use requires.
Mistake 5: Trusting AI Without Checking
AI enhancement can create plausible details.
Better: Compare the enhanced version with the original.
Mistake 6: Ignoring the Final Display Size
An image may look different at different sizes.
Better: Judge it at its intended output size.
Mistake 7: Over-Sharpening Faces
Skin can quickly look unnatural.
Better: Use selective adjustments.
A Professional-Looking Workflow for Sharpening
If you want a more controlled result, use this workflow:
1. Preserve the original
↓
2. Identify the blur
↓
3. Crop or frame the important area
↓
4. Reduce noise if necessary
↓
5. Apply basic sharpening
↓
6. Use deblur if appropriate
↓
7. Upscale if needed
↓
8. Apply selective sharpening
↓
9. Compare with the original
↓
10. Export at the required size
This workflow gives you multiple opportunities to stop before the image becomes over-processed.
Pros and Cons of Different Blurry Photo Fixes
| Method | Pros | Cons |
|---|---|---|
| Basic sharpening | Easy and fast | Limited for severe blur |
| Clarity/texture | Adds definition | Can look harsh |
| Noise reduction | Cleans noisy images | Can remove detail |
| Deblur | Useful for certain blur types | Results vary |
| AI enhancement | Can improve low-resolution images | May invent plausible details |
| Upscaling | Makes small images larger | Cannot guarantee original detail |
| Selective editing | More natural control | Takes more time |
| Better original | Best starting point | May not be available |
When Should You Stop Editing?
Knowing when to stop is just as important as knowing what to adjust.
Stop when:
- The image looks naturally sharp.
- Important details are clear enough.
- Noise is controlled.
- There are no obvious halos.
- Faces look natural.
- Text is as readable as the source allows.
- Further adjustments make the image look artificial.
The goal is not perfection.
The goal is the best realistic result that the source image can provide.
Final Practical Checklist
Before saving your repaired photo, ask:
- Did I use the highest-quality original available?
- Did I identify the type of blur?
- Did I avoid excessive sharpening?
- Did I reduce noise only when necessary?
- Did I check for halos?
- Did I inspect faces carefully?
- Did I compare the edited image with the original?
- Did I avoid unnecessary upscaling?
- Did I save the original separately?
- Does the final image look natural at its intended size?
If the answer is yes, your image is ready for the final stage.
How to Fix a Blurry Photo: 8 Ways to Sharpen Images
Conclusion
A blurry photo does not always mean the image is unusable.
If the blur is mild, careful sharpening, noise reduction, clarity adjustments, or a dedicated deblur tool may noticeably improve the result. Low-resolution images can sometimes benefit from upscaling and enhancement, while photos with heavy motion blur or severe focus problems may have more limited recovery potential.
The most important thing is to identify why the photo is blurry before choosing an editing method.
For a slightly soft image, start with gentle sharpening.
For a noisy low-light photo, reduce distracting noise before sharpening.
For motion blur, try a deblur or stabilization feature.
For a small, low-resolution image, consider upscaling.
And whenever possible, start with the highest-quality original file available.
Remember that sharpening cannot reliably recreate information that the camera never captured. The goal is not to make every image perfectly sharp. The goal is to create the clearest, most natural-looking version that the original image can realistically support.
The 8 Ways to Sharpen or Improve a Blurry Photo
Here is a quick recap of the eight methods covered in this guide:
| Method | Best Use |
|---|---|
| Basic sharpening | Slightly soft photos |
| Clarity and texture | Flat-looking images |
| Noise reduction | Noisy, low-light photos |
| Deblur tools | Certain motion or camera blur |
| AI enhancement | Low-resolution or difficult images |
| Image upscaling | Small images |
| Edge and contrast adjustments | Weak-looking details |
| Better original source | Any type of blurry image |
You do not need to use every method.
Choose the technique that matches the problem.
How to Fix a Blurry Photo: Quick Decision Guide
Not sure where to start?
Use this simple guide.
Your photo is slightly soft
Try:
Basic sharpening
Your photo is soft and noisy
Try:
Noise reduction → Sharpening
Your photo has movement streaks
Try:
Deblur or stabilization → Sharpening
Your photo is very small
Try:
Upscaling → Enhancement → Final sharpening
Your portrait looks soft
Try:
Selective sharpening around eyes and hair
Your screenshot is blurry
Try:
Find the original screenshot or source first
Your old photo is blurry and damaged
Try:
Restoration → Noise reduction → Upscaling → Sharpening
Your image is severely blurred
Set realistic expectations.
Enhancement may improve its appearance, but perfect recovery may not be possible.
Can You Really Unblur a Photo?
The word "unblur" can be misleading.
Image editing software can reduce some types of blur and make a photo appear clearer.
However, there is a physical limitation.
When an image is captured, the camera records a certain amount of information.
If movement, incorrect focus, or low resolution causes important information to be lost, software cannot guarantee that the exact original detail can be recovered.
Modern enhancement tools can sometimes estimate missing detail, but estimated detail should not automatically be treated as original information.
This distinction is especially important for:
- Documents
- Identification images
- Historical records
- Technical photographs
- Evidence
- Important personal photographs
For these uses, keep the original file and do not rely solely on an enhanced version.
How to Prevent Blurry Photos in the Future
Fixing a blurry image is useful, but preventing blur is even better.
Here are some simple photography habits that can help.
Keep the Camera Steady
Hold the camera firmly with both hands.
When possible, support your arms or use a stable surface.
Use Better Lighting
Low light often requires longer exposure times, increasing the chance of camera shake or subject movement.
More light can make it easier to capture a sharp image.
Tap to Focus
On a smartphone, tap the important subject before taking the picture.
This can help the camera prioritize the area you actually want sharp.
Avoid Unnecessary Digital Zoom
Heavy digital zoom can make an image appear softer and reduce useful detail.
If possible, move closer or use optical zoom when available.
Clean the Lens
A dirty camera lens can make photos appear hazy or soft.
A quick lens check before taking important photographs can prevent unnecessary softness.
Take Multiple Photos
For important moments, taking several shots can increase the chance that at least one image is sharp.
Blurry Photo vs Low-Quality Photo
These terms are often used interchangeably, but they are not exactly the same.
A photo can be:
- Sharp but low resolution
- High resolution but blurry
- Sharp but heavily compressed
- Blurry and low resolution
- Noisy and soft
This distinction matters.
Example
A 500 × 500 pixel image can be perfectly sharp at its original size but look poor when enlarged significantly.
That does not necessarily mean the original photo was out of focus.
Likewise, a 4000 × 3000 pixel image can be heavily blurred even though it has a high resolution.
Therefore, always identify the actual problem before choosing an editing technique.
Does Increasing Sharpness Increase Image Quality?
Not necessarily.
Sharpness is only one aspect of image quality.
An image can have strong edge contrast and still look poor because of:
- Noise
- Compression artifacts
- Incorrect exposure
- Low resolution
- Motion blur
- Color problems
- Excessive sharpening
A good edit balances several factors.
The best-looking image is not always the sharpest image.
Should You Use an Online Blurry Photo Fixer?
Online tools can be convenient for quick edits.
They can be useful when:
- You do not have desktop editing software.
- You need a quick enhancement.
- The image is not highly sensitive.
- You want to compare different enhancement methods.
Before uploading private photographs, personal documents, or sensitive images, check how the service handles uploaded files.
For sensitive material, consider using trusted software that processes the image locally when practical.
How to Compare Different Sharpening Results
If you are trying multiple tools or settings, do not rely only on the final file.
Create several versions.
For example:
Original
Version A — Light sharpening
Version B — Deblur
Version C — AI enhancement
Then compare them at the intended viewing size.
Ask:
- Which version looks most natural?
- Which version preserves important details?
- Which version has fewer artifacts?
- Does the face still look natural?
- Is text clearer?
- Are edges clean?
- Has noise increased?
The best version may not be the one with the strongest visible sharpening.
How to Preserve Quality When Saving the Final Image
After repairing a blurry image, exporting it incorrectly can introduce new problems.
Before saving, check:
File Format
Choose a format appropriate for the intended use.
Quality Settings
Avoid unnecessary heavy compression.
Dimensions
Do not resize the image more than necessary.
Original Backup
Keep the original file separately.
Final Preview
Open the exported file and inspect it again.
The image you save should be the image you actually intend to use.
A Simple Workflow for Beginners
If all the technical options feel confusing, start with this beginner-friendly process:
Step 1: Find the Best Original
Use the highest-resolution version you have.
Step 2: Look at the Blur
Decide whether it is focus blur, motion blur, noise, or low resolution.
Step 3: Make a Copy
Never experiment on your only original.
Step 4: Try Gentle Sharpening
Start small.
Step 5: Reduce Noise if Necessary
Only if noise is distracting.
Step 6: Try Deblur or Enhancement
Use this if ordinary sharpening is not enough.
Step 7: Resize for the Final Use
Do not enlarge unnecessarily.
Step 8: Compare Before and After
Make sure the image still looks natural.
Step 9: Export
Save the final version separately.
This process is simple enough for beginners while still avoiding many common editing mistakes.
Frequently Asked Questions
1. How do I fix a blurry photo?
Start by identifying the type of blur. For mild softness, use gentle sharpening. For motion blur, try a deblur tool. For low-resolution images, consider upscaling or enhancement. Always start with the highest-quality original available.
2. Can a blurry photo be made clear?
Sometimes. Mild blur can often be improved, but severe focus problems or motion blur may not be completely recoverable. Editing can improve the appearance without guaranteeing restoration of every original detail.
3. How can I sharpen a blurry image?
Use a sharpening tool and increase the setting gradually. Inspect edges, faces, text, and textures for halos or excessive noise. If basic sharpening is not enough, consider deblur or image-enhancement tools.
4. How do I fix a blurry photo online?
Upload the image to a suitable online photo-enhancement or sharpening tool, apply a moderate sharpening or enhancement setting, preview the result, and compare it with the original. Check the service's privacy practices before uploading sensitive images.
5. Can AI fix a blurry photo?
AI enhancement can improve some blurry or low-resolution images by estimating and enhancing visual details. However, AI may generate plausible details that were not clearly present in the source, so the result should be compared carefully with the original.
6. How do I fix a blurry photo on my phone?
Use a mobile photo editor with sharpening, clarity, detail, noise reduction, deblur, or enhancement controls. Make small adjustments and save the edited version as a copy instead of replacing the original.
7. Can I fix a photo that is completely out of focus?
Severely out-of-focus images are difficult to restore completely. Enhancement software may improve their appearance, but it cannot guarantee recovery of detail that was never captured clearly.
8. Why does sharpening make my photo look worse?
Excessive sharpening can emphasize noise, compression artifacts, and edge halos. Reduce the sharpening amount and consider reducing noise before sharpening.
9. Should I sharpen a photo before or after resizing?
It depends on the workflow and software. When preparing an image for a specific final size, it is often useful to judge sharpening at the final output dimensions. Always inspect the exported version.
## 10. What is the best way to make a blurry image clearer?
There is no single method for every image. Start with the best original, identify the type of blur, and then choose sharpening, noise reduction, deblurring, upscaling, or AI enhancement as appropriate. Use controlled adjustments and avoid over-processing.
Ready to optimize your images?
Every tool mentioned in this article is free to use. No upload, no signup, and no watermarks — ever.
Try our free toolsRelated articles
How to Make an Image Clearer Online: Easy Quality Tips
Learn how to make an image clearer online by improving sharpness, reducing blur, adjusting lighting, and increasing resolution with practical methods.
How to Restore an Old Photo With AI: Complete Beginner's Guide
Learn how to restore an old photo with AI by repairing damage, improving clarity, reducing noise, and bringing faded photographs back to life with simple techniques.
How to Remove a Person From a Photo With AI: Easy Online Guide
Learn how to remove a person from a photo with AI using simple online editing techniques. Discover how AI object removal works, when to use it, and how to get natural-looking results.