
How to Restore an Old Photo With AI: Complete Beginner's Guide
Learn how to restore an old photo with AI by repairing damage, improving clarity, reducing noise, and bringing faded photographs back to life with simple techniques.
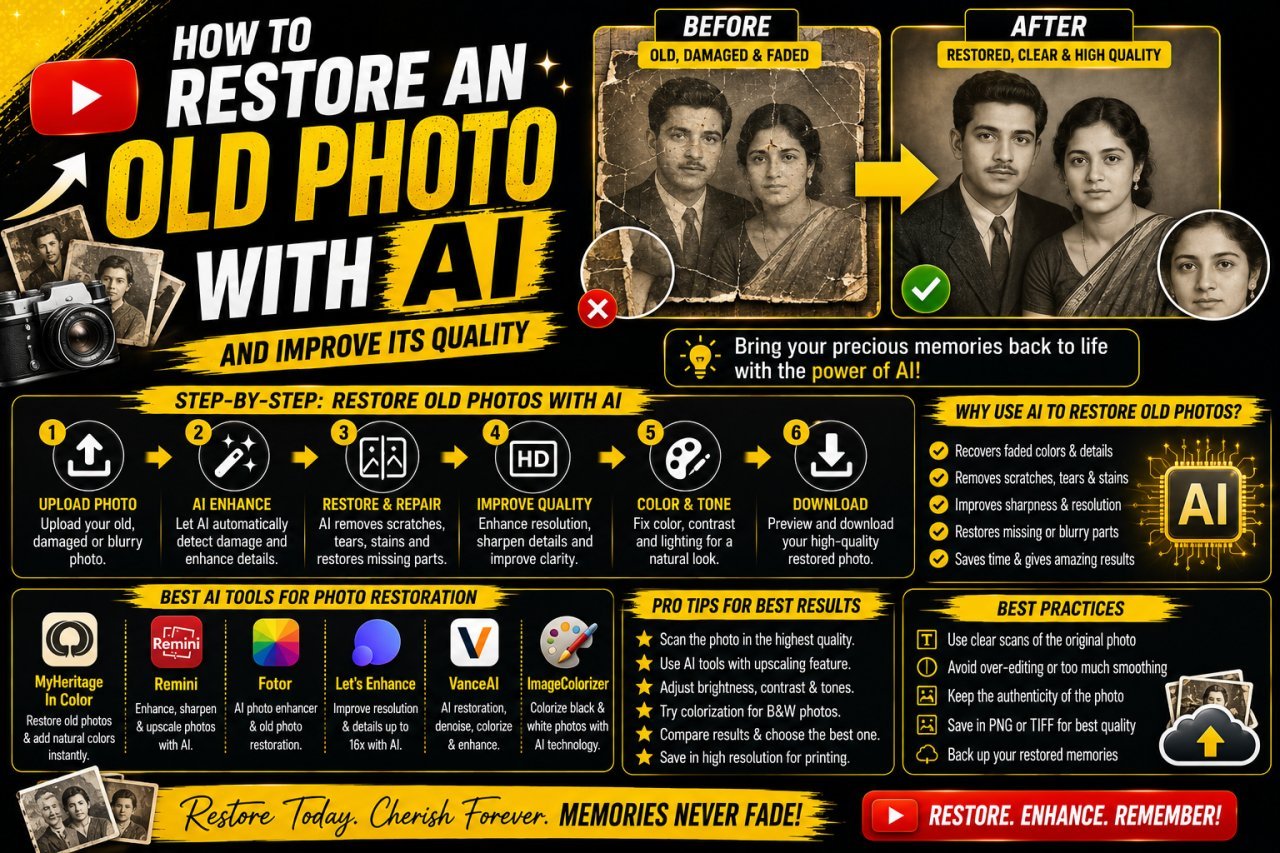
How to Restore an Old Photo With AI
Old photographs often contain memories that are difficult to replace. Unfortunately, printed photos can fade, develop scratches, lose contrast, or become damaged over the years.
If you are looking for how to restore an old photo with AI, modern AI photo restoration tools can make the process much easier than traditional manual editing.
AI can help improve certain problems such as faded details, low contrast, visible scratches, noise, softness, and other common signs of aging. Some tools can also improve faces and overall image clarity.
However, AI photo restoration is not the same as recovering the exact original photograph. When important details are missing, the software may have to estimate or generate them.
That is why the best restoration process combines AI enhancement with careful human review.
In this guide, we'll cover the basics of AI photo restoration, what it can and cannot do, how to prepare an old photograph, and how beginners can approach restoration without accidentally damaging the original.
Why Restoring Old Photos Matters
An old photograph can hold personal, family, historical, or cultural value.
Unfortunately, physical photographs can deteriorate over time.
Common problems include:
- Faded colors
- Scratches
- Dust marks
- Creases
- Tears
- Missing sections
- Low contrast
- Film grain
- Blurry details
- Discoloration
- Uneven exposure
- Damaged edges
- All Tools
A photograph doesn't necessarily need to be severely damaged to benefit from restoration.
Even a slightly faded family photograph may look significantly better after careful enhancement.
Digital restoration also makes it easier to create a backup copy before the physical photograph becomes further damaged.
What Is AI Photo Restoration?
AI photo restoration is a digital editing process that uses artificial intelligence to analyze an old or damaged photograph and improve its appearance.
Depending on the software, AI restoration may help with:
- Noise reduction
- Sharpening
- Contrast improvement
- Color enhancement
- Scratch removal
- Face enhancement
- Resolution improvement
- Damage repair
- Fading correction
- Background cleanup
Different tools offer different features, so the exact results will vary.
Some applications focus mainly on increasing image quality, while others are designed specifically for restoring old photographs.
The important distinction is that AI doesn't simply "bring back" every original detail. If information has been completely lost, the software may generate an approximation based on visible patterns and learned image structures.
How AI Restoration Works
The exact technology varies between applications, but a typical AI restoration workflow looks like this:
1. Image Analysis
The software analyzes the uploaded photograph.
It may identify areas such as faces, backgrounds, edges, textures, scratches, and other visual features.
2. Damage Detection
Some tools can identify visible problems such as scratches, noise, dust, or damaged sections.
3. Detail Enhancement
The AI may attempt to improve soft or low-resolution areas by generating a clearer-looking version.
4. Restoration
Depending on the tool, damaged or missing areas may be reconstructed using information from surrounding pixels and learned visual patterns.
5. Final Enhancement
The software may also adjust contrast, sharpness, brightness, color, or other visual characteristics.
The result should then be reviewed carefully rather than accepted automatically.
What Types of Old Photos Can Be Restored?
AI restoration can be useful for many types of older photographs.
Black-and-White Photos
Black-and-white photographs can sometimes benefit from:
- Scratch removal
- Noise reduction
- Contrast adjustment
- Detail enhancement
- Face enhancement
- Resolution improvement
If you want a color version, some AI tools can also attempt colorization.
Faded Color Photos
Older color photographs may lose saturation or develop an uneven color cast.
AI enhancement can sometimes help restore a more balanced appearance.
Scratched Photos
Small scratches and surface marks may be removable with AI-powered restoration features.
Damaged Portraits
Portrait photographs can benefit from careful face and detail enhancement.
However, face restoration requires extra attention because AI may alter facial characteristics when original details are missing.
Low-Resolution Photos
AI upscaling can make an old image appear sharper and larger, although it cannot guarantee recovery of every original detail.
Common Problems Found in Old Photographs
Before restoring an old photograph, identify the problems it actually has.
| Problem | What It Looks Like | Possible AI Assistance |
|---|---|---|
| Fading | Weak colors or contrast | Color and contrast enhancement |
| Scratches | Thin marks across the image | Scratch or damage removal |
| Dust | Small spots or marks | Cleanup |
| Noise | Grainy or rough appearance | Noise reduction |
| Blur | Soft or unclear details | Detail enhancement |
| Low resolution | Very few visible pixels | AI upscaling |
| Tears | Missing or damaged sections | Generative reconstruction |
| Color cast | Yellow, red, or other unwanted tint | Color correction |
| Face damage | Missing facial details | Face restoration |
| Dark exposure | Underexposed areas | Brightness and tonal adjustment |
Start With a Digital Copy
Before attempting to restore a physical photograph, create a high-quality digital copy.
If possible, scan the photograph rather than relying on a quick phone snapshot.
A good digital copy gives you a stronger starting point for restoration.
Keep the original scan untouched.
Then create a separate working copy for editing.
This provides two important benefits:
- You can experiment without damaging your original digital file.
- You can return to the original scan if an AI edit produces an unwanted result.
Never rely on only one edited version of an important family photograph.
Scan the Photo as Carefully as Possible
The restoration process starts before you open an AI editor.
If you are scanning a physical photograph, make sure the photo is reasonably clean and positioned correctly.
Avoid unnecessary reflections, shadows, or strong lighting when creating a digital copy.
A good scan should preserve as much of the original information as possible.
If the photograph is fragile or historically valuable, handle it carefully rather than repeatedly placing it into equipment that could cause physical damage.
Should You Restore Before Upscaling?
There is no single workflow that works perfectly for every photograph.
In many cases, it can make sense to correct obvious damage before performing aggressive enlargement.
For example:
Original → Damage cleanup → Restoration → Enhancement → Upscaling → Final review
But some software combines restoration and upscaling in a single process.
If your chosen tool performs both tasks automatically, carefully compare the result with the original.
The important point is not to blindly apply multiple enhancement steps.
Repeated sharpening, noise reduction, and upscaling can sometimes create an artificial appearance.
AI Restoration vs Traditional Photo Restoration
AI is not the only way to restore an old photograph.
Traditional editing techniques remain useful, especially when precise control is required.
| Method | Advantages | Limitations |
|---|---|---|
| AI restoration | Fast and beginner friendly | Generated details may be inaccurate |
| Manual retouching | Precise control | Can require significant time |
| Clone tool | Useful for copying nearby textures | Requires careful manual work |
| Healing tool | Good for small marks | Not ideal for major damage |
| Color correction | Can improve faded colors | Doesn't repair missing details |
| AI upscaling | Can enlarge images | Added detail may be generated |
| Professional restoration | High level of control | Usually more expensive and time-consuming |
For many users, combining AI tools with manual corrections is a practical approach.
What AI Can and Cannot Restore
It's important to have realistic expectations.
AI May Help With
- Small scratches
- Dust spots
- Mild fading
- Noise
- Low contrast
- Soft details
- Some background damage
- Certain facial details
- General image enhancement
- Enlargement
AI May Struggle With
- Large missing sections
- Completely destroyed faces
- Severe tears
- Missing text
- Heavy motion blur
- Extremely low-resolution images
- Complex overlapping objects
- Historically important details that must remain exact
The more visual information that has been permanently lost, the more uncertain the AI-generated replacement becomes.
Why AI Can Change Faces
Faces deserve special attention during photo restoration.
When a face is blurry or damaged, an AI model may attempt to generate plausible facial details.
That can make the face look sharper, but sharper does not necessarily mean more historically accurate.
For example, an AI might change:
- Eye shape
- Facial contours
- Skin texture
- Hair details
- Mouth shape
- Small facial features
This is especially important when restoring photographs of relatives or historical figures.
If preserving identity and authenticity matters, always compare the restored face with the original photograph and avoid assuming that newly generated details are genuine historical information.
A Simple Beginner Workflow
If this is your first time restoring an old photograph, keep the process simple.
Step 1: Create a High-Quality Digital Copy
Scan or photograph the original carefully.
Step 2: Preserve the Original File
Save an untouched copy before making edits.
Step 3: Identify the Damage
Look for scratches, fading, noise, blur, tears, and missing areas.
Step 4: Apply Basic Restoration
Use an AI restoration feature to address the most obvious problems.
Step 5: Inspect Faces
Check whether facial features have changed unexpectedly.
Step 6: Check the Background
Look for generated patterns, strange textures, or distorted objects.
Step 7: Make Additional Corrections
If necessary, use smaller AI edits or manual retouching.
Step 8: Upscale Carefully
If you need a larger image, apply an appropriate enlargement process.
Step 9: Compare With the Original
Make sure the restoration hasn't changed important details unnecessarily.
Step 10: Save a Final Copy
Keep the restored version separate from the original.
Beginner-Friendly Restoration Checklist
Before you begin, check:
- I have a digital copy of the original photo.
- The original scan is safely stored.
- I know which problems I want to fix.
- I am not expecting AI to recover completely missing information perfectly.
- I will check faces carefully.
- I will inspect generated details.
- I will compare the result with the original.
- I will avoid excessive sharpening.
- I will keep the edited version separate from the original.
- I will save the final restoration in a suitable format.
Important: Restoration vs. Colorization
Restoration and colorization are two different processes.
Restoration attempts to improve or repair an existing photograph.
Colorization attempts to add color to a black-and-white photograph.
A black-and-white photograph can be restored without adding color.
Similarly, a photograph can be colorized even if it has not been fully restored.
If historical accuracy matters, remember that AI-generated colors are interpretations rather than proof of the exact original colors.
For personal projects, colorization can be an interesting creative option. For historical work, keep the original black-and-white version available.
How to Protect the Original Photo
Old photographs can be irreplaceable.
A sensible restoration workflow should always protect the source.
Keep:
Original physical photo → Original digital scan → Working copy → Restored version
Don't overwrite the original digital scan with an AI-generated version.
If you make several different restorations, keep each version separately.
This makes it possible to compare different results and return to the untouched source whenever necessary.
Final Part 1 Tips
If you're restoring an old photo for the first time, remember these basics:
- Start with the best scan you can create.
- Always preserve the original.
- Identify the actual damage before editing.
- Don't assume AI-generated details are historically accurate.
- Pay close attention to faces.
- Don't over-sharpen the photograph.
- Check backgrounds for AI artifacts.
- Restore first and enhance carefully.
- Compare every major edit with the original.
- Keep different versions of important restorations.
Restoring an old photograph with AI is usually more effective when you treat the process as a series of small improvements rather than one automatic transformation.
An old image may have several problems at the same time. It could be faded, scratched, blurry, noisy, and low resolution. Applying one strong enhancement to everything can sometimes create an artificial result.
A better approach is to identify the most important problems first and address them carefully.
The following techniques can help you get more controlled results while keeping the character of the original photograph.
Before applying any AI restoration, create a duplicate of the original digital file.
Keep the original untouched and use the duplicate as your working file.
This is especially important for family photographs and historical images because you may want to try different restoration approaches later.
A useful file structure can look like this:
Original_Scan ↓ Working_Copy ↓ Restoration_V1 ↓ Restoration_V2 ↓ Final_Restoration
Keeping versions separate makes it easier to compare results and undo decisions.
If a photograph contains large scratches, tears, dust marks, or damaged areas, address those problems before focusing heavily on sharpness.
For example, a sensible workflow might be:
- Clean obvious dust and marks.
- Repair major scratches.
- Correct exposure and contrast.
- Improve overall detail.
- Enhance faces carefully.
- Upscale if necessary.
- Perform final cleanup.
This approach helps prevent you from sharpening defects that should have been removed first.
One of the easiest ways to make an AI-restored photo look artificial is to apply too much sharpening.
Old photographs naturally have different levels of softness, grain, and texture.
Excessive sharpening can create:
- Harsh edges
- Artificial facial details
- Halo-like outlines
- Overly smooth skin
- Strong noise
- Unnatural hair texture
A photograph does not necessarily need to look extremely sharp to look successfully restored.
The goal is usually a cleaner and more readable image, not an image that looks completely modern.
Faces are often the most important part of an old family photograph, but they can also be the most sensitive part of an AI restoration.
If a face contains enough visible information, an AI enhancement may improve its appearance.
If the face is heavily damaged or extremely blurry, however, the AI may generate details that were not actually present in the original.
After face restoration, compare:
- Eye position
- Face shape
- Nose shape
- Mouth
- Hairline
- Eyebrows
- Facial proportions
- Visible marks or distinctive features
If the restored face looks dramatically different from the original, consider reducing the enhancement or using a less aggressive restoration.
When restoring a photograph of a family member, preserving recognizable characteristics may be more important than maximizing sharpness.
For example, a highly enhanced face may look cleaner but less like the person in the original photograph.
A more conservative restoration may leave some softness while preserving the original appearance.
This is an important principle:
More detail does not always mean more accuracy.
AI-generated detail should be treated as an enhancement or reconstruction, not automatically as recovered historical information.
Scratches are common in old printed photographs and scanned film.
A restoration tool may be able to remove some visible scratches automatically.
However, be careful when a scratch crosses an important feature.
For example, a scratch might pass across:
- A person's face
- Hair
- Clothing
- A building
- Printed text
- A patterned surface
Removing it may require more careful work than removing a scratch from an empty background.
After restoration, zoom in and make sure the repaired area blends with the surrounding texture.
Old color photographs can lose saturation and contrast over time.
A faded photograph may look:
- Pale
- Yellowish
- Washed out
- Low contrast
- Unevenly colored
AI enhancement can sometimes improve the overall appearance, but avoid assuming that the generated colors are exactly the original colors.
If you are restoring a family photo for personal use, you can choose a visually pleasing result.
If the image has historical importance, preserve the original scan and consider keeping the restoration relatively conservative.
Aged photographs may develop an unwanted color cast.
For example, the entire photograph might appear warmer or more yellow than expected.
Before correcting it aggressively, remember that some color changes may be part of the physical aging process.
A restoration should aim to improve readability and appearance without automatically removing every characteristic associated with the original photograph.
When uncertain, save multiple versions rather than permanently changing the only copy.
| Workflow | Best For | Advantage | Possible Issue |
|---|---|---|---|
| One-click AI restoration | Quick personal edits | Very fast | Less control |
| Multi-step AI restoration | Important photographs | More control | Takes longer |
| AI + manual cleanup | Detailed restoration | Balanced workflow | Requires editing skills |
| Manual restoration | Precise professional work | Maximum control | Time-consuming |
| AI restoration + upscaling | Small old photos | Larger output | Generated details may appear |
If your old photograph is small, you may want to enlarge it after restoration.
AI upscaling can create a larger image with enhanced-looking detail.
However, enlargement does not magically recover every original pixel.
When information is missing, an AI model may generate plausible-looking details.
This can be useful for viewing or printing, but it is important to distinguish generated detail from genuine information contained in the original photograph.
For an important historical image, keep the original scan available alongside the enlarged version.
Always compare the restored photograph with the original.
A side-by-side comparison can reveal changes that are difficult to notice when viewing only the restored image.
Check:
- Faces
- Clothing
- Background objects
- Buildings
- Text
- Edges
- Shadows
- Hair
- Fine patterns
- Overall contrast
Ask whether the restoration improved the photograph or simply made it look more processed.
This simple comparison is one of the most useful quality-control steps.
For a faded family photograph, start by preserving the original scan.
Then consider:
- Basic cleanup
- Contrast correction
- Color correction if appropriate
- Detail enhancement
- Careful face restoration
- Final comparison
Don't push facial enhancement too far.
For family memories, preserving the person's recognizable appearance can be more valuable than making the photograph extremely sharp.
For a black-and-white photograph with scratches and dust, focus first on physical-looking damage.
A possible workflow is:
- Remove dust.
- Repair obvious scratches.
- Improve contrast.
- Reduce excessive noise.
- Enhance important details.
- Review the faces.
- Export a restored copy.
You do not need to colorize the image simply because you are restoring it.
Keeping the black-and-white appearance can preserve the character of the original photograph.
If the original photograph is very small, start by determining whether you have access to a better scan.
If possible, rescan the physical photograph at a suitable quality rather than relying entirely on AI enlargement.
Then use AI restoration or upscaling as needed.
If no better source exists, AI can still produce a larger and potentially clearer-looking image, but generated details should not be mistaken for guaranteed recovery of the original information.
Large tears and missing sections are among the more difficult restoration tasks.
If part of the photograph is physically missing, the software has limited information about what was originally there.
AI may generate a plausible replacement based on surrounding content.
That can work well for creative restoration, but the result should be considered reconstructed content rather than a guaranteed reproduction of the missing original.
For historically important photographs, keep the damaged original visible or archived alongside the restored version.
These terms can sound similar, but they are not always the same.
AI restoration generally focuses on repairing or improving an old or damaged image.
AI enhancement generally focuses on improving qualities such as sharpness, resolution, contrast, or overall appearance.
A restoration workflow may use both.
For example:
Old photo → Restoration → Enhancement → Upscaling → Final review
Understanding the difference can help you choose the right editing step instead of applying every available filter.
Best Practices for AI Photo Restoration
For a reliable restoration workflow:
- Start with the best-quality source available.
- Scan the physical photograph carefully.
- Keep an untouched original.
- Work on a duplicate.
- Identify the biggest problems first.
- Remove obvious damage before aggressive sharpening.
- Use conservative face enhancement.
- Check the background as well as the subject.
- Avoid excessive noise reduction.
- Don't assume generated details are historically accurate.
- Keep colorization separate from restoration when appropriate.
- Compare before and after versions.
- Save multiple versions for important photographs.
- Export the final image only after a full review.
Practical Quality Test
Before considering your old photo restored, perform a simple quality test.
Test 1: Normal Viewing
Look at the entire photograph at a normal size.
Does it look natural?
Test 2: Close Inspection
Zoom into the faces, edges, and repaired areas.
Are there strange details or textures?
Test 3: Original Comparison
Place the restored version next to the original.
Did important characteristics change?
Test 4: Background Check
Look for changes in buildings, furniture, clothing, text, and other objects.
Test 5: Authenticity Check
If historical accuracy matters, ask whether any generated details could be mistaken for genuine information.
If the answer raises concerns, consider creating a more conservative restoration.
Restoring an old photo with AI can be a practical way to improve damaged, faded, blurry, or low-quality photographs while keeping their original memories accessible in digital form.
The process is easier when you don't try to fix everything at once. Start with the best-quality scan available, protect the original, identify the biggest problems, and then apply restoration techniques carefully.
AI can help repair scratches, reduce noise, improve contrast, enhance certain details, and make small photographs more usable. However, it has limitations. When information has been completely lost, AI may generate a plausible replacement instead of recovering the exact original detail.
This is particularly important when restoring faces or historically meaningful photographs.
For personal family photos, a carefully restored version can make an old memory easier to view and share. For historically important images, keeping the original scan alongside the restored version is essential.
The best restoration is not necessarily the sharpest or most heavily enhanced version. A good restoration should look natural, preserve important characteristics, and clearly distinguish genuine original information from AI-generated reconstruction.
1. How to restore an old photo with AI?
AI photo restoration usually involves uploading a digital copy of an old photograph to an AI restoration tool, applying restoration or enhancement features, and reviewing the result. AI may help reduce scratches, noise, fading, and softness, but the result should always be checked against the original.
2. Can AI restore damaged old photos?
Yes, AI can help restore many types of damaged photographs. It may improve scratches, dust, fading, noise, contrast, and some missing visual areas. Severe damage or completely missing information can be more difficult because the AI may need to generate an approximation.
3. Can AI make an old photo clearer?
AI can often make an old photo appear clearer by reducing noise, improving contrast, sharpening details, or increasing resolution. However, if the original photograph contains very little detail, AI may generate new-looking details rather than recover the exact original information.
4. Can AI restore old black-and-white photos?
Yes. AI can be used to clean up and enhance black-and-white photographs. Some tools can also colorize them, but colorization is different from restoration and should be treated as an interpretation unless the original colors are known.
5. Can AI remove scratches from old photos?
Many AI photo restoration tools can attempt to remove scratches, dust, and other visible damage. Results depend on the size and location of the damage and the information available around it.
6. Can AI restore an old photo's face?
AI can enhance or reconstruct facial details in some old photographs. However, heavily damaged or blurry faces may cause the AI to generate details that were not clearly present in the original. Always compare the restored face with the source photograph.
7. Can I restore an old photo without losing the original?
Yes. The safest approach is to scan or digitize the original photograph, save the original file separately, and perform all AI restoration on a duplicate. This allows you to experiment while preserving the original digital copy.
8. Is AI photo restoration accurate?
AI restoration can produce visually convincing results, but visual quality and historical accuracy are not the same thing. When original information is missing, AI may generate plausible details rather than recover exactly what was there.
9. Should I colorize an old black-and-white photo?
Colorization is optional. If you want a more modern or creative version, AI colorization can be useful. If historical accuracy matters, keep the original black-and-white version because generated colors may not represent the photograph's original colors.
10. How can I get the best results from AI photo restoration?
Use the highest-quality source available, preserve the original, identify damage before editing, avoid excessive sharpening, inspect faces and backgrounds carefully, and compare the final restoration with the original. For difficult photographs, combining AI with manual editing can provide more control.
Before publishing, read the article from the perspective of someone holding an old family photograph for the first time.
The reader should understand:
- What AI photo restoration means.
- How to prepare an old photo for restoration.
- What AI can realistically improve.
- Why heavily damaged areas can be difficult.
- Why faces require extra care.
- How restoration differs from colorization.
- How AI upscaling fits into the process.
- Why the original image should always be preserved.
- How to identify artificial-looking restoration.
- When manual editing may be a better choice.
If the article answers these questions clearly and gives the reader a realistic understanding of AI restoration, it is ready for the final publishing review.
Ready to optimize your images?
Every tool mentioned in this article is free to use. No upload, no signup, and no watermarks — ever.
Try our free toolsRelated articles
How to Remove a Person From a Photo With AI: Easy Online Guide
Learn how to remove a person from a photo with AI using simple online editing techniques. Discover how AI object removal works, when to use it, and how to get natural-looking results.
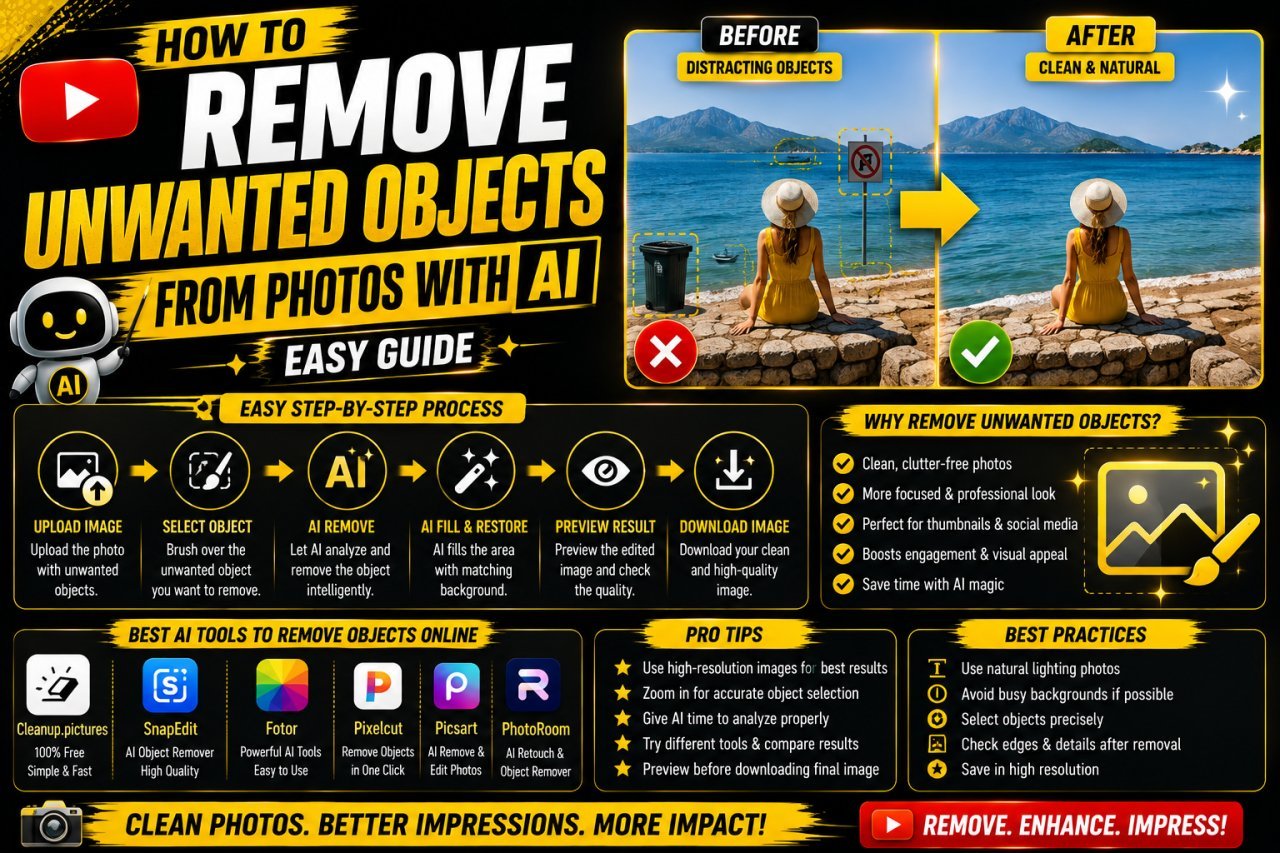
How to Remove Unwanted Objects From Photos With AI: Easy Guide
Learn how to remove unwanted objects from photos with AI using simple editing techniques. Discover how AI object removal works, useful tips, common mistakes, and ways to get natural-looking results.

How to Make YouTube Thumbnail Text Clear and Sharp
Learn how to make YouTube thumbnail text clear and sharp with better fonts, sizing, contrast, spacing, outlines, export settings, and simple design techniques.