
How to Upscale Cricket Photos Without Losing Quality
Learn how to upscale cricket photos without losing quality using AI upscalers, sharpening, noise reduction, and the right export settings.
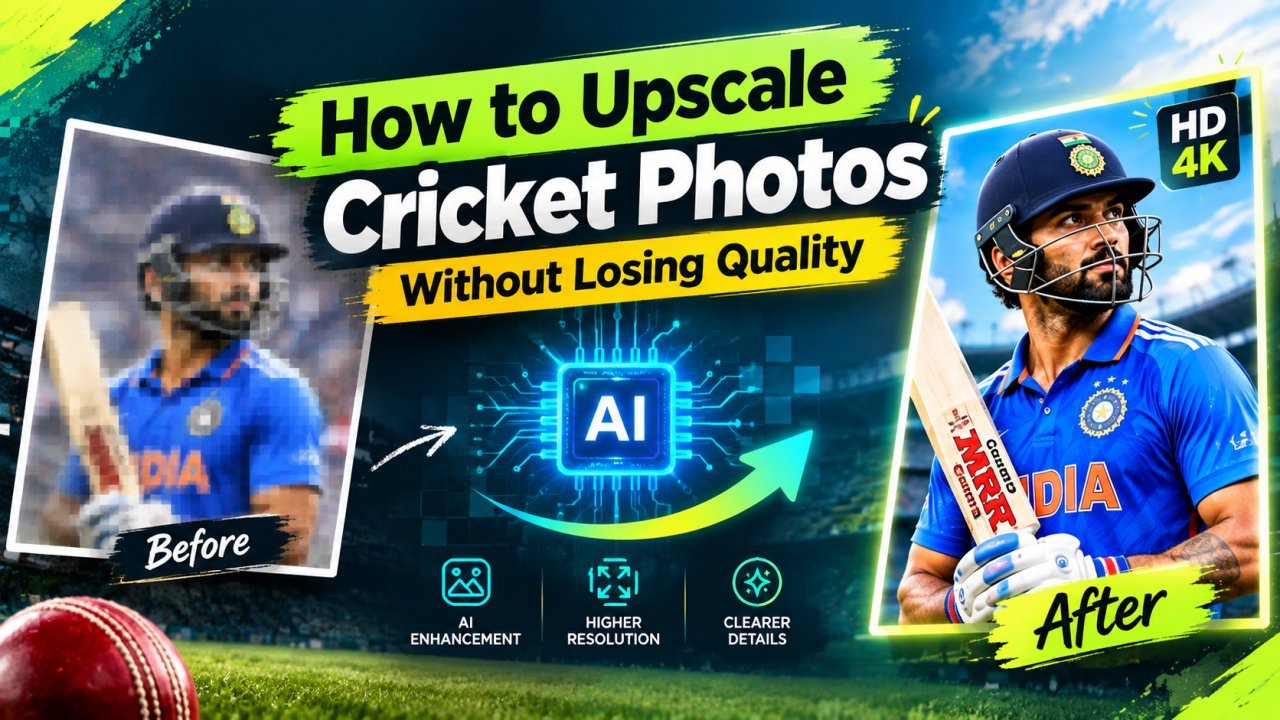
How to Upscale Cricket Photos Without Losing Quality
Cricket photos often look great on a phone but become blurry or pixelated when you try to use them in a thumbnail, poster, social media post, website banner, or print design. If you want a larger image, simply increasing the size can make the problem worse.
Learning how to upscale cricket photos without losing quality can help you create clearer and more usable images for different projects.
AI image upscalers can increase the resolution of a cricket photograph while attempting to preserve important details such as the player's face, cricket bat, ball, jersey, helmet, stadium, and background.
However, choosing the right settings is important. Upscaling a low-resolution sports photograph too aggressively can create artificial faces, strange textures, excessive sharpening, or unwanted details.
This guide explains how to upscale cricket photos correctly, how to choose the right resolution, how to improve player details, and how to avoid common quality problems.
What Does It Mean to Upscale a Cricket Photo?
Upscaling means increasing the resolution or dimensions of an image.
For example, you might have a cricket photograph that is:
- 800 × 600 pixels
- 1280 × 720 pixels
- 1920 × 1080 pixels
You may want to make it larger for a:
- All Tools
- YouTube Thumbnail Enhancer
- Image to PDF — Combine Photos into One PDF
- How to Restore an Old Photo With AI: Complete Beginner's Guide
- YouTube thumbnail
- Cricket poster
- Instagram post
- Website banner
- Blog image
- Match graphic
- Player profile
- Social media design
- Printed photograph
A basic image editor can make the dimensions larger, but that does not necessarily create new realistic detail.
AI upscaling works differently. Depending on the tool, it can analyze the existing image and reconstruct or enhance visual details while increasing the resolution.
The result can be sharper and more detailed than a simple resize.
Why Cricket Photos Can Be Difficult to Upscale
Cricket photography contains several details that can be challenging for image enhancement tools.
A single photograph may include:
- Fast-moving players
- Small cricket balls
- Detailed jerseys
- Bat textures
- Helmets
- Gloves
- Stadium lights
- Spectators
- Grass
- Advertising boards
- Facial details
- Shadows
- Motion blur
When the original image is low resolution, many of these details may already be missing.
An upscaler cannot always recover information that was never captured clearly.
That is why the quality of the original photograph matters.
Can You Upscale a Cricket Photo Without Losing Quality?
Yes, but there is an important limitation.
You can often improve the appearance of a low-resolution cricket photo while increasing its size, but no upscaling method can guarantee that every original detail will remain perfectly accurate.
The best results usually come from:
- Starting with the highest-quality original image available.
- Using an appropriate AI upscaling tool.
- Choosing a reasonable enlargement level.
- Protecting important details such as faces and jerseys.
- Avoiding excessive sharpening.
- Exporting the final image correctly.
If you follow these steps, the enlarged image can look significantly better than a basic resize.
Step 1: Find the Highest-Quality Original Cricket Photo
Before using an AI upscaler, find the best version of the photograph you have.
If you have multiple copies of the same cricket image, compare them.
Look for the version with:
- Higher resolution
- Better lighting
- Less compression
- Less blur
- More visible facial details
- Cleaner background
- Better overall sharpness
Avoid repeatedly downloading and re-uploading the same compressed image.
Every additional compression step can reduce image quality.
Original Photo vs Screenshot
Whenever possible, use the original image instead of a screenshot.
A screenshot may contain:
- Lower resolution
- Interface elements
- Compression
- Cropping
- Reduced detail
If the original file is available, use that instead.
Step 2: Check the Original Resolution
Before upscaling, check the image dimensions.
For example:
Original:
1000 × 667 pixels
If you upscale it by 2×:
2000 × 1334 pixels
At 4×:
4000 × 2668 pixels
The larger you go, the more the AI has to reconstruct.
For many projects, a moderate increase is easier to keep natural than an extreme enlargement.
Step 3: Choose the Right AI Upscaler
Use an image upscaling tool that supports high-resolution enhancement.
Depending on the software, you may find features such as:
- AI upscale
- Super resolution
- Image enhancement
- Resolution enhancement
- Photo restoration
- Detail enhancement
- Sharpening
- Noise reduction
The exact names and options vary between tools.
When choosing an upscaler, look for controls that let you adjust the amount of enhancement rather than applying one fixed effect.
Step 4: Upload Your Cricket Photo
Open your chosen image upscaling tool and upload the original cricket photograph.
Before starting the enhancement, check whether the tool offers options for:
- 2× upscale
- 4× upscale
- Custom resolution
- Face enhancement
- Noise reduction
- Sharpening
- Detail recovery
- Output format
If the image is already reasonably large, you may not need an aggressive enlargement.
Step 5: Start With 2× Upscaling
If you are unsure which setting to use, start with 2×.
For example:
Original:
1200 × 800
2× result:
2400 × 1600
A moderate enlargement gives the AI less work to do compared with an extreme increase.
Check the result before trying a larger scale.
Look closely at:
- Player's face
- Eyes
- Hair
- Cricket bat
- Ball
- Jersey
- Hands
- Shoes
- Stadium background
If these details remain natural, you can consider a larger output.
Step 6: Use 4× Upscaling When You Need a Much Larger Image
A 4× enlargement can be useful when you need a significantly larger image.
For example:
1000 × 667 → 4000 × 2668
This may be useful for:
- Posters
- Large website graphics
- Cropping
- Print projects
- Large social media designs
However, 4× enlargement can also increase the chance of AI-generated artifacts.
If the original image is extremely small or blurry, the tool has limited information to work with.
Always inspect the final image at 100% zoom.
Step 7: Protect the Player's Face
In many cricket photographs, the player's face is the most important detail.
An AI upscaler may sometimes alter facial features while trying to create sharper details.
After upscaling, zoom into the face.
Check:
- Eyes
- Nose
- Mouth
- Jawline
- Facial proportions
- Skin texture
If the face looks unnatural, try reducing the enhancement level or disabling an aggressive face-enhancement option if the tool provides one.
For important photographs, preserving the original appearance can be more important than maximum sharpness.
Step 8: Check the Cricket Bat and Ball
Cricket equipment can also reveal problems in an AI-upscaled image.
Look closely at:
- Bat edges
- Bat branding
- Cricket ball
- Gloves
- Helmet
- Pads
- Shoes
- Stumps
The cricket ball is especially difficult when it occupies only a few pixels in the original image.
If the ball is extremely small or motion-blurred, an AI tool may create a smoother or more detailed-looking ball that does not perfectly represent the original.
Do not assume every newly generated detail is genuine information from the original photograph.
Step 9: Be Careful With Jersey Logos and Text
Small text is another common problem.
A cricket jersey may contain:
- Player name
- Player number
- Team logo
- Sponsor logo
- Tournament branding
When the original text is too small, an AI upscaler may make it appear sharper without actually recovering the correct lettering.
Always check important text manually.
If accuracy matters, use the original high-resolution source whenever possible.
Step 10: Reduce Noise Before Increasing Sharpness
A low-resolution cricket photograph may contain digital noise, especially if it was taken in:
- Night matches
- Indoor stadiums
- Poor lighting
- High ISO conditions
- Cropped areas
If your tool offers noise reduction, use it carefully.
Too much noise reduction can remove useful texture.
A good workflow is often:
Noise reduction → Upscaling → Mild sharpening
rather than applying heavy sharpening to a noisy image.
Step 11: Avoid Excessive Sharpening
Sharpening can make an image appear clearer, but too much sharpening creates problems.
You may notice:
- Bright outlines around players
- Harsh edges
- Artificial skin
- Overly sharp grass
- Strange jersey textures
- Halo effects
A cricket photo should still look like a photograph.
If the image starts looking processed, reduce the sharpening strength.
Step 12: Keep the Stadium Background Natural
Cricket stadiums contain many small details.
The background may include:
- Spectators
- Stadium seats
- Floodlights
- Advertising boards
- Flags
- Grass
- Screens
- Buildings
An AI upscaler may try to reconstruct these areas differently from the original.
For a natural result, avoid extreme enhancement settings.
If the player is the main subject, prioritize the player's clarity rather than trying to make every spectator perfectly detailed.
Best Workflow for Upscaling Cricket Photos
A simple workflow is:
Original cricket photo
↓
Check resolution
↓
Reduce excessive noise if necessary
↓
Upscale 2×
↓
Inspect player and important details
↓
Apply mild sharpening
↓
Check face, bat, ball, jersey, and text
↓
Export at the required resolution
This workflow is safer than immediately increasing a tiny photograph by 8× or 16×.
Example: Upscaling a Cricket Match Photo
Imagine you have a cricket photograph that is:
1280 × 720 pixels
You want to use it in a larger social media design.
A practical approach would be:
Original
1280 × 720
First upscale
2560 × 1440
Check
Inspect the:
- Player
- Face
- Bat
- Ball
- Jersey
- Stadium
Final adjustment
Apply only mild sharpening if required.
Export
Save the final image in a high-quality format suitable for your intended use.
This keeps the workflow simple and gives you a chance to catch problems before producing a much larger file.
Common Mistakes When Upscaling Cricket Photos
Mistake 1: Upscaling a Screenshot
Screenshots may already be compressed or reduced in size.
Always look for the original image first.
Mistake 2: Immediately Using the Maximum Upscale
More enlargement does not automatically mean better quality.
Start with a moderate setting and inspect the result.
Mistake 3: Over-Sharpening
Heavy sharpening can create artificial edges and halos.
Use sharpening carefully.
Mistake 4: Ignoring the Face
A photograph may look sharp overall but have an unnatural player face.
Always inspect important faces at full size.
Mistake 5: Trusting AI-Generated Text
AI may reconstruct small jersey names, logos, or advertising text incorrectly.
Check important text against the original.
Mistake 6: Exporting With Heavy Compression
Even a good upscale can look poor after excessive compression.
Use an appropriate high-quality export setting.
Quick Beginner Method
If you just want a simple process, use this:
- Find the highest-quality cricket photo available.
- Upload it to an AI image upscaler.
- Start with 2× enlargement.
- Check the player's face.
- Check the cricket bat and ball.
- Check the jersey and important text.
- Reduce excessive noise if necessary.
- Apply mild sharpening.
- Compare the result with the original.
- Export the final image at high quality.
This approach works well for many everyday cricket photo enhancement tasks.
What to Remember
The goal of upscaling is not simply to make a cricket photo larger.
The goal is to make it larger while keeping the important visual details natural.
Start with the best original image you can find, use moderate enlargement, inspect the player's face and equipment, avoid excessive sharpening, and export the final image carefully.
In Part 2, we will cover advanced AI upscaling techniques, how to improve blurry cricket action shots, how to upscale cropped player photos, how to handle night-match images, and how to prepare cricket photos for thumbnails, posters, social media, and printing.
How to Upscale Cricket Photos Without Losing Quality — Part 2
Advanced Ways to Upscale Cricket Photos
Basic upscaling works well for simple images, but cricket photographs often need more attention.
Action shots can contain motion blur, small players, fast-moving balls, dark stadiums, and complicated backgrounds. Cropped images can also lose important details.
With a better workflow, you can improve these images while keeping them natural.
How to Upscale a Blurry Cricket Action Photo
Action photography is one of the most difficult types of images to enhance.
A cricket player may be:
- Running between wickets
- Bowling
- Batting
- Diving
- Catching the ball
- Celebrating
- Fielding
Fast movement can create motion blur even when the original camera has a high resolution.
AI upscaling can improve overall clarity, but it cannot always completely recover motion-blurred details.
Start with moderate enhancement.
For example: Enhance this cricket action photograph while preserving the original player's appearance, natural facial features, cricket equipment, stadium details, and realistic photographic texture. Improve clarity and resolution without creating artificial details or excessive sharpening.
How to Upscale Cricket Photos Without Losing Quality — Part 3
Final Tips for Better Cricket Photo Upscaling
Once you understand the basic and advanced techniques, the final step is to make sure your cricket photo looks natural after enlargement.
A good upscale should improve the image without making the player, equipment, or background look artificial.
Before exporting your final image, check the most important details carefully.
Check the Player's Face
The face should be one of the first things you inspect.
Look closely at:
- Eyes
- Nose
- Mouth
- Jawline
- Hair
- Skin texture
- Facial proportions
If the face looks different from the original, reduce the enhancement level or try another upscale setting.
For important photographs, preserving the original appearance is usually more important than adding extreme detail.
Check the Cricket Equipment
Zoom in on the:
- Bat
- Ball
- Helmet
- Gloves
- Pads
- Shoes
- Stumps
Look for strange edges, distorted shapes, or unrealistic textures.
If an object looks unnatural, try a lower enhancement level and compare the result again.
Check Jersey Text and Logos
Small text is one of the easiest things for an AI upscaler to change.
A player name, number, team logo, or sponsor logo may look sharper but still be incorrect.
If the exact text or logo matters, compare the enlarged image with the original.
For professional designs, use a separate high-resolution source for important logos whenever possible.
Compare the Original and Upscaled Photo
Do not judge the final image only by looking at the enlarged version.
Open the original and enhanced images together.
Compare:
Face → Jersey → Bat → Ball → Hands → Grass → Stadium
Ask yourself:
- Is the player still recognizable?
- Does the face look natural?
- Did the colors change?
- Did the jersey details change?
- Did the cricket ball change?
- Does the stadium still look realistic?
- Is the image actually clearer?
If the upscale creates more problems than it solves, try a lower enhancement level.
Do Not Confuse Sharpness With Quality
A very sharp image is not always a high-quality image.
Excessive sharpening can create:
- Harsh edges
- Bright halos
- Artificial skin
- Strange hair
- Over-detailed grass
- Unnatural jersey texture
A natural-looking photograph with moderate detail can be better than an extremely sharp image with obvious AI artifacts.
Best Settings for Different Cricket Photos
Different photographs may require different approaches.
| Cricket Photo Type | Recommended Approach |
|---|---|
| Clear daytime photo | 2× upscale with mild sharpening |
| Night match | Noise reduction + moderate upscale |
| Blurry action shot | Moderate enhancement |
| Cropped player photo | 2× or 4× depending on original size |
| YouTube thumbnail | Focus on player and face |
| Instagram post | Crop first, then upscale |
| Poster | Use highest-quality original available |
| Old or compressed photo | Gentle restoration and upscaling |
| Small player in stadium | Crop carefully before upscaling |
These are starting points rather than fixed rules. The best setting depends on the original image.
How to Upscale Old Cricket Photos
You may also have older cricket photographs that are faded, compressed, or low resolution.
In this case, the workflow can be slightly different.
Start by improving obvious problems such as:
- Dust
- Noise
- Fading
- Low contrast
- Minor blur
Then upscale the image.
A useful workflow is:
Restore → Upscale → Mild Sharpening → Color Correction → Export
Do not try to fix every problem with the upscaler alone.
How to Upscale Cricket Photos for a Website
Website images need a balance between quality and file size.
A huge image file can slow down a page, while an overly compressed image can look poor.
A practical workflow is:
- Upscale the original image.
- Crop it for the page.
- Resize it to the required display dimensions.
- Export it with suitable compression.
- Check the final image on both desktop and mobile.
You usually do not need to upload a massive image if it will only be displayed at a smaller size.
How to Upscale Cricket Photos for Social Media
For social media, prepare the image according to the final post format.
For example, you may need:
- Square crop
- Portrait crop
- Landscape crop
- Story-style crop
Crop the image carefully so the main player remains visible.
Then create the final-resolution version.
This is usually better than taking one extremely large image and letting every platform resize it automatically.
How to Upscale Cricket Photos for YouTube Thumbnails
For thumbnails, the player's face and main action are usually more important than tiny background details.
A good workflow is:
Select photo → Crop player → Upscale → Improve contrast → Add text → Export
Keep the player's face large enough to remain recognizable.
Avoid excessive sharpening around the face because it can make skin texture look unnatural.
How to Upscale Cricket Photos for Posters
For posters, start with the highest-resolution source you can find.
If the photograph is going to be printed at a large size, inspect the image at 100% after upscaling.
Pay special attention to:
- Face
- Hands
- Bat
- Ball
- Jersey
- Logos
- Stadium lights
If these areas contain visible AI artifacts, try another enhancement level before sending the file for printing.
How to Reduce AI Artifacts
AI artifacts can appear as strange or invented details.
Common examples include:
- Distorted fingers
- Strange facial features
- Unnatural jersey patterns
- Incorrect text
- Repeated grass textures
- Halo effects
- Artificial skin
- Strange stadium details
To reduce these problems:
Use a Lower Upscale
Try 2× instead of 4×.
Reduce Sharpening
Heavy sharpening can make artifacts more visible.
Use the Best Original
A better source gives the AI more information.
Avoid Multiple Processing Steps
Repeated resizing and compression can make the final image worse.
A Useful Cricket Photo Enhancement Prompt
If your AI tool supports text instructions, use this as a general prompt:
Enhance and upscale this cricket photograph while preserving the original player identity, facial features, body proportions, cricket equipment, jersey, ball, stadium, lighting, and composition. Improve resolution and clarity while keeping the image realistic and photographic. Preserve natural skin texture and realistic colors. Reduce noise and mild blur without creating artificial details. Avoid distorted faces, incorrect text, excessive sharpening, halos, artificial textures, and over-processed colors.
Ready to optimize your images?
Every tool mentioned in this article is free to use. No upload, no signup, and no watermarks — ever.
Try our free toolsRelated articles
How to Turn Your Photo Into a 1980s Vintage Photo With AI
Learn how to turn your photo into a 1980s vintage photo with AI using retro outfits, film effects, old cameras, vintage backgrounds, and realistic prompts.
How to Improve a YouTube Thumbnail With AI
Learn how to improve a YouTube thumbnail with AI using practical methods for better composition, text, backgrounds, colors, faces, and visual clarity. Discover how to use AI to enhance an existing thumbnail without making it look confusing or generic.
How to Create a YouTube Thumbnail With AI
Learn how to create a YouTube thumbnail with AI using simple prompts, image generation, editing, text placement, and mobile-friendly design tips.