
How to Change the Background of a YouTube Thumbnail
Learn how to change the background of a YouTube thumbnail, remove an existing background, add a new image or colour, and keep your design clear and professional.
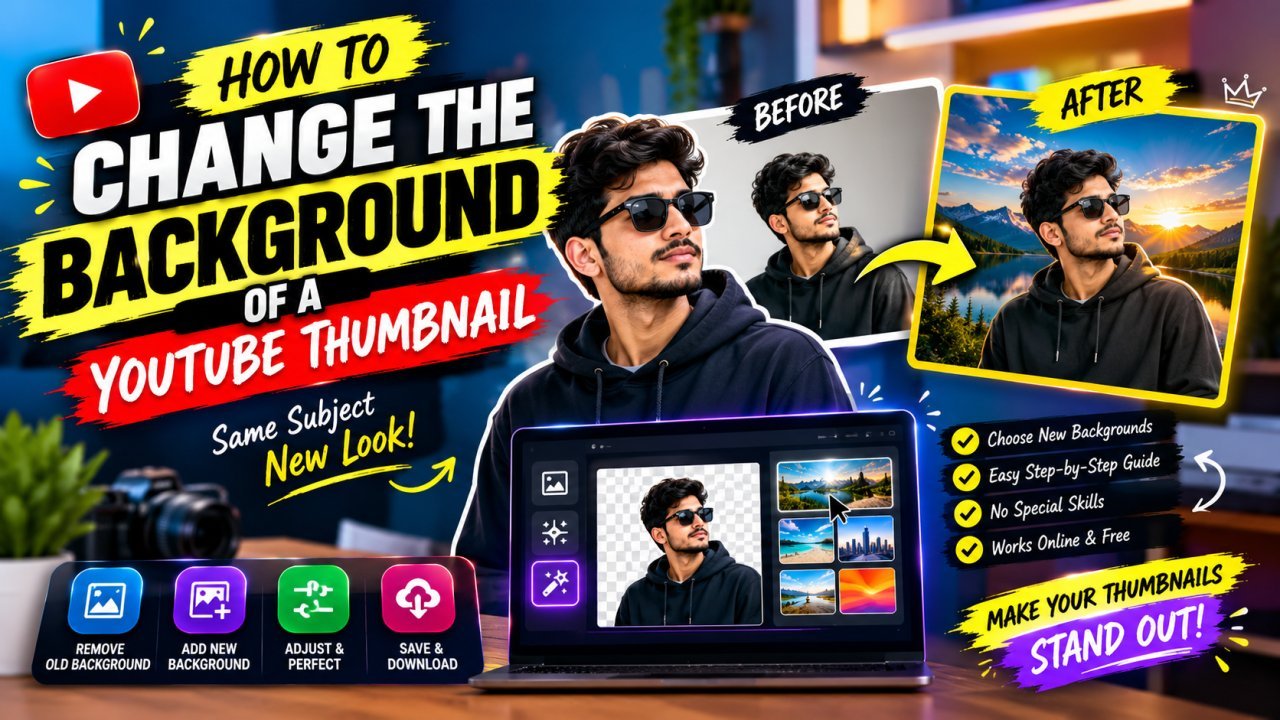
How to Change the Background of a YouTube Thumbnail
A background can change the entire look of a YouTube thumbnail. A plain or distracting background may make the subject hard to notice, while a carefully chosen background can help the main person, product, or message stand out.
If you want to learn how to change the background of a YouTube thumbnail, the process is usually straightforward: open your thumbnail in an editor, remove or cover the existing background, add a new one, and arrange the subject and text so everything remains clear.
You do not always need advanced editing skills. Many beginner-friendly design tools let you use a solid colour, gradient, photo, texture, or another visual as the background. Some also offer automatic background removal, while other tools let you remove the background manually.
This guide explains the basic process, how to choose a suitable background, and how to avoid common design mistakes. The goal is not just to change the background—it is to make the thumbnail easier to understand at a glance.
Why Change the Background of a YouTube Thumbnail?
Changing a thumbnail background can help you improve its appearance and make the main subject easier to notice.
You may want to change the background when:
- All tools
- The original background is cluttered or distracting.
- The subject blends into the background.
- You want to match the thumbnail to your video’s topic.
- You need space for a title or a few important words.
- You want a consistent style across your channel.
- The original photo was taken in an unsuitable location.
For example, a tutorial thumbnail may work well with a simple background and a clear image of the tool being used. A travel video may suit a location photo, while a product review may benefit from a clean background that keeps attention on the product.
A background should support the main subject, not compete with it. A dramatic background is not automatically better. The right choice is the one that makes the thumbnail’s message clear.
What Is a Thumbnail Background?
The background is the visual layer behind the main subject, such as a person, object, product, or text.
A thumbnail may contain several layers:
- Background: The colour, photo, pattern, or scene behind everything else.
- Main subject: The person, object, or image viewers should notice first.
- Text: A short phrase that explains or adds context to the video.
- Supporting elements: Shapes, arrows, borders, icons, or other details.
When you change the background, you usually want to keep the main subject and other important elements in place. This is easiest when each element is on a separate layer in your editing tool.
If your thumbnail is a single flattened image, you may need to remove the old background from the subject first—or cover the existing background with a new design.
Choose the Right Background Before Editing
Before removing anything, decide what you want the new background to look like. Choosing it first helps you create a balanced composition and avoid unnecessary editing.
Solid-colour background
A solid colour is a simple option for tutorials, explainers, and thumbnails that need a clean appearance. It can also make it easier to read text.
Choose a colour that contrasts with the subject without making the design uncomfortable to look at.
Gradient background
A gradient transitions between two or more colours. It can add depth while keeping the design relatively simple.
Use a subtle gradient when the subject already has strong colours or details.
Photo background
A photo can provide context for the video. For example, a travel thumbnail might use a location image, while a cooking video might use a kitchen or food-related scene.
Make sure the photo does not distract from the main subject. If it is too busy, consider softening it or placing a subtle overlay behind the subject or text.
Pattern or texture
A pattern or texture can add visual interest, but it should remain secondary. Avoid patterns that make text difficult to read or create too much visual noise.
Quick rule: If the background grabs your attention before the main subject, simplify it.
Prepare Your Thumbnail Before Changing the Background
A little preparation can make the editing process easier and help you avoid quality problems.
Before you begin:
- Keep a copy of the original thumbnail. This gives you a safe version to return to.
- Use the highest-quality image available. A small or blurry subject may still look poor after the background is replaced.
- Check the canvas dimensions. Set up the thumbnail at the size you intend to publish.
- Identify the main subject. Decide what should remain in front of the new background.
- Plan where text will go. Leave enough clear space for any important words.
- Choose a background that fits the video. The background should support the topic and subject.
If your editing tool supports layers, keep the background, subject, text, and decorative elements separate. That makes it easier to adjust one part without rebuilding the entire thumbnail.
How to Change the Background of a YouTube Thumbnail
The exact buttons and menu names depend on the editing tool you use, but the general workflow is similar.
Step 1: Open your thumbnail in an editor
Open the thumbnail project in your preferred design or photo-editing tool. If you only have an exported image, import that file into a new project.
Step 2: Select the existing background or subject
If the background is on its own layer, select that layer. If the subject and background are combined in one image, look for a background-removal or subject-selection feature.
Step 3: Remove or cover the old background
Use an automatic background remover if your tool provides one. Review the result carefully, especially around hair, hands, clothing, and other detailed edges.
If automatic removal is not available, use a selection, masking, or eraser tool to separate the subject from the background. Work carefully around the subject so you do not remove important details.
Step 4: Add the new background
Choose a solid colour, gradient, photo, or texture. Place it behind the subject. If your editor uses layers, move the background layer below the subject layer.
Step 5: Adjust the subject
Resize and position the subject so it looks natural against the new background. Avoid stretching the subject to fill space.
Step 6: Add or adjust text
Place text where it is easy to read and does not cover important parts of the subject. Use contrast between the text and the background.
Step 7: Review and export
Check the thumbnail at its full size and at a smaller viewing size. Make sure the subject is clear, the edges look natural, and the text is readable.
Export a fresh final image using a suitable format and quality setting. Keep your editable project in case you need to make changes later.
Choose an Editing Method That Fits Your Image
The best method depends on whether your thumbnail is an editable project or a single flattened image.
| Your situation | A practical method |
|---|---|
| Background is on a separate layer | Replace or hide the background layer |
| Person or object is on a plain background | Use background removal or a selection tool |
| Subject has detailed edges, such as hair | Use a background remover, then refine the edges |
| You only have one flattened image | Select or mask the subject, then place a new background behind it |
| You want a quick design | Use a thumbnail editor with background and layer controls |
If you already have an editable project, use it. Separate layers make it much easier to replace the background without damaging the subject, text, or other elements.
If you only have a single exported image, you may need to isolate the subject first. The result depends on how clearly the subject stands apart from the original background.
Method 1: Replace a Background Layer
If your thumbnail was created with separate layers, changing the background is usually the simplest method.
- Open the thumbnail project.
- Find the background layer in the layers panel.
- Hide it, remove it, or replace it with a new background.
- Add your chosen colour, gradient, photo, or texture.
- Move the new background layer below the subject and text.
- Check that the main subject is still visible and correctly positioned.
- Export a fresh copy of the thumbnail.
Keep the original project unchanged or save a new version before making major edits. This gives you a way to return to the earlier design if the new background does not work.
Method 2: Remove the Background From a Person or Object
When the subject and background are part of the same image, you need to separate them before placing a new background behind them.
Many editing tools provide an automatic background-removal feature. Others offer selection, masking, or eraser tools.
Basic process
- Import the image into your editor.
- Select the background-removal or subject-selection tool.
- Let the tool identify the main subject.
- Review the cutout carefully.
- Correct any areas where the tool removed part of the subject or left pieces of the old background.
- Place the new background behind the cutout.
Check the edges
Pay special attention to:
- Hair and flyaway strands
- Hands and fingers
- Glasses and other small details
- Clothing edges
- Transparent or semi-transparent objects
Automatic removal can save time, but it may not produce perfect edges every time. Zoom in to inspect the cutout, then zoom out again to judge whether it looks natural in the full thumbnail.
Method 3: Change the Background of a Flattened Image
A flattened image has its visual elements combined into one file. You cannot simply select a separate background layer because the background, subject, and other elements are merged.
You may still be able to change the background, but the process takes more care.
Option A: Select the subject
Use a selection or background-removal tool to isolate the person or object. Place the cutout on a new background and refine the edges.
Option B: Cover the old background
If the subject does not need to be separated completely, you may be able to cover parts of the old background with shapes, colour blocks, or a new image. This works best when the subject is clearly separated from the area you want to cover.
Option C: Rebuild the thumbnail
If the original background is very busy or overlaps the subject, rebuilding the design may be faster than trying to repair every area. Use the original subject image if available, then recreate the text and other elements on a new canvas.
Important: If the old background overlaps the subject or contains details that are difficult to separate, the result may not look perfect. A better source image can make the job much easier.
Make the Subject Blend Naturally With the New Background
A cutout can look pasted onto a new background if its lighting, colour, or edges do not match the scene.
You do not need complicated effects to make it look natural. Start with a few careful adjustments.
Match the brightness
If the background is bright but the subject is very dark, the subject may look disconnected. Adjust brightness or contrast slightly so the elements feel compatible.
Check the colour balance
A warm background may look unusual behind a subject with a strong blue or green colour cast. Small colour adjustments can help the subject fit the new design.
Use shadows carefully
A subtle shadow can help separate the subject from the background. Keep it soft and restrained. A very dark or large shadow may make the thumbnail look artificial.
Avoid obvious cutout edges
If the subject has a bright outline or leftover background colour around the edges, refine the mask. Do not hide every edge with a thick outline; it may make the cutout look less natural.
Keep the background simple
A busy background makes edge problems easier to notice and can compete with the subject. If the new background is detailed, consider softening it or using a subtle overlay.
How to Choose a Background Colour
A background colour should make the main subject easy to notice and support the topic of the video.
Use contrast
If the subject is dark, a lighter background may help it stand out. If the subject is light, a darker or more saturated background may provide separation.
Limit the colour palette
Using too many competing colours can make a thumbnail look messy. A simple palette with one main background colour and one or two supporting colours is often easier to control.
Consider the subject’s colours
Check the colours in the person’s clothing, product, or main object. Avoid choosing a background that makes the subject blend into it.
Preview the design at a small size
A colour combination that looks attractive when zoomed in may become muddy or hard to distinguish at a smaller size. Always check the thumbnail at a realistic viewing size.
How to Use a Photo as the New Background
A photo background can add context to a thumbnail. It might show a location, a room, a product setting, or a scene related to the video.
To use one effectively:
- Choose a photo that matches the video topic.
- Place it behind the main subject.
- Crop it to fit the thumbnail canvas without stretching.
- Keep important background details away from the text.
- Adjust brightness or contrast if the subject does not stand out.
- Reduce visual distractions if the background is too busy.
The background should support the story of the video. It does not need to show every detail of the scene.
Before-and-After Review
After changing the background, compare the new design with the original.
Ask yourself:
- Is the main subject easier to notice?
- Does the new background fit the video topic?
- Are the subject’s edges clean?
- Does the subject look naturally placed?
- Is the text still readable?
- Does the thumbnail look clear at a smaller size?
- Have any important details been covered or cropped out?
If the new background makes the thumbnail busier or harder to understand, try a simpler option. The purpose of changing the background is to improve the design, not just make it different.
Comparison: Which Background Works Best?
| Background type | Best suited for | Possible drawback |
|---|---|---|
| Solid colour | Simple designs, tutorials, bold text | May feel plain if the composition lacks focus |
| Gradient | Clean designs that need a little depth | Strong gradients can distract from the subject |
| Photo | Videos where location or setting matters | Busy details may compete with the subject |
| Pattern or texture | Designs that need subtle visual interest | Detailed patterns can reduce readability |
| Blurred photo | Keeping context while reducing distractions | Too much blur may look artificial |
There is no single background type that works for every video. Choose the option that makes the subject and message clearest.
Pros and Cons of Changing a Thumbnail Background
Benefits
- Helps separate the subject from a distracting original scene.
- Makes it easier to match the thumbnail to the video topic.
- Creates space for text and other important elements.
- Can help establish a consistent visual style across a channel.
- Gives an existing thumbnail a fresh look without starting completely from scratch.
Limitations
- Background removal may leave rough edges around detailed subjects.
- A new background may not match the subject’s lighting or colour.
- Editing a flattened image can take more time than editing a layered project.
- Too many effects can make the thumbnail look artificial.
- A background change cannot fix a low-quality or blurry source image by itself.
The best results come from improving the whole composition, not just replacing the background.
Pros and Cons of Changing a Thumbnail Background
Benefits
- Helps separate the subject from a distracting original scene.
- Makes it easier to match the thumbnail to the video topic.
- Creates space for text and other important elements.
- Can help establish a consistent visual style across a channel.
- Gives an existing thumbnail a fresh look without starting completely from scratch.
Limitations
- Background removal may leave rough edges around detailed subjects.
- A new background may not match the subject’s lighting or colour.
- Editing a flattened image can take more time than editing a layered project.
- Too many effects can make the thumbnail look artificial.
- A background change cannot fix a low-quality or blurry source image by itself.
The best results come from improving the whole composition, not just replacing the background.
Conclusion
Changing the background of a YouTube thumbnail can make the main subject easier to notice and help the design match your video’s message. Start by choosing a background that supports the subject, then use an editing tool to replace the existing background or remove it and add a new one.
Keep the subject clear, use strong contrast, and avoid adding too many details. Before publishing, review the thumbnail at a small size to make sure the main image and text are still easy to understand.
With a little practice, you can create cleaner, more eye-catching thumbnails that look consistent with your channel.
Ready to improve your next YouTube thumbnail? Open your preferred image editor, choose a background that fits your video, and follow the steps in this guide. If you found these tips helpful, explore more thumbnail tutorials on our blog and subscribe for practical design advice.
1. How do I change the background of a YouTube thumbnail?
Open the thumbnail in an image editor. Replace the background layer if it is separate, or remove the existing background and add a new one. Check the subject’s edges and save the finished image.
2: Can I change a thumbnail background without Photoshop?
Yes. Many browser-based and mobile image editors include background-removal, selection, or layer tools. Choose one that lets you add a new background and export the image.
3: How do I remove the background from a thumbnail?
Use a background-removal tool or select the subject manually. Refine the edges around hair, clothing, and small details, then place the isolated subject over a new background.
4: Can I change the background of a JPG thumbnail?
Yes. Open the JPG in an editor and use a selection or background-removal tool. Because a JPG is usually a flattened image, you may need to separate the subject from the background before replacing it.
5: What background colour is best for a YouTube thumbnail?
There is no single best colour. Choose one that fits the video and creates clear contrast with the subject and text. Test the design at a small size to make sure the main elements remain visible.
6: How can I make a new background look realistic?
Match the new background’s lighting, brightness, colour tone, and perspective to the subject. Refine rough edges and add a subtle shadow only when it helps the subject fit naturally into the scene.
7: Can I use a photo as my thumbnail background?
Yes. Add the photo as the background layer, then place the subject and text above it. Keep the photo simple enough that it does not compete with the main subject.
8: Why does my thumbnail background look blurry?
The background image may be too small, enlarged too much, or softened by an editing effect. Use a suitable high-resolution image and check the exported thumbnail at its intended display size.
9: What size should a YouTube thumbnail be?
YouTube’s recommended thumbnail size is 1280 × 720 pixels, with a minimum width of 640 pixels. Keep the image in a 16:9 aspect ratio and check YouTube’s current guidance before publishing.
10: How do I upload my edited thumbnail to YouTube?
Open YouTube Studio, select the video, and use the thumbnail option to upload your edited image. Save the changes. The available options may differ depending on your account and device.
Suggested links:
- How to Make a YouTube Thumbnail
- Best YouTube Thumbnail Design Tips
- How to Remove a Background From an Image - How to Add Text to a YouTube Thumbnail - Best Thumbnail Editing Tools for Beginners
Ready to optimize your images?
Every tool mentioned in this article is free to use. No upload, no signup, and no watermarks — ever.
Try our free toolsRelated articles
How to Extract the Best Frame From a Video for a YouTube Thumbnail
Learn how to extract the best frame from a video for a YouTube thumbnail, choose a sharp frame, improve its quality, and create a more effective thumbnail.

How to Remove a Background From a YouTube Thumbnail Easily
Learn how to remove a background from a YouTube thumbnail using online tools, AI background removers, and simple editing techniques for cleaner thumbnails.
How to Turn a Video Screenshot Into a YouTube Thumbnail
Learn how to turn a video screenshot into a YouTube thumbnail using the right frame, cropping, sharpening, text, contrast, and image optimization techniques.