
How to Add Space Around an Image Without Cropping
Learn how to add space around an image without cropping using canvas resizing, borders, padding, and simple background techniques.
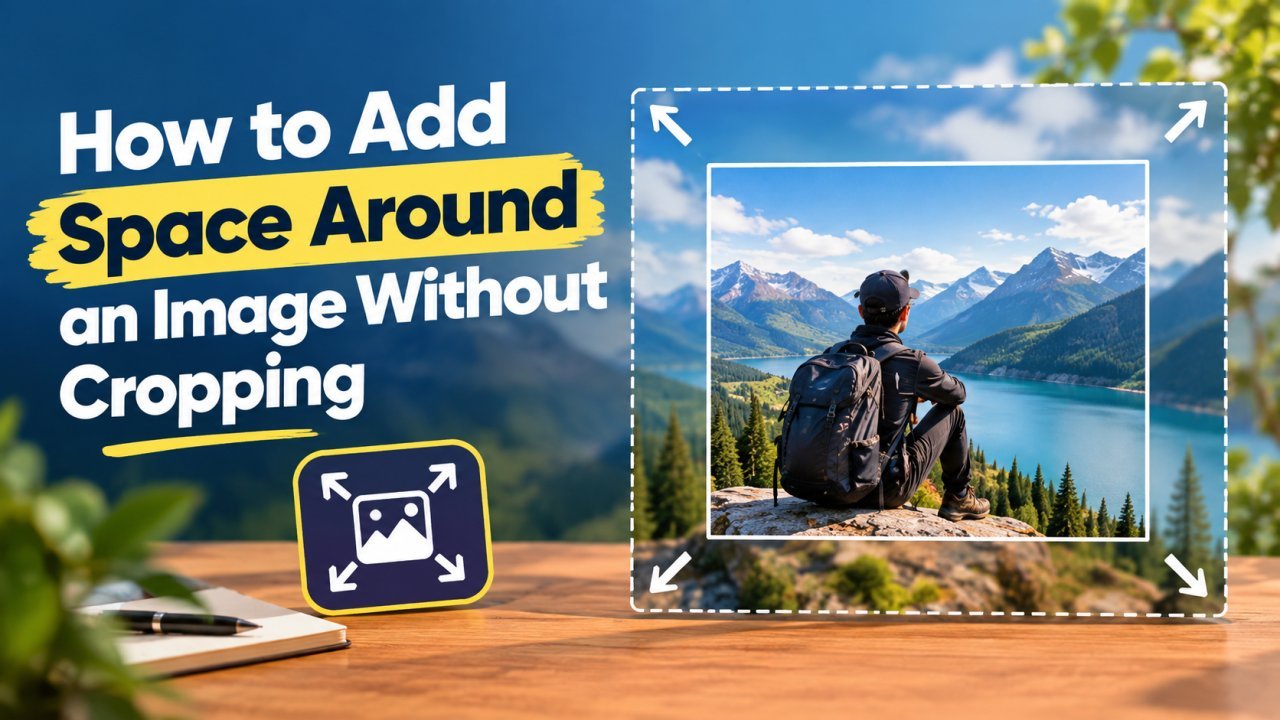
How to Add Space Around an Image Without Cropping
Sometimes you have a photo that looks perfect, but it does not fit the size or layout you need. Maybe the image is too close to the edges, you need extra room around it, or you want to change its shape without removing any part of the original photo.
In this situation, cropping is not always the best solution.
Instead, you can add space around an image without cropping. This means keeping the original photo intact while increasing the area around it.
The extra space can be filled with a plain color, a white or black background, a border, a blurred version of the same photo, or another simple design.
This technique is useful for social media posts, WhatsApp profile pictures, product images, YouTube thumbnails, blog graphics, website banners, presentations, and many other types of visual content.
In this guide, you will learn what adding space around an image means, why it is different from cropping, how canvas size works, and how to prepare an image without cutting away important parts.
All Image Tools
- All Tools
- Ecommerce Photo Optimizer
- Free Image Compressor
- How to Turn Your Photo Into a 1980s Vintage Photo With AI
- How to Compress a YouTube Thumbnail Without Losing Quality
What Does It Mean to Add Space Around an Image?
Adding space around an image means making the overall canvas larger while keeping the original photo unchanged.
For example, imagine you have a portrait photo that is taller than it is wide.
If you want to make the final image square, one option is to crop the top and bottom.
However, cropping removes part of the original photo.
Instead, you can create a square canvas and place the complete portrait inside it.
The empty area around the photo becomes the extra space.
This allows you to change the overall shape of the final image while keeping the complete original photo visible.
The same method works with landscape photos.
If your photo is very wide and you want to make it taller, you can increase the canvas height and add space above and below the original image.
The important part is that the original photo does not need to be cropped.
Why Add Space Instead of Cropping?
Cropping is useful when you want to remove unwanted parts of a photo.
But sometimes the edges of an image contain important information.
For example, a portrait may include a person's full body.
A group photo may have people standing near both sides.
A product photo may have important details close to the edges.
A screenshot may contain text or buttons that you need to keep visible.
If you crop these images, you may lose something important.
Adding space gives you another option.
Instead of removing part of the photo, you can create more room around it.
This is especially useful when you need to fit an image into a different shape or layout.
Cropping vs Adding Space
Before editing your image, it is important to understand the difference between cropping and adding space.
Cropping
Cropping removes part of the original image.
For example:
Original photo → Crop the edges → Smaller visible area
The final image contains less of the original photo.
Adding Space
Adding space keeps the original photo and increases the area around it.
For example:
Original photo → Increase canvas → Add surrounding space
The original image remains visible.
This makes adding canvas space a better choice when your main goal is to preserve the entire photo.
What Is a Canvas?
The canvas is the overall area in which your image is placed.
You can think of it as a frame surrounding your photo.
The photo does not have to fill the entire canvas.
You can have additional space around the photo for a border, background, text, or other design elements.
This is why canvas size and image size are not the same thing.
Changing the image size changes the actual photo.
Changing the canvas size changes the overall area surrounding the photo.
Understanding this difference is the key to adding space without cropping.
Canvas Size vs Image Size
Suppose your original image is 1200 × 800 pixels.
If you resize the actual image to 1600 × 1067 pixels, you are making the photo itself larger.
But if you keep the photo at 1200 × 800 pixels and create a larger canvas around it, the photo remains the same size.
For example, you could create a 1600 × 1200 pixel canvas and place the original 1200 × 800 image inside it.
The extra area becomes space around the photo.
This is the method you need when you want to add margins or padding without changing the original composition.
How to Add Space Around an Image Without Cropping
The process is straightforward.
You can follow the same basic workflow in many image-editing applications.
Step 1: Open the Original Image
Start by opening the image you want to edit.
Use the highest-quality version available whenever possible.
If you have the original photo on your phone or computer, use that instead of a screenshot or a repeatedly compressed copy.
Starting with a good-quality image gives you more flexibility during editing.
Step 2: Find the Canvas Tool
After opening the photo, look for an option related to the canvas.
Depending on the editing software, it may be called:
- Canvas Size
- Resize Canvas
- Expand Canvas
- Canvas
- Add Padding
- Image Canvas
The exact name will depend on the app or software you are using.
The important thing is to choose an option that expands the area around the image.
Do not accidentally select a crop tool.
Step 3: Increase the Canvas Size
Now increase the width, height, or both.
How much you increase it depends on the result you want.
If you only want a small border, add a small amount of space.
If you want to turn a portrait image into a square, increase the width until the canvas becomes square.
If you want space for text, you can increase the canvas more on one side.
For example, if your original image is 1200 × 800 pixels, you might create a larger canvas around it.
The original photo stays unchanged while the canvas provides the additional area.
Step 4: Position the Original Image
After increasing the canvas, decide where the original photo should sit.
If you want equal space around the photo, place it in the center.
If you want extra space at the top, move the image toward the bottom.
If you want more room on the left, position the image toward the right.
This gives you control over the final layout.
You do not always have to center the image.
The best position depends on how you plan to use the final image.
How to Add Equal Space Around an Image
If you want a clean border around the entire photo, add approximately equal space on all four sides.
For example, suppose your original image is 1000 × 1000 pixels.
If you want around 100 pixels of space on each side, you can create a canvas of approximately 1200 × 1200 pixels.
The original photo remains 1000 × 1000 pixels.
The remaining area becomes the surrounding space.
This creates a simple and balanced appearance.
Equal spacing works well for:
- Profile pictures
- Product images
- Portfolio photos
- Blog images
- Social media graphics
- Presentation images
It is also one of the easiest methods for beginners.
How to Add Space Only on One Side
You do not always need to add space equally around the image.
Sometimes you may need extra room on only one side.
For example, imagine you are creating a promotional graphic with a product photo on the right and text on the left.
Instead of shrinking or cropping the product photo, you can increase the canvas width and create extra space on the left.
The original image remains unchanged.
This approach is useful for:
- YouTube thumbnails
- Blog banners
- Website headers
- Product advertisements
- Social media posts
- Presentation slides
The same technique works if you need additional space on the right, top, or bottom.
How to Add Space Above or Below an Image
You can also add space vertically.
This is useful when you want to make an image taller without cropping the original.
For example, a landscape photo can be placed inside a taller canvas.
The additional area can be added above, below, or both.
You can then use that space for:
- A title
- A caption
- A logo
- A short message
- A border
- A background
The original photo stays unchanged.
This is particularly useful when converting a landscape image into a square or vertical layout.
How to Add Space to the Sides of an Image
If you have a portrait photo and want to make it wider, increase the canvas width.
This creates extra space on the left and right without removing anything from the top or bottom.
For example, a vertical portrait can be placed in the center of a wider canvas.
The additional space can then be filled with a color, border, gradient, or blurred background.
This method is useful when preparing portrait photos for wider layouts.
How to Add White Space Around an Image
White space is one of the simplest options.
After increasing the canvas, use white as the background around the original image.
This creates a clean and minimal appearance.
White space works particularly well for:
- Product photos
- Online store images
- Documents
- Blog graphics
- Portfolio images
- Business presentations
- Simple social media designs
If the original photo has a busy background, a plain white border can also help separate the photo from the surrounding page or design.
How to Add Black Space Around an Image
Black space can create a stronger contrast.
It can work well with:
- Portrait photography
- Gaming screenshots
- Cinematic images
- Night photography
- Fashion photos
- Dark or high-contrast designs
The method is the same.
Increase the canvas, keep the original photo in the desired position, and use black for the additional area.
However, do not choose black simply because it is available.
Look at the original photo and choose a background that complements it.
How to Add a Colored Background Around an Image
You can also use a color that matches the photo.
For example, if your image contains blue tones, a soft blue background may make the added space feel connected to the original photo.
If the image contains warm colors, a beige or muted warm tone may work better.
For business designs, you can also use a brand color.
Try to keep the background simple.
The purpose of the extra space is usually to give the image more room, not to distract attention from the main subject.
How to Add a Blurred Background Around an Image
Another useful technique is to create a blurred version of the original image as the background.
This works especially well when you want to make a portrait or landscape photo fit a larger canvas without making the extra area look empty.
The basic idea is:
- Create a larger canvas.
- Add a copy of the original image as the background.
- Enlarge the background until it covers the canvas.
- Apply a blur effect to the background.
- Place the original sharp image above it.
- Resize the sharp image proportionally if necessary.
- Position it in the center.
- Export the final image.
The result keeps the main photo clear while using the surrounding area as a soft extension of the image.
This technique is often useful for social media graphics and profile pictures.
How Much Space Should You Add?
There is no fixed amount of space that works for every image.
The right amount depends on your purpose.
If you only want a thin border, a small amount of padding may be enough.
If you want to create room for text, you may need much more space.
If you are changing a portrait photo into a square, you may need considerable space on both sides.
The most important thing is balance.
Do not add so much empty space that the main image becomes too small.
The original photo should remain the main focus of the final design.
Keep the Original Image Proportions
When adding space around an image, do not stretch the original photo just to fill the new canvas.
The original aspect ratio should remain unchanged.
For example, if a person's face looks natural in the original image, it should look the same after the canvas is expanded.
If the face suddenly looks wider or narrower, the image itself has probably been distorted.
A safer workflow is:
Keep the original photo → Expand the canvas → Position the photo → Add the background → Export
This preserves the natural proportions of the original image.
Add Space Around a Portrait Photo
Portrait photos are usually taller than they are wide.
If you want to make a portrait wider without cropping it, increase the canvas width and place the photo inside it.
You can fill the extra space with:
- White
- Black
- A matching color
- A gradient
- A blurred version of the photo
- A simple background
This lets you keep the complete portrait while changing the overall shape of the final image.
Add Space Around a Landscape Photo
Landscape photos are usually wider than they are tall.
If you want to make a landscape photo taller without cropping it, increase the canvas height.
This creates additional space above and below the original photo.
You can then use that space as a border or background.
This is useful when preparing landscape photos for square or vertical layouts.
Add Space Around a Product Image
Product photos can also benefit from additional space.
If a product is positioned too close to the edges, the image may look cramped.
Increasing the canvas gives the product more breathing room.
This can be useful for:
- E-commerce images
- Product catalogs
- Website graphics
- Social media posts
- Advertisements
- Promotional designs
Keep enough space around the product to make it look clean, but do not add so much empty space that the product becomes difficult to see.
Add Space Around a Screenshot
Screenshots are another common use case.
Suppose you want to use a screenshot in a blog tutorial.
Instead of cropping the screenshot, you can increase the canvas around it.
The additional space can then be used for:
- A heading
- An arrow
- A label
- A short explanation
- A border
This can make tutorial images easier to understand while keeping all the original screenshot information visible.
Add Space Around an Image for Social Media
Social media posts often use different image formats.
An image that looks perfect in its original shape may not fit another format without cropping.
Instead of immediately cutting away part of the photo, create the required canvas and place the complete image inside it.
The remaining space can become part of the design.
This gives you more control over the final composition and helps preserve important details near the edges.
The Simple Rule to Remember
If you want to keep the complete photo, change the canvas instead of cropping the image.
Cropping removes content.
Expanding the canvas adds room.
Once you understand this difference, you can use the same method for profile pictures, social media posts, product images, thumbnails, blog graphics, screenshots, and website designs.
What Comes Next
In Part 2, we will move from the basic concept to practical editing methods.
We will cover how to add space around an image on Android, iPhone, and computer, how to create clean white borders, how to use blurred backgrounds, how to add space for text, and how to make an image square without cropping.
We will also cover common problems such as uneven borders, stretched images, too much empty space, blurry results, and images that still do not fit the required format.
Part 2: Practical Ways to Add Space Around an Image Without Cropping
Now that you understand the difference between cropping an image and expanding its canvas, it is time to look at the practical ways to do it.
The exact buttons may be different in each editing app, but the basic process remains the same: keep the original photo, create more canvas space, position the photo correctly, and choose a background for the new area.
How to Add Space Around an Image on a Phone
You can do this directly on a smartphone using an image-editing app that supports canvas resizing or background expansion.
The general process is:
- Open the photo in your editing app.
- Look for the canvas, resize canvas, or expand option.
- Increase the width or height.
- Keep the original photo proportional.
- Position the photo where you want it.
- Choose a background for the additional space.
- Export the finished image.
Different apps may use different names for these tools, so focus on finding the canvas or background-expansion feature rather than looking for one exact button.
How to Add Space Around an Image on Android
Android phones offer many photo-editing applications that can create a larger canvas around an image.
The process usually starts by opening the original photo.
After that, look for an option related to:
- Canvas
- Resize
- Background
- Border
- Padding
- Expand
- Frame
Once you find the correct tool, increase the canvas size.
For example, if you have a vertical portrait and want a square image, increase the width until the overall canvas becomes square.
Keep the portrait at its original proportions.
Then choose a background for the empty areas.
You can use a plain color if you want a simple result, or use a blurred version of the original image if you want something more visually connected to the photo.
How to Add Space Around an Image on iPhone
The same basic method works on iPhone.
Open the image in an editor that supports canvas expansion or adding a background.
Then:
- Select the photo.
- Choose the canvas or background option.
- Increase the canvas size.
- Keep the original photo proportional.
- Adjust its position.
- Select the background style.
- Save or export the result.
If the app does not provide a direct canvas-size option, look for features such as borders, frames, background, padding, or a custom-size canvas.
The names can vary, but the purpose is the same.
How to Add Space Around an Image on a Computer
A computer gives you more control because larger screens make it easier to position the photo accurately.
You can use an image editor that supports canvas resizing.
The general workflow is:
Open image → Increase canvas → Position image → Add background → Export
When increasing the canvas, check whether the editor allows you to control the anchor or image position.
This is useful when you want extra space on only one side.
For example, if you need room for a heading on the left, position the original photo toward the right side of the larger canvas.
How to Add a White Border Without Cropping
A white border is one of the easiest ways to add space around a photo.
First, create a canvas larger than the original image.
Then place the photo in the center.
Set the surrounding canvas area to white.
The result is a simple photo with a clean white border.
This works especially well when you want the image to look neat without adding visual effects.
White borders are commonly useful for:
- Product photos
- Portfolio images
- Blog graphics
- Printable images
- Minimal social media designs
- Website images
The main advantage is simplicity.
The photo remains the focus while the extra white space gives it more breathing room.
How to Add a Black Border Without Cropping
If white does not match your image, you can use black.
The process is almost identical.
Increase the canvas, center the image, and use black for the surrounding area.
A black border can create a stronger contrast and may work well for portraits, gaming images, cinematic photos, and dark photography.
However, check the image before choosing the color.
A strong black border can sometimes dominate a light or colorful image.
How to Add a Colored Border Around a Photo
You can also choose a custom color.
One simple approach is to select a color that already appears in the image.
For example, if the photo contains a lot of green, a soft green border may make the added space feel connected to the original image.
For business content, you can use your brand's color.
However, avoid choosing a very bright color unless it fits the overall design.
A muted or complementary color often looks cleaner.
How to Add Space Around an Image With a Blurred Background
If you do not want plain empty space, a blurred background can be a useful option.
This technique creates a larger background using the same photo.
The background is enlarged and blurred, while the original image stays sharp and visible in the center.
A simple workflow is:
- Create a larger canvas.
- Duplicate the original image.
- Use one copy as the background.
- Enlarge the background copy until it fills the canvas.
- Apply a blur effect.
- Place the original sharp photo above it.
- Resize the sharp photo if needed.
- Center the sharp photo.
- Export the final image.
This works especially well with portraits because the blurred background can look more natural than a plain color.
How to Add Space Around a Photo With a Gradient
A gradient can make the additional space more visually interesting without adding complicated elements.
For example, you could use a gradient that changes from one color to another.
The important thing is to keep the gradient subtle.
If the background is too bright or contains too many colors, it may compete with the photo.
A gradient works best when it complements the main image.
How to Add Space Around an Image for WhatsApp
If you want to use a complete photo as a WhatsApp profile picture, adding canvas space can help you avoid removing important parts of the image.
For example, a vertical photo may not fit comfortably into a square profile-picture layout.
Instead of cropping the top and bottom, create a square canvas.
Place the complete photo inside it.
Then fill the remaining space with:
- White
- Black
- A matching color
- A blurred version of the photo
- A simple background
Keep the subject away from the extreme edges.
This gives you more control over how the image appears as a profile picture.
How to Add Space Around an Image for Instagram
The same concept can be useful when preparing an image for a social media layout.
If the original image has an aspect ratio that does not match the format you want, you can create a suitable canvas and place the complete image inside it.
This prevents you from having to crop important areas simply to make the image fit.
For example, a landscape photo can be placed inside a square canvas with additional space above and below.
A portrait photo can be placed inside a wider canvas with space on the sides.
The final design should still keep the subject large enough to be easy to see.
How to Make an Image Square Without Cropping
One of the most common reasons people add space around an image is to make it square.
Suppose your original photo is vertical.
If you crop it into a square, you may lose part of the top or bottom.
Instead, create a square canvas.
Then resize the original photo proportionally until it fits inside the square.
The remaining area becomes the added space.
You can use a plain background, border, or blurred version of the photo.
The same method works for a horizontal photo.
Instead of cutting the sides, increase the canvas height and place the full image inside the square.
How to Add Space Around a Portrait Without Making It Smaller
A common problem is adding so much empty space that the person in the photo becomes too small.
The solution is to use the smallest amount of extra canvas needed for the required format.
For example, if you are converting a portrait into a square image, do not make the square dramatically larger than necessary.
Make the canvas large enough to fit the complete photo while keeping the subject clearly visible.
This creates a better balance between preserving the entire photo and maintaining a useful image size.
How to Add Extra Space for Text
Sometimes you are not adding space just to change the image format.
You may need room for text.
For example, you could have a product photo on one side and a headline on the other.
Instead of placing text directly over the product, expand the canvas and create a dedicated text area.
This can make the final design much easier to read.
When doing this, consider:
- Where the main subject is located
- How much text you need
- Whether the background provides enough contrast
- How the final image will be viewed
- Whether the text needs to remain readable on mobile
Do not make the text area unnecessarily large.
Use enough space to create a balanced composition.
How to Add Space Around a Photo Without Changing Its Size
If you want the photo itself to remain exactly the same size, make sure you are changing only the canvas.
For example, suppose your image is 1000 × 800 pixels.
You can create a 1400 × 1200 canvas while leaving the original photo at 1000 × 800.
The image remains the same.
Only the surrounding area increases.
This is useful when you need to preserve the original resolution and composition.
How to Add Margins Around an Image
Adding margins is essentially another way of describing the same process.
Create a larger canvas and leave a gap between the photo and the outer edge.
For equal margins, center the photo.
For custom margins, adjust its position.
For example, you might want:
- 50 pixels on the top
- 100 pixels on the left
- 50 pixels on the right
- 150 pixels on the bottom
The exact values depend on your design.
The important thing is that the photo remains unchanged.
How to Add Space Around an Image for a Website
Website images often need to fit into specific layouts.
Instead of forcing an image into a fixed shape, you can sometimes add space around it.
For example, a product image can have additional white space around it so that it sits comfortably inside a website section.
This can also help when placing images beside text.
However, keep in mind that adding large amounts of empty space also increases the final image dimensions.
For website performance, avoid creating unnecessarily large image files.
After preparing the image, export it in an appropriate format and compress it when necessary.
How to Add Space Around a Photo for a YouTube Thumbnail
YouTube thumbnails are another situation where extra canvas space can be useful.
Suppose your original photo is vertical but your thumbnail needs a wide layout.
Instead of cropping the person out of the photo, create a wider canvas and position the person on one side.
You can then use the remaining space for:
- Thumbnail text
- A logo
- A graphic element
- Another image
- A visual effect
This gives you more control over the composition.
Make sure the main subject remains large enough to recognize when the thumbnail is displayed at a smaller size.
Common Mistakes When Adding Space Around an Image
Adding space sounds simple, but a few mistakes can make the final image look worse.
Mistake 1: Cropping the Photo by Accident
If you use the crop tool instead of the canvas tool, part of the image may be removed.
Always check the final image carefully.
Make sure all important parts of the original photo are still visible.
Mistake 2: Stretching the Original Image
Do not change the width and height independently just to make the image fit.
This can distort faces, products, buildings, and other objects.
Keep the original aspect ratio locked.
Mistake 3: Adding Too Much Empty Space
A large canvas can make the original image look too small.
Use only as much extra space as the design requires.
Mistake 4: Choosing a Distracting Background
A bright or complicated background can take attention away from the main image.
Keep the surrounding area simple unless the design specifically requires something more decorative.
Mistake 5: Placing Important Details Too Close to the Edge
Even after adding space, check the final composition.
Faces, text, logos, and other important elements should have enough breathing room.
How to Fix Uneven Borders
Sometimes you may add space around an image and notice that one side is larger than another.
If you want equal borders, make sure the original image is centered on the canvas.
Check the top, bottom, left, and right margins before exporting.
If the borders are intentionally uneven because you need space for text or another design element, make sure the difference looks deliberate.
Uneven spacing can look like a mistake when there is no clear reason for it.
How to Fix an Image That Looks Too Small After Adding Space
If the final image has too much empty space, reduce the canvas size or enlarge the original photo slightly while keeping its proportions.
The goal is to find a balance.
The image should have enough surrounding space to fit the required layout, but the main subject should still be easy to see.
This is particularly important for profile pictures and social media posts because the final image may be displayed at a small size.
How to Keep the Background Natural
If you use a blurred version of the original image, check the edges carefully.
The background should support the main photo rather than create obvious distractions.
A strong blur can make the transition feel softer.
You can also reduce the background's visual intensity so that the sharp central image remains the main focus.
If the background looks artificial, a simple solid color may actually produce a cleaner result.
When Should You Use a Border Instead of a Background?
Use a simple border when you want a clean and minimal design.
A background extension is more useful when you want the added area to feel like part of the image.
For example:
Border: Good for clean product photos and simple layouts.
Blurred background: Good for portraits and social media images.
Solid color: Good for simple designs and graphics.
Gradient: Good when you want a slightly more decorative appearance.
Choose the method based on the purpose of the image.
Quick Workflow for Beginners
If you are doing this for the first time, use this simple workflow:
1. Open the original photo.
2. Find the canvas or background tool.
3. Increase the canvas size.
4. Keep the original photo proportional.
5. Center or reposition the photo.
6. Choose a background color or effect.
7. Check the borders and important details.
8. Export the final image.
This workflow is enough for most basic image-padding tasks.
What We Will Cover in Part 3
In Part 3, we will finish the guide with best practices, detailed troubleshooting, a quick checklist, FAQs, FAQ schema, internal and external link suggestions, keyword usage notes, image suggestions, and an SEO/E-E-A-T publishing checklist.
We will also summarize the easiest method so that beginners can quickly add space around an image without accidentally cropping or distorting it.
Part 3: Best Practices, FAQs, and SEO Checklist
Adding space around an image is a simple editing technique, but getting the final result right requires a little attention to spacing, image quality, and background choice.
The goal is not simply to make the canvas bigger.
The goal is to create a final image where the original photo remains complete, clear, and visually balanced.
Best Practices for Adding Space Around an Image
Follow these simple tips whenever you need to expand an image without cropping it.
1. Always Start With the Original Image
Use the highest-quality version of the photo available.
Avoid starting with a screenshot or a heavily compressed copy when you have access to the original.
A better source image gives you more flexibility and helps maintain quality during editing.
2. Change the Canvas Instead of Cropping
This is the most important rule.
If your goal is to keep the complete image, expand the canvas.
Do not use the crop tool simply to make the image fit a new shape.
3. Keep the Original Aspect Ratio
Do not stretch the photo to fill the new canvas.
Lock the proportions when resizing the original image.
This prevents faces, products, buildings, and other objects from becoming distorted.
4. Use the Right Amount of Space
More space is not always better.
If you add too much empty space, the main image may become too small.
Add enough room to achieve the required layout while keeping the subject easy to see.
5. Keep Important Details Away From the Edges
Even after expanding the canvas, check where important elements are positioned.
Faces, logos, text, products, and other important objects should have enough breathing room.
This becomes particularly important when the final image will be displayed at a small size.
How to Choose the Right Background
The extra space around your image does not have to remain empty.
You can choose a background based on the style and purpose of the image.
Plain White Background
Use white when you want a clean, simple appearance.
It works particularly well for product photos, documents, websites, and minimalist designs.
Black Background
Black can create strong contrast and work well with portraits, gaming images, cinematic photography, and darker designs.
Matching Color
A color taken from the original image can make the added area feel connected to the photo.
Use a softer version of the color if the original is very bright.
Blurred Photo Background
A blurred version of the original photo can make the added space feel like a natural extension of the image.
This is useful for portraits and social media graphics.
Gradient Background
A subtle gradient can add more visual interest while still keeping the main photo as the focus.
Avoid overly bright or complicated gradients.
How to Add Space Without Losing Image Quality
Adding canvas space does not normally require you to reduce the quality of the original image.
However, your export settings can affect the final result.
For better quality:
- Start with a high-resolution original.
- Avoid repeatedly saving and re-saving the same compressed file.
- Keep the original image at a suitable size.
- Use a high-quality export setting.
- Avoid enlarging a very small photo unnecessarily.
- Check the final image before uploading it.
If the image will be used on a website, you can compress the final file after editing.
The goal is to balance image quality and file size.
How to Add Space Without Making the Image Blurry
If your original image is clear but the final version looks blurry, check whether the image was enlarged unnecessarily.
For example, if a small photo is placed inside a very large canvas and then enlarged to fill that canvas, the photo itself may lose clarity.
Instead, keep the original photo at a reasonable size and use the canvas to create the surrounding area.
If you need to make the actual photo larger, use a suitable image-upscaling method rather than simply stretching it.
How to Fix Stretched Images
If your photo looks wider, narrower, taller, or shorter than the original, the image proportions may have been changed.
To fix it:
- Undo the distortion if possible.
- Restore the original image.
- Enable the aspect-ratio or lock-proportions option.
- Resize the image proportionally.
- Use canvas space to fill the remaining area.
Never change the width and height independently unless you intentionally want to distort the image.
How to Fix Too Much Empty Space
If the final image contains a very large amount of empty space, compare the result with the purpose of the image.
If the space is unnecessary, reduce the canvas dimensions.
If the space is needed for text or another design element, use it intentionally.
For example, a large blank area on the left can work well if you are going to add a headline there.
But if there is no content in that area, the image may look unbalanced.
How to Fix Uneven Space Around the Image
If you want equal borders, center the original photo on the canvas.
Check all four sides:
- Top
- Bottom
- Left
- Right
If the space is intentionally different on each side, make sure there is a design reason for it.
For example, extra space on the left can be useful for text.
Extra space at the top can be useful for a title.
Uneven spacing should look intentional rather than accidental.
How to Add Space Around an Image for a Square Format
Creating a square image is one of the most common reasons for adding space.
If the original photo is vertical, increase the width of the canvas.
If the original photo is horizontal, increase the height of the canvas.
Then place the complete photo inside the square.
You can fill the remaining space with:
- A solid color
- White
- Black
- A blurred version of the image
- A gradient
- A simple design
This allows you to create a square image without cutting away important parts of the original photo.
How to Add Space Around an Image for a Profile Picture
Profile pictures often appear in a small frame, so keeping the subject clearly visible is important.
When preparing a profile picture:
- Create the required canvas shape.
- Place the complete photo inside it.
- Keep the main subject near the center.
- Leave some safe space around important details.
- Avoid very complicated backgrounds.
- Check how the image looks at a small size.
This can help prevent the face or other important parts from appearing too close to the edge.
How to Add Space Around an Image for a Product
For product images, a clean background is usually easier to work with than a complicated one.
A white or light-colored canvas can make the product stand out.
Keep the product large enough to remain recognizable.
Do not use so much empty space that the product occupies only a small part of the final image.
If you are preparing images for an online store, also make sure the final dimensions and file size match the requirements of the platform you are using.
How to Add Space Around an Image for Text
If you need to add text beside or above an image, first decide where the text will go.
Then expand the canvas in that direction.
For example, if the text will appear on the left, add more space on the left side and position the photo toward the right.
This creates a dedicated area for the text.
Keep enough contrast between the text and its background.
Also make sure the text does not overlap important parts of the original photo unless that is intentional.
Common Questions About Adding Space Around an Image
1. How do I add space around an image without cropping?
Increase the canvas size around the original image instead of using the crop tool. Keep the photo at its original proportions and fill the additional canvas with a background, border, or color.
2. How do I add white space around a photo?
Create a canvas larger than the original photo, center the image, and set the surrounding canvas area to white.
3. Can I add space around an image without changing its size?
Yes. Increase only the canvas size while keeping the original image dimensions unchanged.
4. How do I make a photo square without cropping it?
Create a square canvas and place the complete original photo inside it. Resize the photo proportionally if necessary, then fill the remaining space with a background or border.
5. What is the difference between canvas size and image size?
Image size changes the dimensions of the actual photo. Canvas size changes the overall area surrounding the photo.
6. Can I add space to only one side of an image?
Yes. Increase the canvas in the direction where you need additional room and reposition the original photo accordingly.
7. How do I add space above and below a photo?
Increase the canvas height and position the original image so that the additional space appears above, below, or both.
8. How do I add space to the sides of a portrait photo?
Increase the canvas width and keep the portrait centered or positioned according to your design. The extra space can be filled with a color, border, or blurred background.
9. Can I use a blurred version of the photo as the background?
Yes. A duplicate of the original image can be enlarged to cover the canvas, blurred, and placed behind the original sharp photo.
10. Why does my image become stretched when I add space?
The actual photo may have been resized without maintaining its original aspect ratio. Keep the proportions locked and use the canvas to create the additional space.
11. How much space should I add around an image?
There is no universal amount. Add enough space for the required layout while keeping the main subject large and easy to see.
12. Can I add space around a photo on my phone?
Yes. Many mobile image editors provide canvas, border, background, padding, or expansion features that can be used to create extra space.
13. Can I add space around a screenshot?
Yes. Increasing the canvas around a screenshot can create room for labels, arrows, headings, or explanations without removing information from the original screenshot.
14. Can I add space around a product image?
Yes. Product photos can be placed on a larger canvas to create more breathing room. White or simple backgrounds are often useful for clean product layouts.
15. Does adding canvas space reduce image quality?
Adding canvas space by itself does not require the original photo to become lower quality. However, exporting repeatedly or enlarging a low-resolution image can affect the final result.
Quick Checklist
Before saving your final image, check these points:
- Original image is complete.
- No important part has been accidentally cropped.
- Canvas is large enough for the required layout.
- Original image proportions are preserved.
- Borders are balanced if equal spacing is intended.
- Important details have enough breathing room.
- Background matches the photo.
- Main subject is still large enough to see clearly.
- Image is not stretched.
- Final image is sharp enough.
- File format is suitable for the intended use.
- Final file size is reasonable for web use.
Simple Workflow to Remember
If you want the easiest possible method, remember these steps:
Open the photo → Expand the canvas → Keep the original proportions → Position the photo → Add a background → Check the spacing → Export
That is all you need for most basic image-padding tasks.
The important part is understanding that you are not trying to force the photo into a new shape.
You are creating a larger space around the photo.
Conclusion
Adding space around an image without cropping is a simple way to change the layout of a photo while preserving the complete original image.
The main technique is to increase the canvas size instead of reducing the image with a crop tool.
Once the canvas is larger, you can position the photo wherever you need and use the additional area as a white border, black border, colored background, blurred image, gradient, or space for text.
This method works for portraits, landscapes, product photos, screenshots, profile pictures, thumbnails, social media graphics, blog images, and website designs.
The most important things to remember are to keep the original aspect ratio, avoid unnecessary empty space, choose a background that supports the image, and check the final composition before exporting.
With this simple workflow, you can make an image wider, taller, square, or more spacious without cutting away the parts of the photo you want to keep.
Ready to optimize your images?
Every tool mentioned in this article is free to use. No upload, no signup, and no watermarks — ever.
Try our free toolsRelated articles
How to Make a WhatsApp DP Without Cropping Your Photo
Learn how to make a WhatsApp DP without cropping your photo using simple resizing, borders, backgrounds, and easy photo editing methods.
Wallpapers: How to Download, Resize and Make Them HD
Learn how to download wallpapers, resize them for any screen, and make them HD using simple image editing, upscaling, and quality enhancement techniques.
How to Make 1980s AI Photos With Your Own Picture
Learn how to make 1980s AI photos with your own picture using AI tools, retro outfits, vintage backgrounds, film effects, and detailed prompts.