
How to Improve a YouTube Thumbnail With AI
Learn how to improve a YouTube thumbnail with AI using practical methods for better composition, text, backgrounds, colors, faces, and visual clarity. Discover how to use AI to enhance an existing thumbnail without making it look confusing or generic.
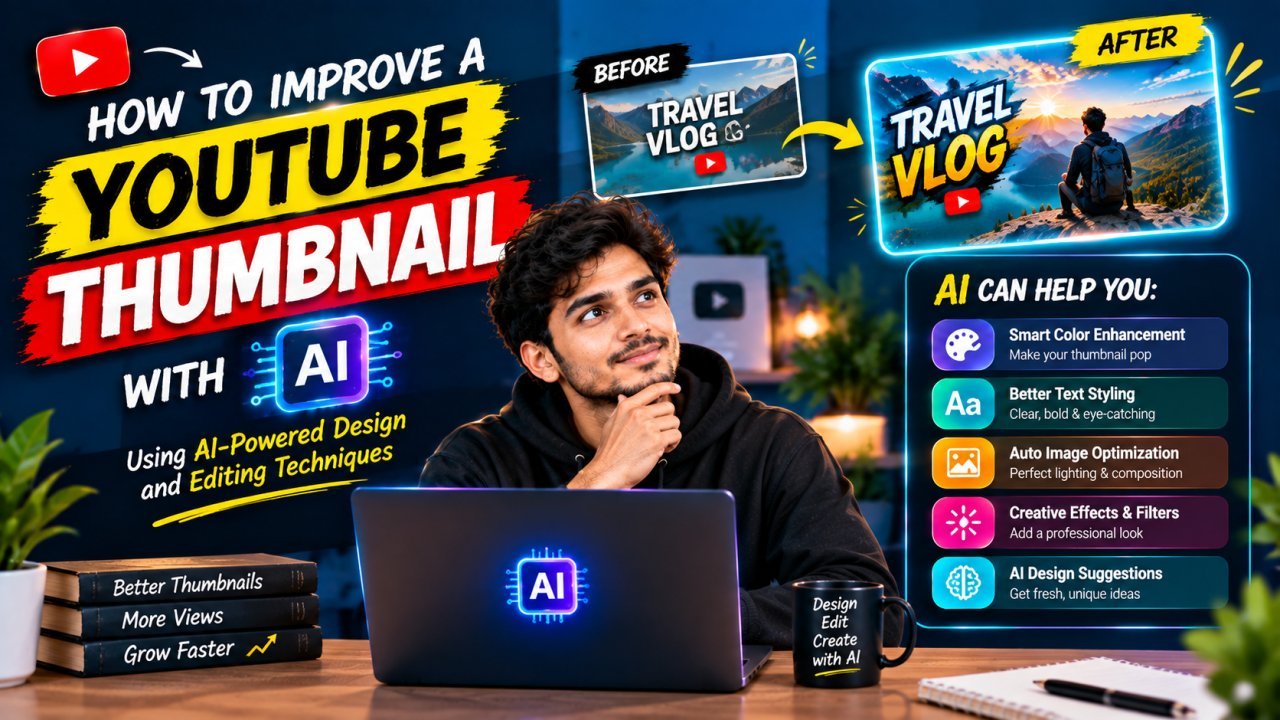
How to Improve a YouTube Thumbnail With AI
A good YouTube thumbnail can make a video easier to understand before someone reads the title. But creating a thumbnail does not always mean starting from a blank canvas.
If you already have a thumbnail that looks average, you can use AI to improve it.
Learning how to improve a YouTube thumbnail with AI can help you enhance the background, improve image quality, create better compositions, remove distracting elements, improve lighting, generate new visual ideas, and make the design easier to understand.
The important part is not to change everything just because AI can change it. A better approach is to identify what is weak in the existing thumbnail and use AI to solve specific design problems.
For example, if the subject is difficult to see, AI can help create a cleaner background. If the image looks dull, AI tools can help improve lighting and contrast. If the composition feels empty, you can use AI to expand or replace parts of the background.
In this guide, you will learn practical ways to improve an existing YouTube thumbnail with AI while keeping the final design clear, relevant, and useful.
What Does It Mean to Improve a YouTube Thumbnail With AI?
Improving a thumbnail with AI means using artificial intelligence as part of the editing and design process rather than simply generating a completely new image.
You might start with an existing thumbnail and use AI to improve one or more elements, such as:
- All Tools
- Image quality
- Background
- Lighting
- Colors
- Subject separation
- Facial appearance
- Composition
- Cropping
- Visual effects
- Object removal
- Background expansion
- Supporting visual elements
This approach can be especially useful when your existing thumbnail already has a good concept but needs visual improvements.
For example, imagine your thumbnail contains a person standing in front of a busy room.
The person may be difficult to see because the background contains too many objects.
Instead of creating an entirely new thumbnail, you could use AI to simplify the background, separate the person from it, improve the lighting, and then add a short text element.
The result can communicate the same idea more clearly.
Why Improve an Existing Thumbnail Instead of Starting Over?
Sometimes the basic idea of a thumbnail is already good.
The problem may simply be execution.
You may already have:
- A useful photo
- A strong facial expression
- A relevant product
- A good video screenshot
- A recognizable subject
- A strong thumbnail concept
Starting over could mean losing those useful elements.
AI gives you the option to improve individual parts while keeping the original concept.
For example:
| Existing Problem | Possible AI Improvement |
|---|---|
| Background is distracting | Simplify or replace the background |
| Subject is hard to see | Improve separation and contrast |
| Image looks dull | Improve lighting and tonal balance |
| Background does not fill the canvas | Expand the image |
| Unwanted object appears | Remove the distracting object |
| Composition feels empty | Add relevant visual elements |
| Subject looks too small | Reframe or adjust composition |
| Thumbnail feels generic | Add more specific visual details |
| Image quality is weak | Use appropriate enhancement tools |
| Colors do not work together | Adjust the visual color balance |
The goal is not to add more effects.
The goal is to make the existing idea easier to understand.
Start by Finding the Problem With Your Thumbnail
Before using an AI tool, look at the thumbnail and identify what is actually wrong.
This step is important because AI can make a bad design more complicated if you give it no clear direction.
Ask yourself a few simple questions.
Is the Main Subject Easy to See?
The main subject should usually be one of the first things viewers notice.
If the subject blends into the background, the thumbnail may need better separation.
For example, if a person is wearing a dark shirt and standing against a dark background, AI could help create a brighter or simpler background.
Is the Thumbnail Too Busy?
A thumbnail can contain many interesting elements and still be difficult to understand.
Too many objects, colors, effects, and text elements can compete for attention.
AI can help remove unnecessary objects or generate a cleaner background.
Is the Main Idea Obvious?
Look at the thumbnail for a few seconds and ask:
Can I understand the basic topic without reading the entire title?
If the answer is no, the visual concept may need improvement.
For example, a video about testing an expensive smartphone should ideally have a recognizable phone or relevant visual subject rather than a completely abstract background.
Is the Text Easy to Read?
Thumbnail text should be easy to understand at a small size.
If the text disappears into the background, you can improve the background or manually adjust the text styling.
AI can help create the visual environment, but manual text editing often gives you better control over exact wording, font size, placement, and readability.
Use AI to Improve the Thumbnail Background
One of the easiest ways to improve an existing thumbnail is to work on the background.
A background should support the main subject rather than compete with it.
For example, suppose you have a photo of a person holding a laptop.
The original background might contain:
- Furniture
- People
- Random objects
- Bright lights
- Cluttered walls
You could use AI to create a cleaner environment that matches the video's topic.
For a technology video, you might use:
- A modern workspace
- Computer screens
- Subtle digital elements
- A clean studio
- A futuristic environment
The important point is relevance.
Do not replace a normal background with an unrelated dramatic scene simply because it looks impressive.
Keep the Background Secondary
The background should usually support the subject.
If the background becomes more visually interesting than the person, product, or main object, the thumbnail can lose its focus.
A useful AI prompt might look like this:
Create a clean modern technology background for a YouTube thumbnail. Keep the center area visually simple, use subtle blue lighting, add realistic computer equipment in the distance, and leave clear space around the main subject.
Notice that the prompt does not ask AI to fill every part of the image with detail.
It specifically asks for visual space around the subject.
Improve Image Quality With AI
Sometimes the concept of your thumbnail is good, but the original image is low quality.
For example, you might have an older photo that is:
- Slightly blurry
- Too dark
- Low resolution
- Poorly cropped
- Lacking detail
AI-powered image enhancement tools can sometimes help improve the appearance of such images.
However, enhancement should be used carefully.
Increasing sharpness too much can create unnatural edges.
Over-processing a face can make the person look artificial.
Excessive detail can also make a thumbnail look less natural.
The goal should be to make the image cleaner and easier to see, not to make every pixel extremely sharp.
Improve Subject Separation
Subject separation is another useful way to improve a thumbnail.
Imagine a person standing in front of a complicated background.
Their clothing, hair, or face may blend into the surrounding objects.
You can use AI-assisted editing to:
- Remove or simplify the background.
- Separate the subject from surrounding elements.
- Create stronger contrast.
- Add a cleaner background.
- Adjust lighting around the subject.
- Place the subject in a stronger position within the composition.
This can make the thumbnail easier to understand at a glance.
Example
Imagine an existing thumbnail showing a creator standing in a messy office.
The creator is small and surrounded by objects.
Instead of completely redesigning the thumbnail, you could:
- Remove unnecessary objects.
- Increase the size of the subject.
- Create more empty space around the person.
- Use a simpler background.
- Improve lighting on the face.
- Add short, readable text.
The underlying idea stays the same, but the visual hierarchy becomes stronger.
Improve Thumbnail Colors With AI
Color can change how quickly a thumbnail attracts attention.
But using more colors does not automatically make a thumbnail better.
The important thing is contrast and visual consistency.
For example, if the subject, background, and text all have similar tones, the thumbnail may look flat.
AI-assisted editing can help you experiment with:
- Brighter backgrounds
- Darker backgrounds
- Stronger subject contrast
- Different lighting
- Warmer or cooler visual tones
- More consistent colors
You can also ask AI to create alternative background concepts that complement your existing subject.
For example:
Create a clean high-contrast background that makes the subject stand out clearly. Use a modern technology style, subtle lighting, minimal details, and enough empty space for large white text.
Then manually compare the result with your original thumbnail.
Use AI to Remove Distracting Objects
Sometimes one small object can make a thumbnail look messy.
It could be:
- A random person in the background
- A cable
- A piece of furniture
- An unrelated sign
- A distracting object
- An unwanted background element
AI-powered object removal can help clean up these areas.
But always inspect the edited image afterward.
AI editing can sometimes produce strange textures or distorted areas around the removed object.
A thumbnail may look fine at full size but reveal obvious artifacts when viewed closely.
Improve the Composition
Composition refers to how the visual elements are arranged inside the thumbnail.
A strong concept can still look weak if the elements are positioned poorly.
For example, you may have:
Person + Product + Text + Background
But if all four elements are placed in the center, the thumbnail can feel crowded.
A better layout could place:
- The person on one side
- The product near the center
- The text in open space
- Supporting background elements behind the subject
AI can help you explore alternative compositions by generating different backgrounds or expanding the image in a particular direction.
For example, if your subject is already positioned on the right side, you could use AI to extend the background toward the left and create space for text.
This is often more useful than shrinking the subject just to make room for text.
Use AI to Create More Thumbnail Variations
One of the biggest benefits of AI is speed.
Instead of spending a long time creating one design, you can explore several variations.
For the same video, you could test:
Version 1: Person-focused
Large face + simple background + short text.
Version 2: Product-focused
Large product + dramatic background + short text.
Version 3: Before-and-after
Two contrasting visual states + short text.
Version 4: Problem-focused
Visual representation of the problem + emotional reaction.
Version 5: Result-focused
Show the final result prominently with supporting visual elements.
These variations can help you discover which visual direction communicates your video most clearly.
AI should be used to create options, not to automatically decide which thumbnail is best.
Improve a Thumbnail Without Making It Look Fake
A common problem with AI editing is over-processing.
You may start with a normal thumbnail and keep adding:
- Glowing effects
- Dramatic lighting
- Artificial backgrounds
- Excessive sharpness
- Large visual effects
- Unrealistic colors
- Too many objects
The final result may look impressive but become less believable.
A better approach is to ask:
Does this edit make the video topic clearer?
If the answer is no, the effect may not be necessary.
For educational, business, technology, finance, tutorial, and review content, clarity can often be more useful than extreme visual effects.
Summary
Improving an existing YouTube thumbnail with AI is often easier than starting completely from scratch.
The basic process is:
Analyze the thumbnail → Identify the biggest problem → Use AI to solve that problem → Edit manually → Check readability → Compare versions
AI can help improve backgrounds, image quality, subject separation, colors, composition, and unwanted objects.
But the most important part remains the original idea.
A thumbnail should communicate the video's subject clearly and quickly. AI should support that goal rather than add unnecessary complexity.
The first step in improving a YouTube thumbnail with AI is to identify the biggest problem instead of changing everything at once.
Look at your current thumbnail and decide what needs the most attention.
For example:
- The subject is too small.
- The background is too busy.
- The text is difficult to read.
- The colors look dull.
- The face is not clear.
- The image looks low quality.
- The composition feels unbalanced.
- There is too much empty space.
- Important elements are competing with each other.
Once you identify the biggest problem, use AI specifically to solve it.
This makes the editing process more controlled and helps you avoid creating a thumbnail that looks over-designed.
A simple workflow is:
Find the problem → Choose the right AI feature → Make one improvement → Check the result → Make the next adjustment.
Composition is one of the most important parts of a YouTube thumbnail.
Even a high-quality image can perform poorly as a visual design if the main elements are positioned badly.
AI can help you explore different compositions without completely recreating the thumbnail.
For example, if your person is positioned in the center, you could move the subject visually toward one side and create empty space on the other side for text.
A common layout can include:
- Main subject on the left
- Supporting object on the right
- Short text in open space
- Simple background behind everything
Another layout might use:
- Large face on one side
- Product or object on the other side
- Very short text near the top or bottom
The correct arrangement depends on the video topic.
The important thing is to create a clear visual hierarchy.
The viewer should quickly understand what the main subject is, what the supporting element represents, and where the text belongs.
AI image expansion can be useful when your existing thumbnail does not have enough space for text or other design elements.
For example, imagine you have a portrait photo where the person's face takes up most of the image.
You want to place large text next to the person, but there is not enough empty space.
Instead of making the person smaller, you can use AI to expand the background.
For example:
Original: Person fills most of the frame.
Improved: Person remains large on the right side while AI extends the environment toward the left.
This creates additional space for text without reducing the visual importance of the subject.
When expanding a background, make sure the generated area matches the original lighting, perspective, and environment as closely as possible.
Faces can be important visual elements in many YouTube thumbnails.
If the face is too dark, too small, or surrounded by distracting elements, it may lose visual impact.
AI-assisted editing can help improve:
- Lighting
- Background separation
- Overall image quality
- Contrast around the face
- Cropping
- Background distractions
However, avoid changing the person's natural appearance unnecessarily.
The goal should be to make the existing face easier to see rather than creating an unrealistic face.
This is especially important when the thumbnail represents a real creator, customer, expert, or public personality.
Always check the final result carefully for unnatural facial details.
If your video is about a product, the product should usually remain recognizable.
This applies to videos about:
- Smartphones
- Laptops
- Cameras
- Headphones
- Cars
- Software
- Gadgets
- Online tools
- Beauty products
- Other physical products
AI can help create a better environment around the product.
For example, if you have a clean image of a smartphone, you could place it in a modern technology environment.
But avoid asking AI to completely redesign important product details if accuracy matters.
The product's:
- Shape
- Buttons
- Screen
- Logo
- Camera layout
- Color
- Physical proportions
should remain accurate enough for the viewer to understand what is being shown.
A strong approach is to keep the original product image and use AI mainly for the background and supporting elements.
Different YouTube niches can benefit from different thumbnail styles.
AI can help you create backgrounds that match the subject of the video.
Gaming
Use relevant game-inspired environments, action scenes, dramatic lighting, or recognizable visual themes.
Keep the main character or important gameplay element easy to identify.
Technology
Use clean workspaces, devices, screens, digital environments, or modern backgrounds.
Avoid filling the image with unnecessary futuristic effects.
Finance
Use simple professional environments, charts, money-related visual elements, or business settings when relevant.
Keep the design trustworthy and easy to understand.
Travel
Use recognizable destinations, landscapes, landmarks, transportation, or travel-related environments.
The background should support the destination rather than hide the main subject.
Education
Use clean backgrounds, relevant objects, diagrams, books, classrooms, or topic-specific visuals.
The design should prioritize clarity over excessive effects.
The key is to make the AI-generated background relevant to the video rather than simply making it visually dramatic.
Before-and-after concepts can work well when the video itself is about a transformation.
For example:
- Old website → New website
- Bad photo → Improved photo
- Messy room → Clean room
- Old design → New design
- Beginner result → Professional result
AI can help create or improve the supporting visuals while keeping the transformation clear.
A simple layout could show the "before" result on one side and the "after" result on the other side.
Keep the difference obvious.
If both sides look almost identical, the viewer may not immediately understand the point of the thumbnail.
AI can help you create empty space for text, but the final text is often better added manually.
For example, if your subject is positioned on the right, you can ask AI to create a clean background area on the left.
Then add your own text using an image editor.
This gives you control over:
- Exact wording
- Font
- Font size
- Position
- Spacing
- Alignment
- Text color
- Outline or shadow
Keep the text short.
Instead of writing:
"Here Is Everything You Need to Know About Creating Better YouTube Thumbnails"
a thumbnail might use:
"BETTER THUMBNAILS"
The title can provide additional information.
The thumbnail should provide a quick visual hook.
One of the most useful ways to improve a thumbnail with AI is to create several different versions.
For example, create:
Version A: Large face + simple background + short text
Version B: Product-focused + clean background + short text
Version C: Before-and-after composition
Version D: Large result image + minimal text
Version E: Close-up subject + dramatic but simple background
Compare the versions based on clarity.
Ask:
- Which version has the clearest subject?
- Which version is easiest to understand?
- Which version has the strongest visual hierarchy?
- Which version remains readable at a small size?
- Which version accurately represents the video?
Do not automatically choose the version with the most effects.
A simpler design can sometimes communicate the topic more clearly.
One problem with AI-generated thumbnails is that they can sometimes look similar to many other AI images.
Generic backgrounds, excessive glowing effects, unrealistic lighting, and repeated visual styles can make a thumbnail feel less distinctive.
To make the result more specific, include details in your prompt.
Instead of:
"Create a modern technology background."
Try:
"Create a clean home-office technology background with a laptop on a wooden desk, subtle monitor glow, realistic indoor lighting, minimal objects, shallow depth of field, and clear empty space on the left for thumbnail text."
The second prompt gives the AI more direction.
You can make the thumbnail even more specific by describing:
- Environment
- Subject position
- Camera angle
- Lighting
- Mood
- Background details
- Empty space
- Visual hierarchy
Background removal can be particularly useful when the original photo has a distracting environment.
For example, you might have a creator photo taken in a normal room.
You can remove the original background and place the person over a cleaner environment.
A simple workflow is:
- Upload the original image.
- Remove the background.
- Check the edges around the hair, hands, and clothing.
- Add a new background.
- Match the lighting between the subject and background.
- Adjust the subject size and position.
- Add text manually.
- Review the final thumbnail at a smaller size.
Pay particular attention to hair and small details.
Background removal can sometimes create rough or unnatural edges, especially around complex areas.
Replacing the background is not enough.
The subject and background should look like they belong together.
For example, if your subject is photographed under warm indoor lighting but the AI background has strong blue outdoor lighting, the final image may look unnatural.
Try to match:
- Lighting direction
- Brightness
- Color temperature
- Shadows
- Perspective
- Depth
- Overall image quality
If the subject is bright but the background is extremely dark, the difference may look intentional or it may look artificial.
Small adjustments can make the composition feel more natural.
Lighting can have a major effect on how a thumbnail looks.
AI-assisted editing can help you experiment with:
- Brighter faces
- Stronger subject lighting
- Background brightness
- Highlight control
- Shadow adjustment
- Directional lighting
For example, if the face of your main subject is too dark, improving the lighting around the face can make it easier to notice.
However, avoid making the lighting so dramatic that the image looks unrealistic.
The purpose is to improve visibility and visual hierarchy.
Sometimes the best improvement is removing something.
A thumbnail may contain:
- Too many objects
- Random people
- Unnecessary signs
- Cables
- Furniture
- Background clutter
- Repeated visual elements
Removing these details can create more visual focus.
A useful rule is:
If an element does not help explain the video, consider whether it needs to remain in the thumbnail.
AI object removal can make this process faster, but inspect the edited area carefully for strange textures or repeated patterns.
Mistake 1: Changing Everything
If your existing thumbnail already has a strong concept, you may not need a complete redesign.
Improve the weakest element first.
Mistake 2: Adding Too Many Effects
Glow, particles, dramatic lighting, and other effects can quickly make a thumbnail look crowded.
Use effects only when they support the main idea.
Mistake 3: Making the Background More Important Than the Subject
A beautiful background can still be a bad choice if it distracts from the person, product, or main visual.
Mistake 4: Trusting AI Without Checking the Result
AI-generated edits can contain unusual details.
Check:
- Faces
- Hands
- Products
- Text
- Logos
- Objects
- Edges
- Shadows
Mistake 5: Making the Thumbnail Too Realistic
A highly detailed image is not necessarily a better thumbnail.
The design still needs clear visual hierarchy.
Mistake 6: Using AI-Generated Text Without Checking It
If AI creates text inside an image, inspect every word.
For important thumbnail text, manually adding the final wording gives you more control.
Mistake 7: Ignoring the Actual Video
The thumbnail should represent the video accurately.
Do not create a completely unrelated visual simply because it looks more dramatic.
Here is a simple workflow you can follow whenever you want to improve an existing YouTube thumbnail with AI.
Step 1: Review the Existing Thumbnail
Look at the current design and identify the biggest weakness.
Step 2: Identify the Main Subject
Decide what viewers should notice first.
Step 3: Simplify the Composition
Remove unnecessary elements and create a clear visual hierarchy.
Step 4: Improve the Background
Use AI to clean, replace, or expand the background where necessary.
Step 5: Improve Image Quality
Enhance the image carefully without creating unnatural details.
Step 6: Improve Subject Separation
Make sure the main subject stands out from the background.
Step 7: Adjust Lighting and Contrast
Make important elements easier to see.
Step 8: Add or Improve Supporting Visuals
Use relevant objects or visual elements only when they help communicate the topic.
Step 9: Add Thumbnail Text Manually
Use short, readable wording with strong contrast.
Step 10: Create Multiple Versions
Generate several compositions and compare them.
Step 11: Check the Thumbnail at a Small Size
A thumbnail should still be understandable when viewed small.
Step 12: Check for AI Errors
Look closely at faces, hands, products, text, logos, and background details.
Step 13: Compare With the Original
Ask whether the new version actually communicates the topic more clearly.
Step 14: Export the Final Version
Use the current recommended YouTube thumbnail requirements when preparing the final image.
Before publishing your improved YouTube thumbnail, check:
- Main subject is immediately visible.
- Background does not distract from the subject.
- Text is short and readable.
- Text has enough contrast.
- Face or product details look natural.
- AI-generated objects have been checked.
- Important product details are accurate.
- No unnecessary objects remain.
- Composition feels balanced.
- Colors work together.
- Image is clear at a small size.
- Thumbnail accurately represents the video.
- The design does not rely on excessive effects.
- The final image looks intentional rather than randomly AI-generated.
How to Improve a YouTube Thumbnail With AI
Improving a YouTube thumbnail with AI does not mean replacing the entire design. In many cases, you can get a better result by identifying the weakest part of the existing thumbnail and improving it with the right AI editing technique.
AI can help you clean up backgrounds, remove distracting objects, improve image quality, expand the canvas, adjust lighting, create better compositions, and generate different visual ideas.
The key is to keep the original purpose of the thumbnail in mind.
A thumbnail should make the video's topic easy to understand. It should have a clear main subject, readable text, useful contrast, and a visual design that works even when the image is viewed at a small size.
Instead of adding more effects simply because an AI tool can add them, focus on improvements that make the thumbnail clearer.
A simple process is:
Analyze the existing thumbnail → Find the biggest problem → Use AI to improve that element → Edit the result manually → Check the thumbnail at a small size → Compare different versions.
With this approach, AI becomes a practical design assistant rather than a replacement for good thumbnail strategy.
Whether you create gaming videos, tutorials, technology content, reviews, educational videos, travel content, or business videos, the same principle applies: improve the visual elements that help viewers understand the video quickly.
Key Takeaways
Here are the most important points to remember when learning how to improve a YouTube thumbnail with AI:
- Start with your existing thumbnail instead of automatically creating a new one.
- Identify the biggest design problem before making changes.
- Use AI to clean or replace distracting backgrounds.
- Improve subject separation so the main visual is easier to see.
- Use AI to expand the background when you need additional space for text.
- Improve image quality carefully without making the image look artificial.
- Remove unnecessary objects that distract from the main subject.
- Use AI to explore different compositions.
- Keep important faces and products accurate.
- Add important thumbnail text manually when possible.
- Keep text short and easy to read.
- Create multiple thumbnail versions and compare them.
- Avoid excessive effects and unnecessary visual details.
- Check AI-generated images for unusual faces, hands, objects, logos, and other errors.
- Make sure the final thumbnail accurately represents the video.
- Always judge the thumbnail at a small viewing size.
- Use AI to improve clarity and communication, not just visual effects.
Call to Action
If you already have YouTube thumbnails that look average, you do not always need to start from scratch.
Use AI to identify and improve the weak parts of your existing thumbnail.
Clean the background, improve the subject, remove distractions, create better composition, and test different versions before choosing the final design.
Start with one existing thumbnail today and see which single improvement makes the biggest difference.
Once you understand how to improve a YouTube thumbnail with AI, you can use the same workflow to improve thumbnails across your entire YouTube channel.
1. How can I improve a YouTube thumbnail with AI?
You can improve a YouTube thumbnail with AI by identifying weak elements such as the background, composition, lighting, image quality, or subject separation and then using AI editing tools to improve those specific areas. After making the changes, add or adjust the text manually and check the final thumbnail at a small size.
2. Can AI improve an existing YouTube thumbnail?
Yes. AI can be used to improve an existing thumbnail instead of creating a completely new design. Depending on the tool, you can remove objects, replace or expand backgrounds, enhance images, adjust visual elements, and explore alternative compositions.
3. How do I make my YouTube thumbnail look better with AI?
Start by finding the biggest weakness in your thumbnail. You can then use AI to simplify the background, improve subject separation, adjust lighting, remove distracting objects, improve image quality, or create additional visual space. Avoid adding effects that do not help communicate the video's topic.
4. Can AI improve a blurry YouTube thumbnail?
AI image enhancement tools can sometimes improve the appearance of a low-quality or slightly blurry image. However, the result depends on the original image and the tool being used. Avoid excessive sharpening because it can create unnatural edges and details.
5. Can AI change the background of a YouTube thumbnail?
Yes. AI-assisted editing can remove an existing background, generate a new background, or expand the current background. This can be useful when the original background is distracting or when you need more empty space for thumbnail text.
6. How can AI make a YouTube thumbnail more eye-catching?
AI can help create stronger contrast, cleaner backgrounds, better subject separation, improved lighting, and alternative compositions. However, adding more effects does not automatically make a thumbnail better. The main subject and video topic should remain easy to understand.
7. Should I use AI-generated text on my YouTube thumbnail?
For important thumbnail wording, manually adding the text can give you better control over the exact words, font, size, position, spacing, and readability. AI can help with visual ideas, but the final text should always be checked carefully.
8. Can AI remove objects from a YouTube thumbnail?
Yes. AI-powered object removal can help remove unwanted people, objects, cables, furniture, signs, and other distracting elements from an image. Always inspect the edited area afterward because AI editing can sometimes create unusual textures or artifacts.
9. How do I improve the background of a YouTube thumbnail with AI?
First decide whether the background needs to be cleaned, replaced, or expanded. Then use an AI editing tool to create a background that matches the video's topic and supports the main subject. Keep the background less visually dominant than the main subject.
10. Is AI enough to create a professional YouTube thumbnail?
AI can help with many parts of thumbnail creation and improvement, but the final design still benefits from human editing and review. Text placement, composition, accuracy, branding, and visual clarity should be checked before publishing.
Ready to optimize your images?
Every tool mentioned in this article is free to use. No upload, no signup, and no watermarks — ever.
Try our free toolsRelated articles
How to Create a YouTube Thumbnail With AI
Learn how to create a YouTube thumbnail with AI using simple prompts, image generation, editing, text placement, and mobile-friendly design tips.
How to Make a YouTube Thumbnail With Two Images
Learn how to make a YouTube thumbnail with two images. Follow simple steps to combine photos, arrange them clearly, and create a balanced thumbnail that works on mobile.

How to Make YouTube Thumbnail Text Clear and Sharp
Learn how to make YouTube thumbnail text clear and sharp with better fonts, sizing, contrast, spacing, outlines, export settings, and simple design techniques.