
How to Blur the Background in a YouTube Thumbnail
Learn how to blur the background in a YouTube thumbnail with simple editing steps. Make your subject stand out while keeping the design clean and easy to understand.
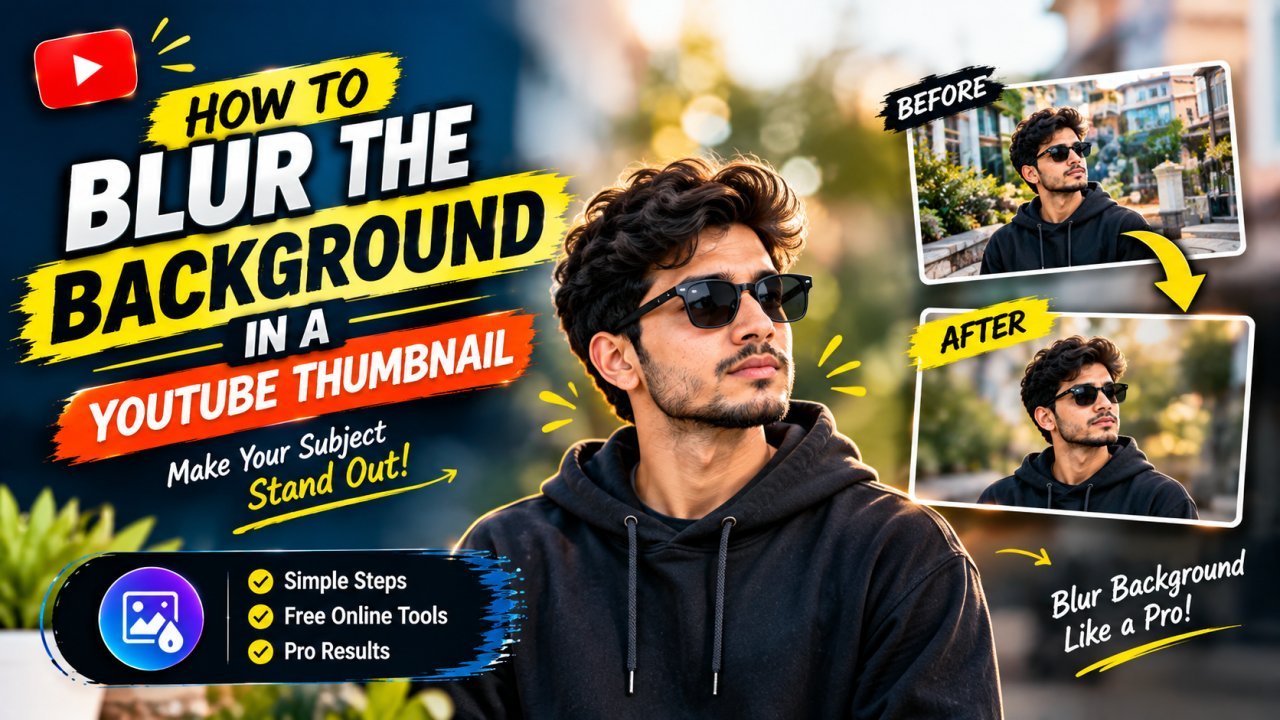
How to Blur the Background in a YouTube Thumbnail
A busy background can make a YouTube thumbnail difficult to understand at a glance. Blurring the background is one way to reduce distractions and draw more attention to the main subject, whether that is a person, product, or object.
Learning how to blur the background in a YouTube thumbnail does not require advanced editing skills. Many image editors let you blur the whole image, select only the background, or separate the subject from the background before applying the effect.
In this guide, you’ll learn when background blur helps, how to choose the right amount, and how to create a clean result without making the thumbnail look artificial.
Why Blur the Background in a YouTube Thumbnail?
A thumbnail appears alongside many other videos, often at a small size. If the background contains too many details, viewers may struggle to identify the main subject quickly.
A subtle blur can help by:
- All Tools
- Making the main subject easier to notice.
- Reducing visual distractions behind the subject.
- Helping text stand out against a busy scene.
- Giving the image a sense of depth.
- Making a photo feel more focused and intentional.
Background blur is not always necessary. If the original background is simple and supports the video’s topic, keeping it sharp may work better. The goal is to improve clarity—not to blur everything automatically.
What Is Background Blur?
Background blur is an editing effect that softens details in the background while keeping the main subject clear.
For example, imagine a thumbnail showing a person holding a camera. The room behind them contains shelves, boxes, and other objects. Softening the room can reduce those distractions while keeping the person and camera sharp.
There are two common approaches:
Blur the entire image
This applies blur to the whole thumbnail, including the subject. It can be useful for a background layer or an image that will sit behind another sharp subject, but it usually does not work well when the thumbnail contains only one photo.
Blur only the background
This keeps the main subject sharp and softens the area behind it. It usually creates a clearer result when the goal is to make a person or object stand out.
When Should You Use a Blurred Background?
Background blur can be useful when the original photo has details that compete with the main subject.
Consider using it when:
- The background contains many small objects.
- The subject blends into a detailed scene.
- You want to make a person or product more prominent.
- Text needs a calmer area behind it.
- You want a soft, portrait-style look.
Avoid strong blur when the background contains important information. For example, if the video is about visiting a specific place, blurring the location so much that viewers cannot recognize it may weaken the thumbnail.
Choose the Right Amount of Blur
The best blur level depends on the photo, the subject, and the thumbnail’s purpose. A small amount may be enough to reduce distractions while preserving the scene.
Use a light blur for natural photos
A light blur can soften busy details without making the background look completely out of focus. It is often a good starting point for portraits, product photos, and everyday scenes.
Use a stronger blur when the background is very busy
A stronger effect may help when the background contains many competing details. However, check that the image still looks believable and that the subject’s edges remain clean.
Avoid blurring the subject
If the subject becomes soft around the edges, the selection or masking may need adjustment. Pay special attention to hair, glasses, clothing, hands, and small product details.
Prepare Your Thumbnail Before Editing
A few simple steps can make the editing process easier.
1. Save a copy of the original
Keep an untouched version of the photo or thumbnail. This lets you compare the edited result with the original and undo changes if needed.
2. Use the largest suitable image available
A higher-resolution source gives you more detail to work with. If possible, edit the original photo rather than a small, compressed thumbnail.
3. Decide what should stay sharp
Identify the main subject before applying blur. If the thumbnail includes a person, product, and text, decide which elements should remain crisp and readable.
4. Check the background
Look at the area behind the subject. A plain wall may need only a light blur, while a detailed room or street scene may need more adjustment.
How to Blur the Background in a YouTube Thumbnail
The exact tools and labels vary between editing apps, but the general workflow is similar.
Step 1: Open your image in an editor
Open the photo or thumbnail in an image editor that supports blur effects. If your design uses separate layers, keep the subject and background on different layers when possible.
Step 2: Find the blur tool or effect
Look for a blur filter, background blur option, or selection-based blur tool. Some editors let you choose an area directly; others require you to select or mask the subject first.
Step 3: Select the background
If the editor offers automatic subject selection or background selection, use it as a starting point. Otherwise, select the background manually.
Check the selection around the subject. If parts of the subject are included in the background selection, they may become blurred too.
Step 4: Apply a light blur
Start with a low blur setting. Increase it gradually while checking how the thumbnail looks.
Avoid choosing the strongest setting immediately. Heavy blur can make the image look artificial and may create distracting edges around the subject.
Step 5: Check the subject’s edges
Zoom in and inspect areas where the subject meets the background. Look for:
- Blurred hair or clothing.
- A sharp outline or halo around the subject.
- Background details that remain sharply visible in some places.
- Small gaps where the background selection missed an area.
If you notice these issues, refine the selection or mask before continuing.
Step 6: Review the whole thumbnail
Zoom out and check the complete design. Make sure the subject is still clear, the blur is not too strong, and any text remains readable.
A background effect that looks attractive when zoomed in may not look right at the small size where viewers see the thumbnail.
Step 7: Save and export the image
Save an editable version if your editor supports it. Then export a separate image for uploading and open the exported file to confirm that the blur looks as expected.
What If Your Editor Blurs the Whole Image?
If the blur effect softens the subject as well as the background, you may be applying it to the entire image.
Try one of these approaches:
- Select the background before applying blur.
- Use a background-removal tool to separate the subject.
- Duplicate the image, blur the lower layer, and keep the subject sharp on the upper layer.
- Use a mask to control which parts of the image receive the effect.
The right approach depends on the editing tools available and how complex the image is.
Advanced Ways to Blur a YouTube Thumbnail Background
The basic method is often enough for a simple photo. If the background is busy or the subject has fine details, you may need more control. Layers, masks, and careful selection can help keep the subject sharp while softening only the background.
Method 1: Blur the Background on a Separate Layer
If your editor supports layers, you can keep the original image intact and apply blur to a duplicate.
- Open the image and duplicate its layer.
- Apply a blur effect to the lower copy.
- Keep the upper copy sharp.
- Select or mask the subject on the upper copy so the blurred layer shows around it.
- Refine the mask around hair, clothing, and other detailed edges.
This method gives you more flexibility because you can adjust the blur later without permanently changing the original image.
Method 2: Use a Mask to Control the Blur
A mask determines which parts of a layer are visible. It can help you apply blur to the background while protecting the subject.
A typical workflow is:
- Create a duplicate of the image.
- Apply blur to the duplicate.
- Add a mask to the blurred layer.
- Hide the blurred effect over the main subject.
- Refine the mask where the subject meets the background.
If the editor supports a soft brush, use it carefully around the subject’s edges. A hard mask may create a visible outline, while an overly soft mask can leave a blurry halo around the subject.
Method 3: Select the Subject First
Some editors can automatically identify a person or main object. Use that selection as a starting point, then invert it if needed so the background is selected instead.
Automatic selections may miss small details or include parts of the background. Zoom in and correct the selection before applying blur.
Pay special attention to:
- Hair and flyaway strands.
- Glasses and transparent objects.
- Fingers and gaps between arms.
- Thin product parts, such as wires or handles.
- Areas where the subject has a colour similar to the background.
Method 4: Use a Gradient or Depth Blur
Some editors offer gradient blur or depth-based blur. These effects can make one area softer than another rather than applying the same blur everywhere.
A gradual effect may suit a scene where the background extends from the foreground into the distance. However, use it carefully: an uneven blur can look artificial if it does not match the scene.
Practical Examples: How Much Blur Should You Use?
The right amount depends on the image and what viewers need to notice.
| Thumbnail situation | Suggested approach | What to watch for |
|---|---|---|
| Person in a busy room | Light or moderate background blur | Keep hair and shoulders sharp |
| Product on a table | Light blur behind the product | Preserve the product’s edges and details |
| Text over a detailed scene | Blur or soften the area behind the text | Keep the text readable without hiding useful context |
| Simple outdoor portrait | Very light blur or no blur | Avoid making the scene look unnaturally soft |
| Busy background with many objects | Moderate blur, applied selectively | Check that the subject does not have a visible halo |
| Thumbnail made from separate layers | Blur the background layer only | Keep text and foreground elements crisp |
Treat these as starting points, not fixed rules. Review the result at the size viewers are likely to see it.
How to Keep the Subject Sharp
A blurred background works best when the main subject remains clear. If the subject looks soft, the selection or mask may include too much of it.
Check the edges
Zoom in around the subject’s outline. Look for a bright or dark halo, a blurred fringe, or a sharp cutout edge that does not match the photo.
Refine the mask gradually. Avoid making the outline unnaturally smooth if the original subject has hair, fabric, or other fine details.
Preserve small details
Small details can be easy to lose during selection. Check fingers, hair, glasses, product edges, and narrow gaps.
If automatic selection struggles, use a manual brush or selection tool to correct the problem areas.
Compare the sharpness
The subject should generally look sharper than the background, but the difference should not feel extreme unless the style calls for it. If the background looks completely smeared, reduce the blur.
How to Make Text Readable Over a Blurred Background
Blur can make a background less distracting, but it does not guarantee that text will be readable.
For better readability:
- Place text over an area with relatively even colour and brightness.
- Use strong contrast between the text and the background.
- Keep the headline short.
- Avoid placing text over a busy edge or high-contrast detail.
- Use a subtle shadow or outline only if it improves readability.
Check the thumbnail at a small size. If the text is hard to read, adjust its placement, contrast, or size rather than increasing the blur without limit.
Common Background-Blur Mistakes
Blurring the subject by accident
If the subject becomes soft, check the selection or mask. Make sure the blur is applied only to the background.
Using too much blur
Strong blur can make the background look artificial or distract from the subject in a different way. Start lightly and increase the effect only when it improves clarity.
Leaving a halo around the subject
A bright or dark outline can appear when the mask does not follow the subject’s edges. Refine the mask and review the image at both close-up and full size.
Ignoring the original lighting
A blur effect does not fix mismatched lighting or colour. If the subject and background already look inconsistent, consider adjusting brightness or colour balance as well.
Blurring important context
A background may contain information that helps explain the video. Keep useful details visible when they contribute to the thumbnail’s message.
Forgetting to check the exported image
Some export settings can affect image quality. Open the exported file and make sure the subject remains sharp, the blur looks natural, and the text is readable.
Before-and-After Review Checklist
Before publishing, check the thumbnail carefully:
- The main subject remains sharp and easy to identify.
- The background is softened only as much as needed.
- No visible halo or rough outline surrounds the subject.
- Hair, clothing, hands, and product edges look natural.
- The blur does not hide important context.
- Text remains readable at a small size.
- The image still looks balanced and believable.
- The exported file matches the edited version.
- An editable copy of the project has been saved.
Conclusion
Blurring the background in a YouTube thumbnail can reduce distractions and help the main subject stand out. For the cleanest result, keep the subject sharp and apply the blur only where it supports the design.
Start with a light effect, then check the subject’s edges for halos or blurry areas. Make sure important background details remain visible and that any text is easy to read. Finally, review the exported image at a small size before uploading it.
A subtle, natural-looking blur is often more effective than an extreme effect. Choose the amount that makes your thumbnail clearer without changing the message of the image.
Key Takeaways
- Blur the background only when it helps reduce distractions.
- Keep the main subject sharp and easy to recognize.
- Start with a light blur and increase it gradually if needed.
- Use layers or masks for more control over which areas are blurred.
- Check hair, clothing, hands, and product edges for halos or soft patches.
- Keep useful background details visible when they help explain the video.
- Review the thumbnail at a small size before exporting.
Call to Action
Ready to improve your next YouTube thumbnail? Open your image editor, try a subtle background blur, and check that your subject and text remain clear. Explore more thumbnail tutorials on our blog for practical tips to create cleaner, more focused designs.
1. How do I blur the background in a YouTube thumbnail?
Open the image in an editor with a blur effect. Select the background, apply a light blur, and check that the main subject remains sharp. Refine the selection if the blur affects the subject.
2. Can I blur a thumbnail background without Photoshop?
Yes. Many desktop, browser-based, and mobile image editors offer blur effects, background selection, or masking tools. Check that your chosen editor lets you keep the subject sharp.
3. How do I blur only the background and not the subject?
Select or mask the background before applying blur. If your editor supports layers, you can blur a background copy and keep the subject on a separate sharp layer.
4. Why does my subject look blurry after applying background blur?
The background selection or mask may include part of the subject. Refine the selection around the subject’s edges, then apply the blur again.
5. How much background blur should I use?
Start with a light blur and increase it only if the background still distracts from the subject. The right amount depends on the image and the thumbnail’s purpose.
6. How do I avoid a halo around my subject?
Zoom in and refine the mask around the subject’s edges. Check hair, clothing, and small details, and avoid making the selection too hard or too soft.
7. Can I blur the background of a JPG thumbnail?
Yes. Open the JPG in an editor and select the background before applying blur. Since a JPG is usually flattened, you may need to separate the subject from the background first.
8. Does background blur make thumbnail text easier to read?
It can reduce distracting details behind text, but it does not guarantee readability. Use clear contrast, short wording, and a placement that keeps the text easy to see.
9. Should I blur every YouTube thumbnail background?
No. Use blur when it improves clarity. If the background is simple or provides useful context, keeping it sharp may be the better choice.
10. How do I upload my edited thumbnail to YouTube?
Open YouTube Studio, select the video, and use the thumbnail option to upload your edited image. Save the changes. The available options may vary by account and device.
Link Suggestions
Ready to optimize your images?
Every tool mentioned in this article is free to use. No upload, no signup, and no watermarks — ever.
Try our free toolsRelated articles
How to Remove Unwanted Objects From a YouTube Thumbnail
Learn how to remove unwanted objects from a YouTube thumbnail using simple editing methods. Clean up distractions, keep your subject clear, and create a more focused thumbnail.

Why Is My YouTube Thumbnail Low Quality? Causes & Fixes
Find out why your YouTube thumbnail looks low quality and learn how to improve its resolution, sharpness, text clarity, and export settings.

How to Change the Background of a YouTube Thumbnail
Learn how to change the background of a YouTube thumbnail, remove an existing background, add a new image or colour, and keep your design clear and professional.