
How to Remove Objects from Photos Online for Free
Learn how to remove objects from photos online for free using simple browser-based tools. Follow this beginner-friendly guide to clean up unwanted people, objects, text, and distractions from your pictures.
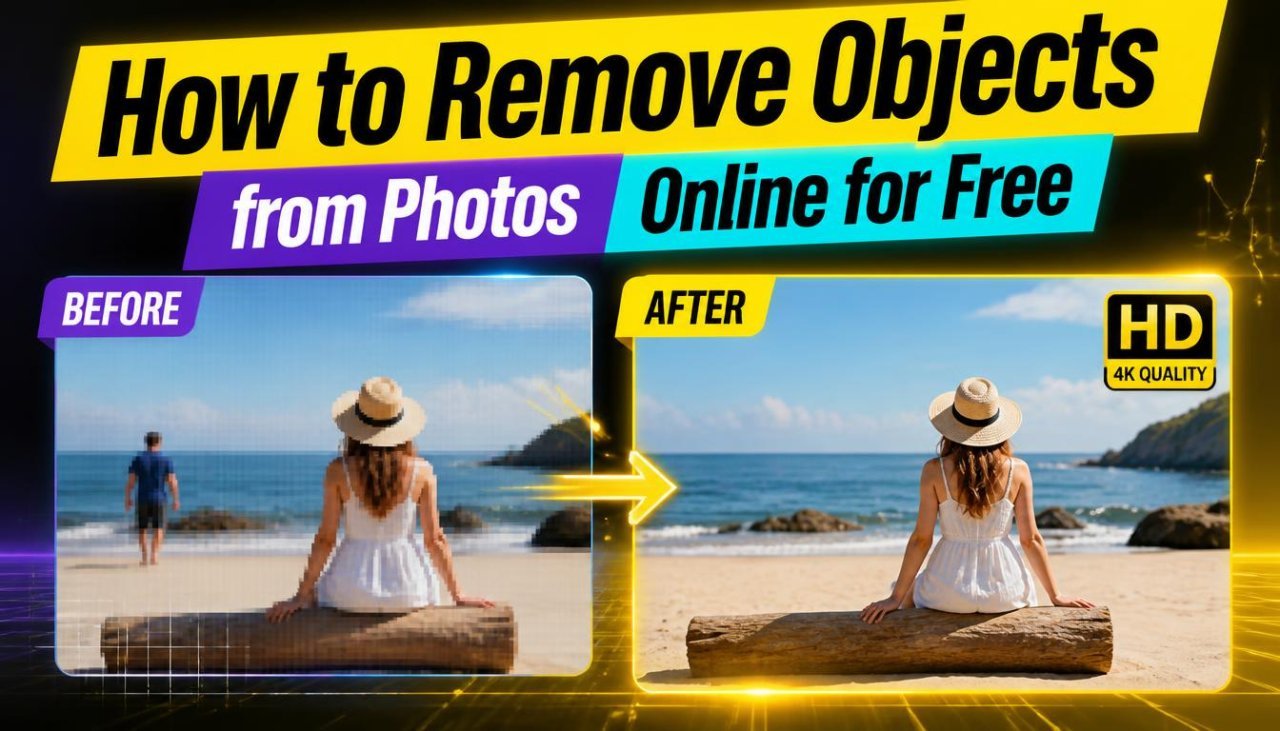
How to Remove Objects from Photos Online for Free
Introduction
Have you ever taken a great photo only to notice an unwanted person, object, sign, wire, or other distraction in the background?
You do not always need expensive photo-editing software to fix it. Today, you can remove objects from photos online for free using browser-based image editing tools. These tools are useful for beginners because they usually require little or no technical editing experience.
Whether you want to clean up a travel photo, remove a distracting object from a product picture, or make a personal photo look more polished, an online object remover can often do the job in just a few steps.
In this guide, you will learn what object removal means, how online object removal works, which types of unwanted elements can be removed, and how to get better results when editing your images.
Why Remove Objects from a Photo?
A photo can be technically good but still look distracting because of something in the frame.
For example, you may have:
- A stranger in the background
- A garbage bin near the subject
- Power lines across the sky
- Unwanted text or signs
- Small marks or spots
- Extra objects on a table
- Background clutter
- Reflections or distractions
- Objects accidentally included at the edge of the image
Removing these elements can help make the main subject more noticeable.
For personal photos, object removal can make an image cleaner. For businesses, it can also be useful when preparing product images, social media graphics, website images, or promotional content.
The important point is that object removal should improve the image without making it look unnatural.
What Does It Mean to Remove an Object from a Photo?
Object removal is a photo-editing technique used to erase an unwanted element from an image while filling the empty area with pixels that match the surrounding background.
For example, imagine a person standing behind you in a holiday photo.
When you remove that person, the editing tool has to fill the area where the person was. If the background is a simple wall or sky, this can be relatively easy. If the background contains detailed patterns, buildings, trees, or other objects, the result can require more careful editing.
Modern online photo editors may use tools such as:
- Object erasers
- Healing brushes
- Clone tools
- Content-aware editing
- AI-powered object removal
- Generative image editing
The exact technology depends on the editor you use.
Can You Remove Objects from Photos Online for Free?
Yes. Several online photo editors offer free object-removal features or free editing options.
The exact limits can vary between tools. Some may allow free editing but place restrictions on image resolution, the number of edits, or certain advanced features.
For a simple edit, however, you often do not need professional desktop software.
A typical workflow looks like this:
| Step | What you do |
|---|---|
| 1 | Upload your photo |
| 2 | Select the object-removal or erase tool |
| 3 | Brush over the unwanted object |
| 4 | Let the editor process the selected area |
| 5 | Check the result |
| 6 | Make additional corrections if necessary |
| 7 | Download the edited image |
The process is generally beginner-friendly and can be completed directly in a web browser.
How to Remove Objects from Photos Online
Step 1: Choose the Photo You Want to Edit
Start with the original image whenever possible.
A higher-quality original usually gives you more editing flexibility than a screenshot or heavily compressed copy.
Before uploading the image, consider what you want to remove.
For example:
“I want to remove the person standing in the background while keeping the main subject unchanged.”
Having a clear goal makes the editing process easier.
Step 2: Upload Your Image
Open your preferred online photo editor and upload the image.
Depending on the website, you may be able to upload common image formats such as JPG, JPEG, PNG, or WebP.
If the image contains private or sensitive information, check the editor's privacy and file-handling policies before uploading it.
Step 3: Find the Object Removal Tool
Look for an option with a name such as:
- Object Remover
- Remove Object
- Eraser
- Magic Eraser
- AI Eraser
- Healing
- Retouch
The name can vary from one editor to another.
Select the tool and look for a brush, selection area, or similar control.
Step 4: Mark the Unwanted Object
Use the brush or selection tool to highlight the object you want to remove.
Try to cover the entire unwanted object.
If you select only part of it, the remaining portion may still be visible after processing.
At the same time, avoid selecting large areas that do not need to be removed. A smaller, accurate selection can sometimes produce a more natural result.
Step 5: Review the Result
After processing, zoom in and inspect the edited area.
Look for:
- Strange lines
- Repeated patterns
- Blurry areas
- Missing details
- Unnatural textures
- Distorted edges
- Shadows that no longer make sense
Do not judge the result only at a small preview size. Zooming in can reveal problems that are difficult to see at first.
Step 6: Make Smaller Corrections
If the first attempt does not look right, try removing the object in smaller sections.
For example, instead of selecting an entire person and the surrounding background at once, you can work around the person's outline in smaller areas.
This can be particularly useful when the background contains important details.
What Types of Objects Can You Remove?
Online object-removal tools can be useful for many everyday photo-editing tasks.
People in the Background
One of the most common uses is removing unwanted people from a photo.
For example, you might want to clean up:
- A beach photo
- A tourist attraction
- A street photograph
- A family picture
- A restaurant photo
- A product photo
The difficulty depends heavily on the background behind the person.
Unwanted Objects
You can also try removing objects such as:
- Bags
- Bottles
- Boxes
- Cables
- Trash
- Signs
- Furniture
- Small decorations
Small objects against simple backgrounds are generally easier to remove cleanly.
Text and Signs
Object-removal tools may also help with unwanted text or signs in an image.
However, if the text is part of an important physical object, removing it can sometimes leave visible artifacts.
Always check the edited area carefully.
Small Marks and Distractions
For portraits and everyday images, you may want to remove minor distractions such as spots, dust, or small unwanted elements.
A healing or retouching tool can sometimes be more appropriate than a large object-removal brush for these small corrections.
Why Background Complexity Matters
The background is one of the biggest factors affecting the quality of object removal.
Consider these two examples:
| Background | Expected difficulty |
|---|---|
| Clear blue sky | Easy |
| Plain wall | Easy |
| Smooth floor | Easy to moderate |
| Grass | Moderate |
| Trees and leaves | Moderate to difficult |
| Brick wall | Difficult |
| Crowded street | Difficult |
| Detailed patterns | Difficult |
If an object covers a plain area, the editor has more predictable information to work with.
If the object covers several different textures, the editor has to reconstruct more visual information.
Simple Example
Suppose you took a photo of a building and there is a small trash bin near the entrance.
You can:
- Upload the photo.
- Select the object-removal tool.
- Carefully brush over the trash bin.
- Process the selection.
- Zoom in to inspect the entrance.
- Repeat the edit if any part of the bin remains.
- Download the final image.
The same basic process can work for many other unwanted objects.
Tips for Beginners
If this is your first time using an online object remover, keep these tips in mind:
- Start with a high-quality original photo.
- Select only the unwanted area.
- Use smaller selections for detailed backgrounds.
- Zoom in before checking the final result.
- Compare the edited image with the original.
- Keep a copy of the original image.
- Do not over-edit the photo.
- Check the image at its final intended size.
A natural-looking edit is usually better than an aggressive edit that removes too much of the surrounding image.
Free Object Removal vs Professional Photo Editing
For simple tasks, an online free editor can be enough.
Professional software becomes more useful when you need advanced control over layers, masks, colors, textures, or complex compositions.
| Feature | Free online editor | Professional editor |
|---|---|---|
| Basic object removal | Usually suitable | Yes |
| Beginner friendly | Usually very easy | Can require learning |
| Installation | Usually not required | Often required |
| Advanced masking | Limited in some tools | Strong |
| Layer-based editing | Depends on tool | Usually available |
| Complex retouching | May be limited | Better suited |
| Quick edits | Excellent | Good |
| Cost | Free options available | Often paid |
For someone who simply wants to remove an unwanted object from a single photo, starting with an online tool can save time and effort.
When an Online Object Remover May Not Be Enough
Free online tools are not perfect for every image.
You may need more advanced editing if:
- The object covers an important part of the subject.
- The background contains complicated details.
- Several objects overlap.
- The object creates a large shadow.
- The image contains repeating patterns.
- You need pixel-level control.
- The final image must meet strict professional requirements.
In these situations, you may need to make several passes or use a more advanced photo-editing workflow.
A Practical Rule for Better Results
A useful rule is:
Remove the smallest area necessary, review the result, and refine the edit instead of selecting everything at once.
This approach helps preserve surrounding details and makes it easier to spot mistakes.
It is especially helpful when removing objects from photographs with textured backgrounds.
Final Thoughts for Part 1
You do not need to be a professional designer to clean up an ordinary photograph.
With a suitable online photo editor, you can often remove objects from photos online for free using a simple upload, selection, and removal process.
The quality of the final result depends on the image, the size and position of the unwanted object, the surrounding background, and how carefully you make the selection.
In Part 2, we will go further into practical editing techniques, better object-selection methods, difficult backgrounds, real-world examples, tool comparisons, common mistakes, and best practices for getting cleaner results.
How to Remove Objects from Photos Online for Free: Advanced Tips and Best Practices
How to Get Better Results When Removing Objects
Knowing the basic steps is only the beginning. The quality of an object-removal edit often depends on how you select the unwanted object and how you handle the surrounding background.
A quick selection may work for a small object against a plain wall. More complicated images usually need a more careful approach.
Here are practical techniques that can help you get cleaner results.
1. Select the Object Carefully
One of the most common mistakes beginners make is selecting too much of the surrounding area.
For example, suppose you want to remove a small bottle from a table.
If you select the bottle plus a large section of the table, the editor has to reconstruct a much bigger area. This may create unwanted textures or patterns.
Instead:
- Zoom into the object.
- Select the object as accurately as possible.
- Include tiny parts that clearly belong to it.
- Avoid selecting important surrounding details.
- Process the removal.
- Check the result before making another edit.
A careful selection gives the editing tool better information about what should disappear.
2. Use Multiple Small Edits
Sometimes removing a large object in one operation does not produce the best result.
Instead, divide the task into smaller sections.
For example, if you want to remove a person standing beside a brick wall, you can work on:
- The head and hair
- The upper body
- The arms
- The lower body
- The remaining shadow
This method can give you more control over the background reconstruction.
It also makes it easier to undo a problematic edit without starting the entire image again.
3. Be Careful Around Edges
Edges are particularly important.
Suppose you are removing an object next to a person's face. If your selection overlaps the face, the editor may modify part of the subject you wanted to preserve.
Pay extra attention around:
- Hair
- Faces
- Hands
- Clothing
- Buildings
- Product edges
- Furniture
- Vehicle outlines
When an unwanted object touches an important subject, use a smaller brush or selection whenever the editor allows it.
4. Remove Shadows Separately
Removing the main object does not always remove its shadow.
For example, if you remove a chair from a floor, a dark shadow may remain where the chair was standing.
The result can look unnatural even though the chair itself is gone.
In this situation, inspect the area around the removed object and determine whether there are:
- Shadows
- Reflections
- Highlights
- Contact marks
- Color changes
If necessary, make a second small edit to clean up the remaining distraction.
5. Match the Background
A good object-removal result should look as though the unwanted object was never there.
This becomes harder when the background contains repeating patterns.
Examples include:
- Brick walls
- Tiles
- Wooden floors
- Fences
- Windows
- Textured clothing
- Road markings
If the tool creates a distorted pattern, try a smaller selection or another pass.
For highly detailed areas, manual retouching may produce a better result than relying entirely on automatic removal.
Removing People from Photos
Removing an unwanted person is one of the more challenging object-removal tasks.
The difficulty depends on the person's size, position, and what is behind them.
Easy Example
A person standing against a plain sky is relatively simple because the surrounding area has little visual detail.
More Difficult Example
A person standing in front of a building can be much harder because the editor may need to reconstruct:
- Windows
- Doors
- Walls
- Signs
- Brick patterns
- Architectural details
Best Approach
When removing a person:
- Start with the smallest practical selection.
- Avoid including the main subject.
- Check the person's shadow.
- Inspect nearby edges.
- Zoom out to see whether the image still looks natural.
- Repeat the process if necessary.
Do not assume that removing the person automatically means the entire area is finished.
Removing Text from an Image
Sometimes you may want to remove unwanted text from a photograph.
For example:
- A temporary sign
- A label
- A small printed message
- Unwanted text in the background
Object removal can work well when the text sits on a simple surface.
However, be careful when removing text from important documents, official records, identification materials, or images where changing the original information could be misleading.
For ordinary creative editing, always review the final image to make sure the replacement background looks natural.
Removing Objects from Product Photos
Object removal can also be useful for ecommerce and product photography.
Imagine a product photo containing:
- A cable
- A piece of packaging
- A distracting accessory
- Dust
- A background object
- Unwanted props
Cleaning these elements can make the product more visually focused.
However, businesses should avoid editing product images in a way that falsely represents the actual product.
For example, removing a genuine product feature or changing the physical appearance of an item could mislead customers.
A better approach is to remove unrelated distractions while keeping the product itself accurate.
Before and After: What Should You Check?
Do not judge an edit only by asking, "Is the object gone?"
Also ask whether the replacement area looks believable.
Use this checklist:
| What to check | What to look for |
|---|---|
| Object | Is every visible part removed? |
| Background | Does the replacement look natural? |
| Edges | Are there strange outlines? |
| Texture | Are patterns distorted? |
| Shadows | Is an unwanted shadow still visible? |
| Main subject | Was anything important accidentally changed? |
| Color | Does the edited area match nearby pixels? |
| Overall image | Does the photo still look realistic? |
This simple review can catch many editing problems.
Free Online Object Removal vs AI Object Removal
Modern image editors may use different approaches to remove unwanted elements.
A traditional editing tool may rely more heavily on cloning, healing, or manually replacing pixels.
An AI-assisted tool may analyze the surrounding image and generate a replacement area.
Neither approach is automatically perfect.
| Method | Advantages | Limitations |
|---|---|---|
| Healing tool | Good for small corrections | Less suitable for large objects |
| Clone tool | Gives manual control | Requires more editing skill |
| Automatic object remover | Fast and simple | Results can vary |
| AI object removal | Can handle complex areas | May create unexpected details |
| Manual editing | Maximum control | Usually takes more time |
For beginners, automatic tools are often the easiest starting point.
For difficult images, combining automatic removal with manual cleanup can be more effective.
How to Choose a Free Online Object Remover
Before choosing a tool, consider what you actually need.
Look for a Simple Interface
A beginner-friendly editor should make it obvious where to:
- Upload an image
- Select an object
- Remove it
- Undo an edit
- Download the result
A complicated interface can make a simple editing task unnecessarily difficult.
Check Image Quality
Some free services may have limitations on export quality.
If you need the image for printing, ecommerce, a website, or professional use, check the available output resolution before completing the edit.
Check File and Privacy Policies
Before uploading personal photographs, review the website's policies regarding uploaded files.
This is particularly important for images containing:
- Private documents
- Personal information
- Confidential business material
- Children's photographs
- Sensitive locations
A convenient editing tool should not come at the cost of ignoring basic privacy considerations.
Common Mistakes When Removing Objects
Mistake 1: Selecting Too Much
Selecting a huge area around the object can cause the editor to reconstruct details that did not need to be changed.
Better approach: Start with a precise selection.
Mistake 2: Removing Only Part of the Object
A small piece of an unwanted object can remain visible.
This often happens with:
- Hair
- Shoes
- Thin cables
- Shadows
- Small edges
Better approach: Zoom in and inspect the entire area.
Mistake 3: Ignoring Shadows
A removed object may leave behind a shadow.
Better approach: Check the ground and nearby surfaces after removing the object.
Mistake 4: Not Checking at 100% Zoom
An edit may look perfect in a small preview but reveal obvious artifacts when viewed larger.
Better approach: Inspect the edited area at a higher zoom level before downloading.
Mistake 5: Removing Too Much
Sometimes users try to make an image "perfect" by removing every small detail.
This can make a natural photograph look artificial.
Better approach: Remove distractions that genuinely affect the image and leave harmless details alone.
Pros and Cons of Removing Objects Online for Free
Pros
- No expensive software required
- Works directly in a web browser
- Beginner friendly
- Useful for quick edits
- Can save time
- Suitable for many everyday photos
- No advanced editing experience may be required
Cons
- Free versions may have limitations
- Complex backgrounds can produce artifacts
- Large objects can be difficult to remove
- Some tools may reduce export options
- Results can vary between images
- Privacy policies differ between services
For simple edits, the advantages can outweigh the limitations. For professional or highly complex work, more advanced editing options may be necessary.
Practical Examples
Example 1: Remove a Person from a Travel Photo
Imagine you take a photograph at a popular tourist location and another visitor appears in the background.
A practical workflow is:
- Upload the original photo.
- Zoom into the unwanted person.
- Select the person carefully.
- Process the removal.
- Check the surrounding architecture.
- Remove any remaining shadow or visible fragment.
- Compare the result with the original.
- Download the finished image.
If the person covers a detailed building, expect to make several corrections.
Example 2: Remove a Trash Bin
Suppose you photograph a garden but a trash bin appears next to a pathway.
Because the bin may cover grass, pavement, or plants, the best approach is to work carefully around its edges.
If the first attempt creates an unnatural patch, undo it and try a smaller selection.
Example 3: Remove a Cable from the Sky
Thin cables can sometimes be easier to remove when they cross a plain sky.
Use a narrow selection where possible.
After removal, zoom in to check whether the sky has developed visible lines or color changes.
Example 4: Clean Up a Product Photo
Suppose you are preparing a product image and notice a small unrelated object beside the product.
Select only the unwanted item.
Make sure the product itself remains unchanged.
This is especially important for ecommerce images, where customers should see an accurate representation of the item being sold.
Best Practices for Natural-Looking Results
Keep the Original File
Always keep an untouched copy of the original image.
This gives you a backup if an edit goes wrong or you later decide that the original looked better.
Work in Small Steps
Do not try to fix everything at once.
Small adjustments are easier to review and undo.
Use the Right Tool for the Job
A large object may need an object-removal tool.
A tiny spot may be better handled with a healing or retouching brush.
Choosing the appropriate tool can improve the final result.
Inspect the Entire Image
After editing, look at the complete photograph.
Sometimes an edit looks fine when zoomed in but feels unnatural when viewed normally.
The final test should always be the overall image.
Preserve Important Details
Do not accidentally remove:
- Product labels
- Important architectural features
- People's facial details
- Safety information
- Relevant signs
- Details that change the meaning of the photograph
Editing should serve the purpose of the image.
When Should You Use Manual Editing Instead?
An automatic remover is convenient, but manual editing may be preferable when precision is critical.
Consider manual editing if:
- The object overlaps the main subject.
- The background has complex patterns.
- You need exact control over the replacement.
- The photo will be used professionally.
- The automatic result repeatedly creates artifacts.
- You need to preserve very specific details.
A hybrid workflow can also work well: use automatic removal first, then manually clean up the result.
Quick Decision Guide
| Your editing task | Recommended approach |
|---|---|
| Small spot | Healing/retouch tool |
| Small object on plain background | Automatic object remover |
| Person against simple background | Object remover |
| Person covering detailed background | Multiple careful edits |
| Thin cable in sky | Small precise selection |
| Complex architectural background | Advanced/manual editing |
| Professional product image | Careful removal + quality check |
| Major part of the main subject | Consider professional editing |
A Simple Workflow You Can Reuse
For most everyday images, remember this seven-step process:
Upload → Select → Remove → Inspect → Refine → Compare → Download
This keeps the editing process simple while giving you opportunities to catch mistakes before saving the final image.
Final Part 2 Advice
The best object-removal result is not necessarily the fastest one.
Taking a few extra seconds to make a precise selection, inspect the background, and correct small artifacts can make a noticeable difference.
For simple images, a free online editor may be all you need. For complex photographs, you may need several passes or a more advanced editing workflow.
The key is to focus on the final appearance rather than simply making the unwanted object disappear.
Conclusion
Learning how to remove objects from photos online for free can make everyday photo editing much easier. You do not always need expensive software or advanced design skills to clean up an image.
For simple edits, an online object-removal tool can help remove unwanted people, objects, signs, cables, background distractions, and other elements directly from your browser.
The quality of the result depends on several factors, including the size of the object, the complexity of the background, and how carefully you select the area you want to remove.
For the best results, start with a high-quality original image, make precise selections, work in smaller sections when necessary, and always inspect the final image for unusual textures, edges, shadows, or other artifacts.
If a free online tool produces a good result, it can be a practical solution for personal photos, social media images, website graphics, and many everyday editing tasks. For complex professional work, however, more advanced editing software may provide better control.
The goal is not simply to make an object disappear. The goal is to make the final photograph look natural.
Key Takeaways
- You can remove objects from photos online for free without advanced editing experience.
- Start with the highest-quality original image available.
- Select the unwanted object as accurately as possible.
- Avoid selecting large areas of the surrounding background unnecessarily.
- Use multiple smaller edits when removing complicated objects.
- Check for leftover shadows, reflections, edges, and fragments.
- Simple backgrounds are usually easier to reconstruct than detailed backgrounds.
- AI-assisted removal can save time, but results should always be reviewed.
- Keep an original copy of your photograph before editing.
- Choose manual editing when automatic removal cannot produce a natural result.
- Always check the final image before using it publicly or commercially.
Call to Action
Want to clean up a photo without installing complicated software?
Try an online photo editing workflow to remove unwanted objects from your images for free. Upload your photo, select the distraction, review the result, and download the finished image when you are satisfied with the edit.
For quick everyday photo cleanup, an online editor can be a simple place to start.
Ready to clean up your image? Upload your photo and remove unwanted distractions today.
Frequently Asked Questions
1. Can I remove objects from photos online for free?
Yes. Many browser-based photo editors provide free object-removal or erasing features. The available tools, image limits, export quality, and other restrictions can vary between services.
2. How do I remove an unwanted object from a photo?
Upload your image to an online photo editor, choose its object-removal or eraser tool, select the unwanted object, process the selection, and inspect the result. You may need to repeat the process for complicated areas.
3. Can I remove a person from a photo online?
Yes. Online object-removal tools can often remove people from photographs, particularly when the person is separated from the main subject. Results can be more difficult when the person covers detailed backgrounds or important objects.
4. Is it possible to remove text from an image?
In many cases, yes. An object-removal or healing tool may remove unwanted text when the surrounding background is relatively simple. Always check the result afterward for visible artifacts.
5. Can I remove objects from photos without Photoshop?
Yes. You do not necessarily need Photoshop for basic object removal. Browser-based photo editors can handle many simple editing tasks without requiring desktop software.
6. Why does the background look strange after removing an object?
The editor has to reconstruct the area previously occupied by the object. Complex backgrounds, patterns, textures, shadows, and overlapping elements can make this process more difficult.
Try selecting a smaller area, making multiple edits, or using a manual editing tool for better control.
7. How can I remove an object without making the photo look edited?
Use precise selections, avoid removing unnecessary surrounding areas, and inspect the background after processing. Smaller edits and careful cleanup can help produce a more natural-looking result.
8. Can I remove objects from JPG and PNG images?
Most online image editors support common formats such as JPG, JPEG, and PNG, although supported formats and file-size limits depend on the individual service.
9. Is online object removal good enough for professional photos?
It can be suitable for some professional tasks, especially simple cleanup. However, complex commercial photography may require more advanced editing, quality control, or manual retouching.
10. What is the easiest way to remove objects from a photo?
For beginners, the easiest approach is usually an online object-removal tool. Upload the image, mark the unwanted object, process the selection, and check the result before downloading it.
Ready to optimize your images?
Every tool mentioned in this article is free to use. No upload, no signup, and no watermarks — ever.
Try our free toolsRelated articles
How to Restore an Old Photo With AI: Complete Beginner's Guide
Learn how to restore an old photo with AI by repairing damage, improving clarity, reducing noise, and bringing faded photographs back to life with simple techniques.
How to Remove a Person From a Photo With AI: Easy Online Guide
Learn how to remove a person from a photo with AI using simple online editing techniques. Discover how AI object removal works, when to use it, and how to get natural-looking results.
How to Remove Unwanted Objects From Photos With AI: Easy Guide
Learn how to remove unwanted objects from photos with AI using simple editing techniques. Discover how AI object removal works, useful tips, common mistakes, and ways to get natural-looking results.