
How to Remove Unwanted Objects From Photos With AI: Easy Guide
Learn how to remove unwanted objects from photos with AI using simple editing techniques. Discover how AI object removal works, useful tips, common mistakes, and ways to get natural-looking results.
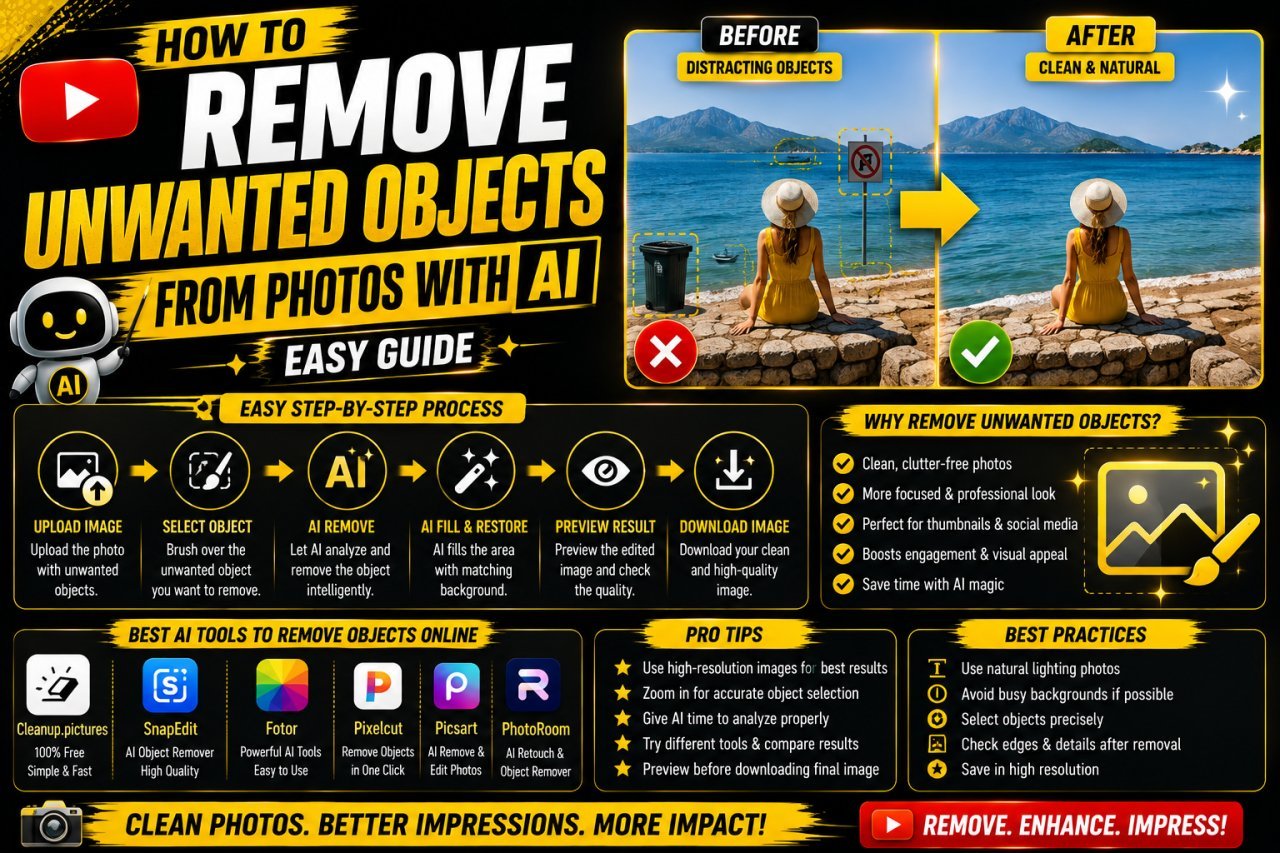
How to Remove Unwanted Objects From Photos With AI
Removing an unwanted object from a photo can completely change how clean and attractive an image looks. A random person, distracting sign, power cable, trash can, stain, or other object can take attention away from the main subject.
In the past, removing these distractions often required careful manual editing. You might have needed cloning, healing, masking, or other retouching techniques to rebuild the background.
Today, AI-powered photo editing tools can make this process much easier.
If you're searching for how to remove unwanted objects from photos with AI, the basic process is usually simple: upload your image, select the unwanted object, let the AI generate a replacement for that area, and then review the result.
AI analyzes the surrounding parts of the image and attempts to create new content that fits the selected area. This can work especially well when the background is simple and there is enough surrounding information.
However, AI object removal is not perfect. Complex backgrounds, overlapping objects, text, faces, patterns, and large missing areas can require additional editing.
This guide explains how AI object removal works, which photos are easier to edit, what beginners should watch for, and how to get cleaner results.
Why This Topic Matters
A small unwanted object can sometimes become the most noticeable part of a photograph.
For example, you may have:
- A travel photo with a distracting sign
- A landscape photo with a power cable
- A product photo with unwanted background items
- A family picture with something distracting behind the subject
- A street photograph with a random object
- A social media image with background clutter
- A property photograph with unwanted items
- A food photo containing distracting objects
- All Tools
Cropping is one possible solution, but it can change the composition and remove parts of the image you actually want to keep.
AI object removal provides another option. Instead of cropping the photograph, you can attempt to remove the unwanted element while keeping the original framing.
The important thing to understand is that AI does not recover a hidden original background. It generates an approximation based on the visible information surrounding the selected area.
That means the quality of the final result depends heavily on the photograph itself.
What Is AI Object Removal?
AI object removal is an image-editing technique that uses artificial intelligence to remove a selected object and generate replacement content for the area it occupied.
Depending on the software, you may see this feature called:
- AI Eraser
- Object Remover
- Magic Eraser
- Generative Fill
- AI Remove
- Remove Object
- Inpainting
- Smart Erase
The names are different, but the general concept is similar.
You identify something you don't want in the image, and the software attempts to replace that area with content that matches the surrounding scene.
For example, imagine a small trash bin sitting on a plain pavement.
After selecting the bin, an AI editor may generate pavement in the area where the bin was located.
The result can be much harder when the object covers a detailed building, another person, text, or an important part of the scene.
How AI Removes an Unwanted Object From a Photo
The exact interface varies between tools, but the basic workflow usually has four stages.
1. Upload the Original Photo
Start with the highest-quality version of the photograph you have.
If possible, avoid using screenshots or heavily compressed copies when the original is available.
A better-quality source gives you more detail to work with during editing.
2. Select the Unwanted Object
Use the editor's brush, selection tool, or automatic detection feature to identify the object you want to remove.
Try to select the entire unwanted object.
Depending on the image, you may also need to include connected elements such as a visible shadow.
3. Let the AI Reconstruct the Area
The AI examines surrounding colors, textures, shapes, and patterns.
It then generates replacement content for the selected area.
The goal is to make the edited area visually blend with the rest of the photograph.
4. Review the Result
Don't immediately download the first result.
Zoom into the edited area and inspect it carefully.
Look for:
- Strange textures
- Repeated patterns
- Distorted lines
- Unnatural shadows
- Missing details
- Changed objects
- Visible edges
- Unexpected shapes
If you find a problem, use a smaller corrective selection when possible.
What Objects Can AI Remove?
AI object removal can be useful for many everyday photo-editing tasks.
Small Background Objects
Examples include:
- Trash cans
- Bags
- Boxes
- Bottles
- Chairs
- Small signs
- Random tools
- Cables
- Decorations
Small objects can sometimes be easier to remove when the surrounding background is relatively simple.
Unwanted People
AI object removal can also be used to remove people from photographs.
However, people may be more difficult than small objects because they can cover larger areas and interact with shadows and other subjects.
Outdoor Distractions
You might want to remove:
- Power lines
- Poles
- Temporary barriers
- Small signs
- Construction items
- Unwanted vehicles
The difficulty depends on what is located behind the object.
Indoor Clutter
AI can sometimes help remove:
- Boxes
- Cables
- Small decorations
- Unwanted furniture
- Items on tables
- Miscellaneous objects
Simple backgrounds are generally easier to reconstruct than highly detailed ones.
Which Photos Work Best for AI Object Removal?
Not every photograph is equally suitable for AI object removal.
One of the biggest factors is the background surrounding the unwanted object.
Simple Backgrounds
AI removal can be easier when the object is surrounded by relatively predictable visual information.
Examples include:
- Plain walls
- Open sky
- Sand
- Simple floors
- Grass
- Large areas of water
- Uncluttered roads
If a small object covers part of a plain wall, for example, the AI may have useful surrounding information for generating a replacement.
Complex Backgrounds
The process becomes more difficult when the unwanted object overlaps:
- Faces
- Buildings
- Text
- Logos
- Detailed furniture
- Vehicles
- Complex patterns
- Other people
- Thin structures
In these situations, inspect the final image carefully because the AI may unintentionally alter nearby details.
| Situation | General Difficulty | What to Check |
|---|---|---|
| Small object on a plain wall | Lower | Wall texture |
| Small object against open sky | Lower | Sky consistency |
| Object on simple sand | Lower | Texture and shadows |
| Small object on grass | Moderate | Grass patterns |
| Cable against the sky | Moderate | Thin edges |
| Object on patterned flooring | Moderate to high | Pattern alignment |
| Object covering text | High | Letter accuracy |
| Object covering a face | High | Facial details |
| Object overlapping another object | High | Object boundaries |
| Large object covering a detailed background | High | Reconstructed details |
Use the Highest-Quality Image Available
One of the easiest ways to improve your starting point is to use the original photograph whenever possible.
Avoid repeatedly editing and saving the same compressed image.
A photograph that has been resized or compressed several times may contain less fine detail than the original.
This becomes especially important when:
- The unwanted object is small
- The background contains fine textures
- You need to inspect small details
- The object overlaps thin lines
- You plan to perform manual cleanup afterward
If you only have a low-resolution image, you can still try AI object removal. Just keep in mind that the final result may have less detail than an edit made from a high-quality source.
Don't Select More Than You Need
A common beginner mistake is selecting a very large area around the unwanted object.
For example, if you want to remove a small bottle from a table, there may be no reason to select half of the table.
A larger selection gives the AI more area to reconstruct.
Instead, try this approach:
- Identify the unwanted object.
- Select it carefully.
- Include connected elements when necessary.
- Apply the AI removal.
- Inspect the result.
- Correct only the areas that need attention.
Controlled selections can make the editing process easier to manage.
Should You Remove the Object's Shadow?
It depends on the photograph.
If an unwanted object is sitting on the ground and creates a noticeable shadow, removing only the object may leave an obvious shadow behind.
For example:
Before: A chair + its shadow
After: Chair removed + chair-shaped shadow remaining
That remaining shadow can make the edit look unnatural.
Before removing a shadow, however, make sure it actually belongs to the unwanted object.
A nearby tree, building, person, or another object may cast a shadow into the same area.
The goal is not to remove every dark area. The goal is to remove the visual elements associated with the unwanted object while preserving the natural lighting of the scene.
Why Does AI Sometimes Create Strange Results?
AI object removal requires the software to generate content that may not be directly visible in the original photograph.
Imagine a person standing in front of a wall.
You can see the wall on both sides of the person, but the exact section behind the person is hidden.
The AI has to estimate what that missing section might look like.
For a simple wall, the estimation may be relatively straightforward.
For a detailed storefront containing windows, signs, products, decorations, and other objects, the reconstruction becomes much more complicated.
This is why an AI edit can look convincing when viewed from a distance but reveal problems when you zoom in.
A good workflow always includes a review stage.
Common Problems After AI Object Removal
Repeated Textures
Grass, bricks, tiles, and other textures can sometimes look repeated or copied.
Broken Straight Lines
A wall edge, table edge, road marking, railing, or other straight element may become distorted.
Unnatural Shapes
Objects near the selected area can sometimes change shape during reconstruction.
Strange Shadows
The unwanted object's original shadow may remain after the main object has disappeared.
Missing Details
Small background elements can sometimes disappear.
Artificial-Looking Areas
The generated section may have a different texture or sharpness compared with the surrounding photograph.
Changes to Nearby Objects
The AI may unintentionally alter something next to the selected area.
For this reason, inspect not only the exact removal area but also the surrounding region.
AI Object Removal vs Cropping
Cropping is often the simplest way to remove an unwanted element, but it changes the composition of the image.
AI removal attempts to preserve the original framing.
| Method | Main Advantage | Main Limitation |
|---|---|---|
| AI object removal | Can preserve the original composition | Generated area may need correction |
| Crop | Very simple | Removes part of the photograph |
| Clone tool | Precise manual control | Can require more time |
| Healing tool | Useful for small imperfections | Less suitable for large objects |
| Manual retouching | High control | Requires editing skills |
The right method depends on the image.
If the unwanted object is near the edge of a photograph, cropping may be perfectly practical.
If the object is in the middle of an important composition, AI removal may be worth trying.
Beginner-Friendly Workflow
If you're new to AI photo editing, follow this simple process.
Step 1: Save the Original
Keep an untouched copy of your photograph before making any changes.
Step 2: Identify the Distraction
Decide exactly which object you want to remove.
Step 3: Inspect the Background
Look at what surrounds the object and consider how complicated the reconstruction might be.
Step 4: Make a Careful Selection
Select the unwanted object without unnecessarily covering large areas.
Step 5: Apply AI Removal
Let the tool generate replacement content.
Step 6: Review the Result
Zoom in and inspect the edited area.
Step 7: Fix Small Problems
If something looks wrong, make a smaller corrective edit where possible.
Step 8: Compare With the Original
Check whether nearby objects or important details have changed.
Step 9: Export the Final Image
Only save the final version after reviewing the entire photograph.
Beginner Checklist
Before using an AI object remover, check:
- I have saved the original image.
- I'm using the highest-quality version available.
- I know exactly what I want to remove.
- I've checked the background behind the object.
- I've checked for shadows.
- I won't select unnecessarily large areas.
- I'll inspect the result after removal.
- I'll check nearby objects for unexpected changes.
- I'll make smaller corrections when needed.
- I'll compare the edited image with the original.
Important Note About Image Authenticity
AI object removal is useful for ordinary creative editing, personal photographs, design projects, and image cleanup.
However, context matters.
If a photograph is being used as evidence, news documentation, an official record, or another situation where visual accuracy is important, removing an object can change the meaning of the image.
For those situations, keep the original photograph and clearly distinguish an edited version from the original when appropriate.
The more important photographic authenticity is, the more carefully AI edits should be documented.
Key Point for Beginners
Getting good results from AI object removal isn't simply about clicking an erase button.
Start with a good-quality image, make a controlled selection, allow the AI to reconstruct the area, and then carefully inspect what it generated.
If you notice an artifact, don't immediately redo the entire image.
Identify the specific problem and make a smaller correction if the tool allows it.
AI can save editing time, but human review is still important for producing a clean and believable photograph.
AI object removal becomes much more useful when you understand how to control the editing process instead of simply selecting an object and accepting the first result.
A clean result depends on several factors, including the size of the unwanted object, the surrounding background, the accuracy of your selection, lighting, shadows, and nearby details.
For simple images, one AI removal can be enough. For complicated photographs, a better approach is often to remove the object in smaller stages and carefully inspect the result after each edit.
The techniques below can help you get more natural-looking results.
One of the most common reasons an object remains visible after AI removal is an incomplete selection.
If you select only part of an object, small pieces may remain in the final image.
For example, when removing a chair, don't select only the seat. Consider the:
- Seat
- Backrest
- Legs
- Attached parts
- Relevant shadow
At the same time, avoid selecting a huge amount of unrelated background.
The goal is a controlled selection that covers the unwanted element without unnecessarily expanding the editing area.
When an unwanted object is large, removing everything in one selection isn't always the best approach.
Consider dividing the edit into smaller sections.
For example:
- Remove the main body of the object.
- Check the surrounding background.
- Remove remaining edges or details.
- Correct any distorted areas.
- Review the complete image.
This gives you more control and makes it easier to identify where an AI-generated artifact appeared.
When an unwanted object is large, removing everything in one selection isn't always the best approach.
Consider dividing the edit into smaller sections.
For example:
- Remove the main body of the object.
- Check the surrounding background.
- Remove remaining edges or details.
- Correct any distorted areas.
- Review the complete image.
This gives you more control and makes it easier to identify where an AI-generated artifact appeared.
Thin objects such as wires, cables, poles, branches, and small lines can require a slightly different approach.
They may be difficult to select accurately because they occupy only a small number of pixels.
A selection that is too narrow can leave fragments behind.
A selection that is too wide can unnecessarily affect the surrounding background.
Zooming in before selecting a thin object can make the process easier.
Perspective can make object removal more challenging.
For example, imagine a person standing in front of a tiled floor.
The tiles become smaller as they move toward the background.
If the AI reconstructs the area without maintaining the same visual pattern, the floor may look distorted.
After removal, inspect perspective-sensitive elements such as:
- Floor tiles
- Roads
- Walls
- Railings
- Building edges
- Fences
- Tables
- Windows
Straight lines and repeating patterns should remain visually consistent with the rest of the image.
AI-generated backgrounds can sometimes contain repeated or unusual patterns.
This may be noticeable on:
- Brick walls
- Tile floors
- Wooden surfaces
- Fences
- Windows
- Printed backgrounds
- Fabric
- Stone surfaces
If you notice a repeated section, try a smaller correction rather than selecting the entire area again.
The goal is to blend the generated content into the existing texture.
Reflections can be easy to overlook.
An unwanted object may appear in:
- Mirrors
- Glass windows
- Polished floors
- Car surfaces
- Water
- Shiny furniture
Removing the main object does not necessarily remove every visual representation of it.
After editing, look around the photograph for reflections that may still contain the unwanted object.
If the reflection is visible and relevant, it may require a separate edit.
Shadows can reveal an otherwise successful AI edit.
Suppose you remove a small table from a floor but leave the table's shadow behind.
The photograph may still look edited.
Before and after the AI removal, inspect the area around:
- Feet
- Ground
- Walls
- Tables
- Objects sitting on surfaces
Don't automatically erase every shadow. Determine which shadow belongs to the unwanted object and which shadows belong to the rest of the scene.
| Object Type | Typical Difficulty | Main Challenge |
|---|---|---|
| Small bottle | Low | Surface texture |
| Trash bin | Low to moderate | Shadow and background |
| Chair | Moderate | Multiple edges |
| Cable | Moderate | Thin selection |
| Sign | Moderate | Text and structure |
| Person | Moderate to high | Large area and details |
| Vehicle | High | Large reconstruction area |
| Object covering a face | High | Important hidden details |
| Object over text | High | Exact text reconstruction |
| Object overlapping another object | High | Complicated boundaries |
AI is convenient, but manual editing still has an important role.
AI is often useful for quickly removing a larger distraction and reconstructing the background.
Manual tools can be useful when you need precise control over a small area.
| Editing Method | Best For | Main Limitation |
|---|---|---|
| AI object removal | Fast cleanup | Results can vary |
| Clone tool | Repeating nearby textures | Requires manual work |
| Healing tool | Small imperfections | Less suitable for large objects |
| Generative fill | Larger missing areas | Generated content needs review |
| Manual masking | Precise selections | More skill required |
| Cropping | Edge distractions | Changes composition |
A practical workflow can combine these methods rather than relying on only one.
Faster Than Many Manual Workflows
AI can automate much of the background reconstruction process.
Beginner Friendly
Many modern editors use simple brush or selection controls.
Useful for Background Cleanup
You can remove distracting elements while attempting to preserve the original composition.
Helpful for Everyday Photography
It can be useful for travel photos, personal images, social media graphics, and creative projects.
Reduces Repetitive Editing
The software can generate replacement content without requiring you to manually copy every section.
Results Can Vary
The same type of object may produce different results depending on the photograph.
Complex Backgrounds Are Harder
Detailed scenes provide less predictable reconstruction conditions.
Hidden Information Cannot Be Known With Certainty
If an object completely covers something, the AI has to generate an approximation.
Small Artifacts Can Remain
Textures, lines, shadows, and edges may need additional correction.
Nearby Details May Change
An AI edit can sometimes affect pixels outside the exact object area.
Multiple Attempts May Be Needed
A first generation isn't necessarily the final version.
Starting with a screenshot when the original photograph is available can make editing less effective.
Whenever possible, use the original or highest-quality source.
A huge selection can force the AI to reconstruct more information than necessary.
Keep your selection controlled whenever possible.
If part of the unwanted object remains outside the selection, you may see fragments after the edit.
Check the entire object before applying the removal.
An object can appear in a mirror, window, water surface, or other reflective area.
Check these areas after removal.
A leftover shadow can make the removal obvious.
Inspect the surface around the object before considering the edit complete.
An AI result can look good at normal viewing size while containing noticeable artifacts when enlarged.
Always inspect the edited area more closely.
If the AI changes a nearby sign, product, person, logo, or other important detail, the edit may have gone too far.
Review the surrounding area, not just the selected object.
For consistently better results, follow these practices:
- Use the highest-quality original image available.
- Preserve an untouched copy before editing.
- Study the background before selecting the object.
- Select the unwanted object carefully.
- Avoid unnecessarily large selections.
- Include relevant shadows when appropriate.
- Check reflections and transparent surfaces.
- Pay attention to straight lines and repeating patterns.
- Inspect nearby objects after removal.
- Make small corrective edits when necessary.
- Compare the final image with the original.
- Export only after checking the complete photograph.
Imagine you take a photograph of a historic building, but a trash can is visible near the bottom of the frame.
The trash can is surrounded by relatively simple pavement.
Step 1: Preserve the Original
Create a copy of the photograph before editing.
Step 2: Select the Trash Can
Carefully select the entire object.
Step 3: Check the Shadow
If the trash can casts a noticeable shadow, consider whether that area should also be addressed.
Step 4: Apply AI Removal
Let the AI generate replacement pavement.
Step 5: Inspect the Pavement
Look for unusual textures, repeated patterns, or distorted lines.
Step 6: Make a Small Correction
If one section looks unnatural, make a targeted correction.
Step 7: Compare the Result
Check the edited image against the original before exporting.
This is a relatively straightforward example because the background is mostly predictable.
Now imagine a street photograph where an unwanted person is standing in front of shops, vehicles, signs, and other pedestrians.
This is considerably more complicated.
After the AI removal, inspect:
- Building edges
- Store signs
- Vehicles
- Other people's faces
- Arms and clothing
- Road markings
- Shadows
- Windows
If important details have changed, try a smaller selection or use manual cleanup.
This example demonstrates why the background matters more than the object itself in many AI removal tasks.
A cable running across an open sky may look distracting in a landscape photograph.
Because the sky can be relatively uniform, the AI may have a simpler reconstruction task.
However, cables can be thin and difficult to select.
Zoom in and make sure the entire cable is covered.
After removal, check for:
- Remaining fragments
- Uneven sky texture
- Visible selection edges
- Unexpected lines
If the sky is smooth and the cable is isolated, this can be a practical AI cleanup task.
Suppose you're photographing a product and a small unwanted item is sitting next to it.
Before removing the item, check whether it overlaps the product.
If it doesn't, AI removal may be relatively straightforward.
If it covers part of the product, be much more careful.
The AI may generate a replacement that changes the product's shape or details.
For commercial photography, always inspect the product after editing and compare it with the original or a reliable reference.
AI isn't always the final step.
Manual cleanup can be preferable when:
- A straight line has been distorted.
- A logo has changed.
- Text has become incorrect.
- A nearby face has been altered.
- A product edge has been damaged.
- A repeating pattern looks wrong.
- A small artifact remains.
- The exact appearance of the background matters.
In these situations, AI can still be used for the initial removal, followed by manual correction.
This hybrid workflow gives you the speed of AI and the control of traditional editing.
A Reliable Workflow for Professional-Looking Results
Step 1: Keep the Original
Never replace your only copy of the original photograph.
Step 2: Inspect the Scene
Look at the unwanted object and everything surrounding it.
Step 3: Identify Difficult Areas
Check for text, faces, reflections, shadows, patterns, and overlapping objects.
Step 4: Make a Controlled Selection
Select the object carefully.
Step 5: Generate the Removal
Allow the AI to reconstruct the area.
Step 6: Review at Normal Size
Check whether the overall photograph still looks natural.
Step 7: Zoom In
Inspect the edited area for small artifacts.
Step 8: Correct Specific Problems
Use smaller AI selections or manual tools where appropriate.
Step 9: Compare With the Original
Make sure unrelated areas have not changed unexpectedly.
Step 10: Export the Final Image
Save the finished version only after the complete image has been checked.
A common mistake is continuing to edit a photograph even after the result already looks natural.
Ask yourself three questions:
Does the edited area blend with the surrounding background?
Can I see any obvious artifacts at normal viewing size?
Did anything important change outside the area I intended to edit?
If the answer is satisfactory, further editing may not provide meaningful improvement.
The goal is a natural-looking photograph, not endless editing.
Final Part 2 Checklist
Before moving to the final stage, make sure:
- The unwanted object is completely removed.
- No fragments remain.
- The shadow has been handled appropriately.
- Reflections have been checked.
- Nearby objects remain intact.
- Faces have not been unexpectedly altered.
- Text and logos have been checked.
- Straight lines look natural.
- Repeating patterns look believable.
- The edited texture matches the surrounding area.
- There are no obvious AI artifacts.
- The original image is safely preserved.
- Small problems have been corrected where necessary.
- The final image has been reviewed at both normal and enlarged sizes.
Removing unwanted objects from photos with AI can save a lot of editing time, especially when the distracting object is surrounded by a simple background.
The process is usually straightforward: keep the original image, select the unwanted object, let the AI reconstruct the area, and carefully review the result.
However, getting a natural-looking result is about more than simply making an object disappear. You also need to check shadows, reflections, textures, straight lines, patterns, text, and nearby objects.
Simple distractions such as small objects on plain backgrounds may require very little work. More complicated edits can need multiple AI attempts or additional manual retouching.
The most reliable approach is to treat AI as an editing assistant rather than assuming every generated result will be perfect.
Start with the best-quality image available, make controlled selections, review every edit, and preserve the original photograph.
With this workflow, AI can be a practical way to clean up photographs while keeping the original composition intact.
Call To Action
Have a photo with a distracting object that you wish wasn't there?
Try an AI object-removal workflow using a copy of your original image. Start with a careful selection, review the generated background, and make small corrections where necessary.
For the best results, don't rush the final step. Zoom in, inspect the details, compare the edited version with the original, and make sure the photograph still looks natural.
Remove the distraction, review the details, and keep the original safe.
1: How to remove unwanted objects from photos with AI?
You can use an AI photo editor with an object-removal or AI eraser feature. Upload your photo, select the unwanted object, apply the removal, and inspect the generated background. If artifacts remain, make smaller corrective edits.
2: Can AI remove objects from photos automatically?
Yes, some AI photo editors can detect or remove selected objects automatically. However, the amount of automation varies between tools, and complicated photographs may still require manual selection or corrections.
3: Can I remove unwanted objects from a photo online?
Yes. Many online photo editors provide AI-powered object-removal features. The typical process involves uploading an image, selecting the unwanted area, generating the replacement, reviewing the result, and exporting the edited photo.
4: What objects can AI remove from photos?
AI object removal can be used for many distractions, including small people, cables, signs, trash cans, bags, boxes, vehicles, background clutter, and other unwanted elements. The difficulty depends on the object and the background around it.
5: Why does AI object removal sometimes look unnatural?
AI has to generate replacement content for areas that were hidden by the unwanted object. If the background contains complex patterns, text, faces, detailed structures, or overlapping objects, the generated result may contain artifacts or inaccuracies.
6: Can AI remove an object without changing the background?
AI attempts to preserve the surrounding background, but it cannot guarantee that every nearby detail will remain unchanged. Always inspect the area around the removed object for unexpected changes.
7: How can I get better results when removing an object with AI?
Use the highest-quality original image available, make a precise selection, avoid unnecessarily large selections, check shadows and reflections, and review the result at both normal and enlarged sizes. Smaller corrective edits can also improve the final result.
8: Can AI remove objects from a complicated background?
Yes, AI can attempt to remove objects from complicated backgrounds, but these edits are generally more challenging. Buildings, text, people, repeating patterns, and overlapping objects can make accurate reconstruction more difficult.
9: Should I remove the shadow along with an unwanted object?
If the shadow clearly belongs to the unwanted object, it may need to be removed or reconstructed as part of the edit. However, don't remove shadows automatically because they may belong to other objects in the scene.
10: Is AI object removal suitable for professional photos?
AI object removal can be useful for many professional editing tasks, but the final image should be carefully reviewed. For commercial, documentary, legal, or other situations where image accuracy matters, preserve the original and consider whether the edit needs to be disclosed.
Ready to optimize your images?
Every tool mentioned in this article is free to use. No upload, no signup, and no watermarks — ever.
Try our free toolsRelated articles
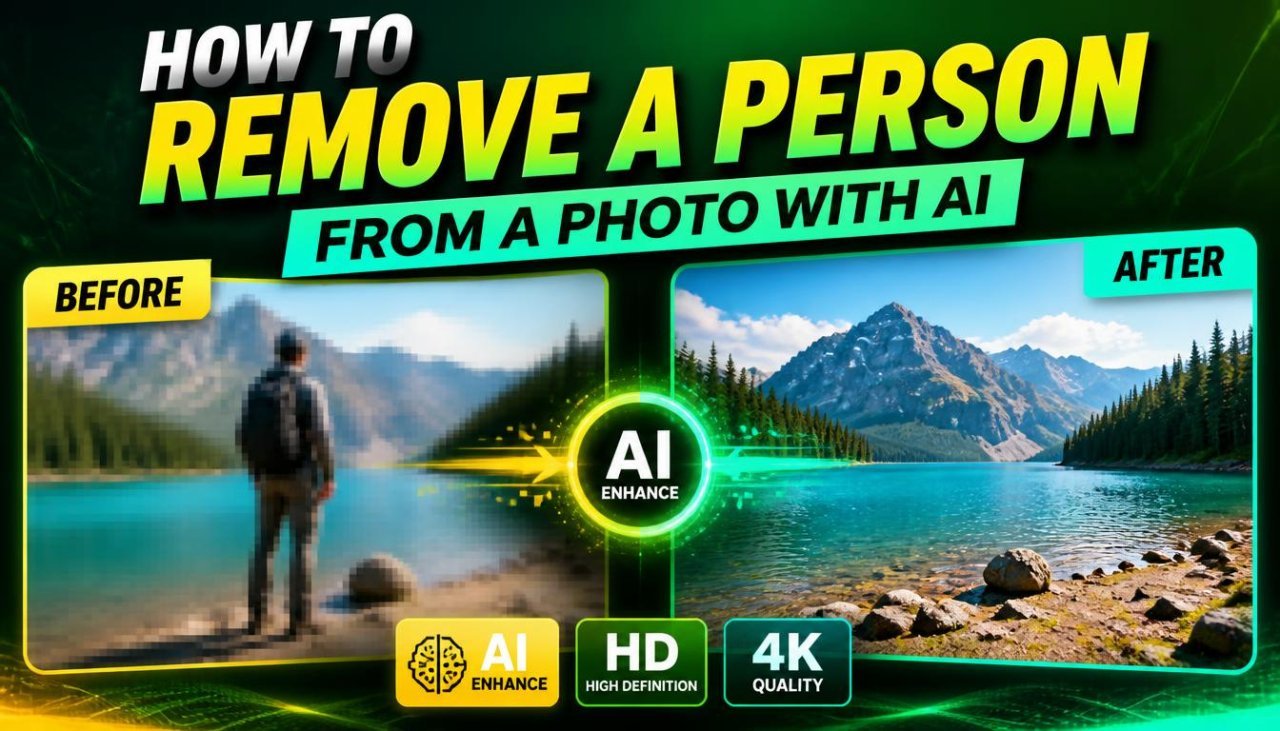
How to Remove a Person From a Photo With AI: Easy Online Guide
Learn how to remove a person from a photo with AI using simple online editing techniques. Discover how AI object removal works, when to use it, and how to get natural-looking results.

Best Free AI Image Editors in 2026 (Top 10 Tools Compared)
Discover the best free AI image editors in 2026. Compare features, pricing, pros, cons, and use cases to find the perfect AI photo editing tool for beginners, designers, marketers, and businesses.
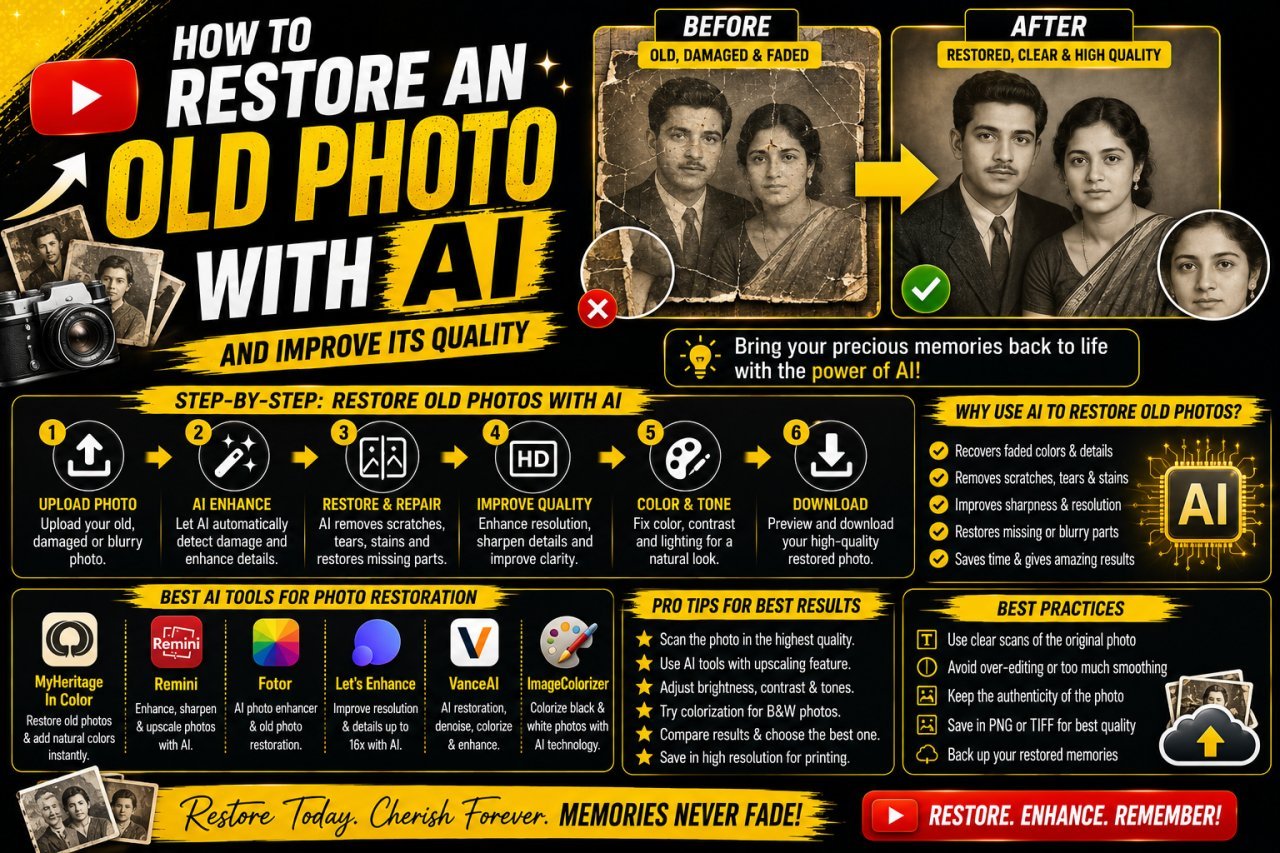
How to Restore an Old Photo With AI: Complete Beginner's Guide
Learn how to restore an old photo with AI by repairing damage, improving clarity, reducing noise, and bringing faded photographs back to life with simple techniques.