
How to Make GTA 6 Images HD and how to make GTA 6 images HD and clear using upscali...
Learn how to make GTA 6 images HD and clear using upscaling, sharpening, AI enhancement, noise reduction, and better image-editing techniques.
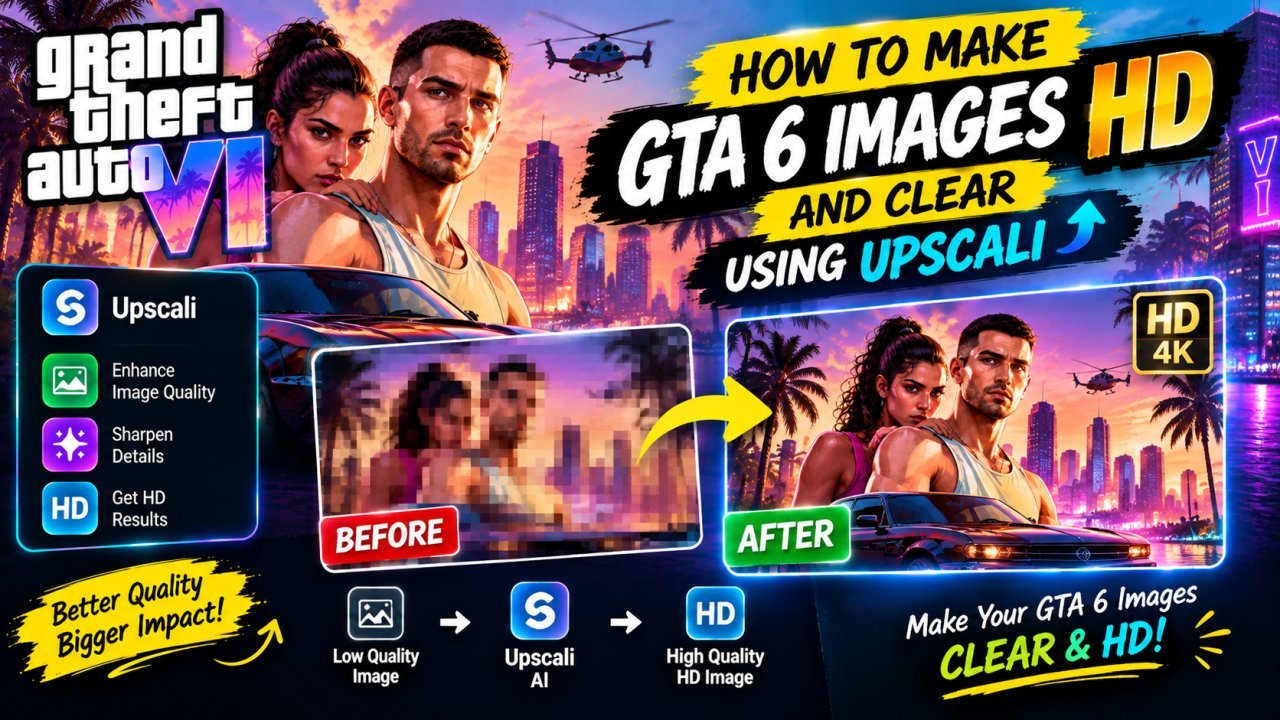
How to Make GTA 6 Images HD and Clear
If your GTA 6 image looks blurry, pixelated, compressed, or unclear, you do not always need to find a completely different image. You can often improve its appearance using image upscaling, sharpening, noise reduction, AI enhancement, and careful editing.
Learning how to make GTA 6 images HD and clear is useful when you want to create wallpapers, YouTube thumbnails, gaming posts, blog graphics, or other digital content.
The important thing is to understand the difference between increasing image size and actually improving image quality. Simply stretching a small image can make it larger, but it usually does not make it genuinely sharper.
In this guide, you will learn practical ways to improve GTA 6 images, how AI upscaling works, how to reduce blur and noise, how to sharpen important details, and how to avoid making an image look unnatural.
What Does It Mean to Make a GTA 6 Image HD and Clear?
Making a GTA 6 image HD and clear generally means improving the image so that it looks sharper, cleaner, and more detailed at a larger display size.
For example, you may have a small GTA 6 screenshot that looks acceptable on your phone but becomes blurry when you use it as a desktop wallpaper.
Image enhancement can help by:
• All Tools • Increasing the image resolution • Improving perceived sharpness • Reducing compression artifacts • Removing or reducing visible noise • Improving important details • Enhancing contrast • Correcting softness • Preparing the image for a larger display
However, there is an important limitation.
An image editor cannot always recover details that were never captured in the original image. AI enhancement can estimate missing details, but those generated details should not automatically be treated as authentic information from the original screenshot.
For the best result, start with the highest-quality source image you can legitimately obtain.
Why GTA 6 Images Can Look Blurry
Before trying to improve an image, it helps to understand why it looks unclear in the first place.
A GTA 6 image may appear blurry because:
• The original file has a low resolution • The image was downloaded from a compressed preview • The image was repeatedly uploaded and downloaded • The image was resized too many times • The image was captured from a video • The image contains motion blur • The image has compression artifacts • The image was enlarged incorrectly • The subject is already out of focus • The image has been heavily edited
For example, taking a 640 × 360 image and simply stretching it to 1920 × 1080 increases its dimensions but does not automatically create the missing detail.
That is why proper upscaling is usually better than basic resizing.
Check the Original Image Before Enhancing It
One of the easiest ways to get a better GTA 6 image is to start with a better source.
Before editing a blurry image, try to find the original or highest-quality version.
Check:
• Image dimensions • File quality • Source website • Compression • Cropping • Watermarks • Image format • Whether the image is an original or repost
For example, if you have a 720p copy but can legitimately obtain a higher-resolution version from the original source, using that version is usually preferable to aggressively enhancing the smaller copy.
AI enhancement should not always be the first step.
Sometimes the best "image enhancement" is simply finding the better original.
Use AI Upscaling to Make GTA 6 Images Larger
AI upscaling is one of the most useful methods for improving a small image.
Traditional resizing mainly estimates pixels mathematically. AI upscaling can analyze patterns, edges, textures, and other visual information to produce a larger image with improved perceived detail.
For example, you may have:
Original: 1280 × 720
After 2× upscaling: 2560 × 1440
After 4× upscaling: 5120 × 2880
The exact result depends on the source image and the software you use.
A 2× enlargement is often a reasonable starting point because extremely aggressive enlargement can introduce artificial-looking details.
When using AI upscaling, compare the enhanced image with the original instead of assuming that the largest output is automatically the best.
How to Make a GTA 6 Screenshot Clearer With Sharpening
Sharpening can make edges and details appear more defined.
For a GTA 6 screenshot, sharpening may help improve the appearance of:
• Character outlines • Hair details • Clothing • Vehicle edges • Buildings • Road markings • Signs • Environmental objects
However, excessive sharpening can make an image look unnatural.
You may notice:
• Bright or dark halos around objects • Excessive texture • Harsh edges • Increased noise • Artificial-looking faces
A better approach is to apply moderate sharpening and then inspect the image at 100% zoom.
If the image starts looking crunchy or overly processed, reduce the sharpening amount.
Reduce Noise Before Sharpening
Noise reduction and sharpening often work better as part of the same workflow.
If a low-quality GTA 6 image contains visible noise, sharpening it first can make that noise more noticeable.
A practical sequence is:
- Start with the best source available.
- Reduce excessive noise or compression artifacts.
- Upscale the image if necessary.
- Apply moderate sharpening.
- Adjust contrast and clarity.
- Inspect the final image at its actual viewing size.
Do not remove too much noise.
Aggressive noise reduction can make faces, clothing, buildings, and textures look unusually smooth or plastic.
The goal is not to remove every tiny variation. The goal is to make the image cleaner while preserving useful visual detail.
Improve GTA 6 Image Quality With Contrast
Sometimes an image looks unclear not because its resolution is extremely low, but because the subject and background have weak contrast.
A small contrast adjustment can help separate important elements.
For example:
A dark character against a dark background may be difficult to see.
Increasing separation between the subject and background can make the character easier to recognize without significantly changing the resolution.
You can improve perceived clarity by adjusting:
• Contrast • Highlights • Shadows • Exposure • Blacks • Whites
Make small changes and compare them with the original.
A good enhancement should improve visibility without making the image excessively dark, bright, or saturated.
Make GTA 6 Characters Look Clearer
Character-focused GTA 6 images often need special attention because faces and small details can become distorted during aggressive enhancement.
When improving a character image:
• Start with the highest-quality source available • Upscale gradually • Use moderate sharpening • Avoid excessive face enhancement • Check eyes and facial features carefully • Watch for unnatural skin texture • Compare the result with the original
AI tools may sometimes reconstruct facial details that were unclear in the source.
That can make the result look sharper, but it can also introduce details that were not actually present in the original image.
For thumbnails or creative projects, this may be acceptable depending on the intended use. For factual reporting about what an original screenshot contains, avoid presenting AI-generated details as original evidence.
Make GTA 6 Cars and Vehicles Look Sharper
Vehicles often contain strong edges, reflections, logos, windows, and other small details.
Upscaling and sharpening can make these areas appear more defined, but excessive processing can also create unwanted artifacts.
For a vehicle-focused image:
- Upscale the image.
- Reduce visible compression artifacts.
- Apply moderate sharpening.
- Adjust contrast if the vehicle blends into the background.
- Check reflective surfaces.
- Inspect logos and small text.
- Compare the enhanced version with the original.
Pay particular attention to reflective surfaces.
AI enhancement can sometimes create strange patterns in reflections or smooth areas that were originally difficult to see.
Make GTA 6 Backgrounds More Clear
Backgrounds can contain buildings, roads, trees, signs, lights, vehicles, and other environmental details.
When improving a background, avoid sharpening everything equally.
Too much sharpening can make distant objects look noisy.
Instead, focus enhancement on the areas that viewers actually need to see.
For example:
• Main subject → stronger detail • Supporting objects → moderate enhancement • Distant background → lighter processing • Sky → minimal sharpening • Smooth surfaces → careful noise reduction
This creates a more natural result than applying maximum sharpness to every part of the image.
Choose the Right Output Resolution
The final resolution should depend on how you plan to use the GTA 6 image.
Use case | Practical starting point Phone wallpaper | Around 1080p or higher Full HD desktop wallpaper | 1920 × 1080 QHD display | 2560 × 1440 4K display | 3840 × 2160 YouTube thumbnail | 1280 × 720 Blog image | Depends on the website layout
These are practical output targets, not guarantees of image quality.
Increasing an image to 4K does not mean the original image suddenly contains genuine 4K-level detail.
A high-resolution output can still contain estimated or reconstructed details if the original source was small.
Do Not Simply Stretch a Low-Resolution GTA 6 Image
One of the most common mistakes is taking a small image and manually increasing its dimensions without using an appropriate upscaling method.
For example:
Original: 640 × 360
Basic resizing: 1920 × 1080
The resulting file has more pixels, but the additional pixels do not automatically contain new meaningful detail.
This can lead to:
• Soft edges • Pixelation • Blurry textures • Unclear faces • Loss of fine details
A dedicated image upscaler can produce a more useful result by analyzing the original image before generating the larger version.
Still, even advanced upscaling has limits. Whenever possible, start with a higher-resolution source instead.
Simple GTA 6 Image Enhancement Workflow
A simple workflow for making GTA 6 images HD and clear is:
STEP 1 Find the highest-quality source available.
STEP 2 Check the original resolution.
STEP 3 Remove unnecessary cropping or compression where possible.
STEP 4 Use AI upscaling if the image needs to be larger.
STEP 5 Reduce excessive noise or compression artifacts.
STEP 6 Apply moderate sharpening.
STEP 7 Adjust contrast, highlights, shadows, and exposure if needed.
STEP 8 Check faces, vehicles, text, and important objects for AI artifacts.
STEP 9 Compare the enhanced image with the original.
STEP 10 Export at the appropriate resolution and file format.
The goal is not simply to make the file bigger.
The goal is to make it look cleaner and more useful while keeping the result visually believable.
Quick Before-and-After Comparison
BEFORE:
• Low resolution • Soft edges • Visible compression • Weak subject separation • Small details difficult to see
AFTER PROPER ENHANCEMENT:
• Higher output resolution • Cleaner edges • Reduced visible compression • Better subject separation • Improved perceived detail • More suitable for wallpapers, thumbnails, and digital content
IMPORTANT:
An enhanced image can look much better than the original, but enhancement cannot guarantee recovery of every detail that was missing from the source.
Best Practices for Making GTA 6 Images HD and Clear
BEST PRACTICES
• Always start with the best source available. • Prefer the original image over a compressed repost. • Use AI upscaling when enlargement is necessary. • Avoid extreme enlargement when the source is extremely small. • Reduce noise before applying strong sharpening. • Use moderate sharpening. • Adjust contrast carefully. • Check faces and small objects for AI artifacts. • Compare the enhanced image with the original. • View the final image at 100% zoom. • Choose the output resolution based on the intended use. • Keep a copy of the original image. • Export the final image in a suitable format. • Check copyright and usage rights before publishing or commercially using the image.
PART 2 — ADVANCED METHODS AND PRACTICAL TECHNIQUES
Use AI Upscaling for GTA 6 Images
AI upscaling is one of the easiest ways to make a small GTA 6 image look larger and clearer.
Instead of simply stretching the image, an AI upscaler analyzes the existing image and attempts to reconstruct additional visual detail.
For example, if your original image is 1280 × 720, you may upscale it to 2560 × 1440 or another larger resolution.
A good workflow is:
- Upload the original GTA 6 image.
- Select a 2× upscale option if available.
- Preview the result.
- Check faces, vehicles, buildings, and text.
- Reduce the enhancement strength if the image looks artificial.
- Export the improved version.
For extremely small or heavily compressed images, start with a moderate upscale rather than immediately choosing the largest available setting.
More enlargement does not automatically mean better quality.
How to Make a GTA 6 Image Look Like 4K
If you want a GTA 6 image to look suitable for a 4K display, you can upscale the image to a 3840 × 2160 output size.
However, there is an important difference between a 4K-sized image and a genuine 4K-quality source.
For example:
Original image: 1280 × 720
Upscaled output: 3840 × 2160
The second file has 4K dimensions, but the original image did not contain genuine 4K detail.
For the best result:
- Start with the highest-resolution source available.
- Use a quality AI upscaler.
- Avoid excessive sharpening.
- Reduce compression artifacts.
- Check small details after upscaling.
- Compare the result with the original.
- Do not claim reconstructed details are original details.
This approach can produce a cleaner large image while keeping expectations realistic.
Fix Pixelation in GTA 6 Images
Pixelation usually becomes visible when a small image is enlarged too much.
You may notice:
- Blocky edges
- Square-looking pixels
- Rough character outlines
- Pixelated backgrounds
- Broken-looking small details
To reduce pixelation:
- Use the highest-quality original available.
- Avoid repeatedly resizing the image.
- Apply AI upscaling.
- Use moderate noise reduction.
- Apply light sharpening after upscaling.
- Inspect the final image at 100% zoom.
If the original image is extremely small, some pixelation may remain.
Do not keep applying sharpening to hide pixelation. Excessive sharpening can actually make the problem more obvious.
Remove Compression Artifacts From GTA 6 Images
Images that have been downloaded and re-uploaded multiple times can develop compression artifacts.
These may appear as:
- Blocky textures
- Blurry edges
- Strange patterns
- Loss of fine detail
- Smudged backgrounds
- Unusual colors around sharp edges
A useful workflow is:
Original source ↓ Artifact reduction ↓ AI upscaling ↓ Moderate sharpening ↓ Final inspection
Avoid processing the same image repeatedly through different apps.
Every additional save or compression step can potentially reduce image quality.
Whenever possible, keep the original file and create edited copies from it.
Make GTA 6 Faces Clearer
Faces require special care because AI enhancement can sometimes invent or alter small facial details.
If a GTA 6 character's face looks blurry:
- Start with the best source image available.
- Upscale moderately.
- Reduce noise carefully.
- Apply gentle sharpening.
- Avoid extreme face enhancement.
- Check the eyes and facial features.
- Compare the result with the original.
If an AI tool creates a completely different facial appearance, reduce the enhancement level or try another method.
For creative thumbnails, an enhanced face may be visually useful. However, if you are presenting the image as an accurate representation of an original screenshot, avoid treating AI-generated facial details as authentic source details.
Make GTA 6 Cars Look Clear and Detailed
Vehicles can benefit significantly from careful enhancement because their shapes contain many strong edges and small details.
To improve a GTA 6 car image:
- Upscale the image.
- Reduce compression artifacts.
- Adjust contrast slightly.
- Apply moderate sharpening.
- Check windows and reflective surfaces.
- Inspect logos and small details.
- Compare the final result with the original.
Be careful with reflections.
AI enhancement can sometimes create strange patterns in shiny surfaces, windows, headlights, or body reflections.
If you notice these problems, reduce the enhancement level rather than trying to fix everything with additional sharpening.
Make GTA 6 Game Environments More Clear
GTA 6 environment screenshots may contain many small details, including buildings, roads, vehicles, signs, trees, lights, and distant objects.
Trying to sharpen every detail equally can make the image look unnatural.
Instead, create a visual hierarchy.
Main subject: Use stronger but controlled enhancement.
Nearby objects: Use moderate enhancement.
Distant background: Use lighter processing.
Sky and smooth areas: Avoid unnecessary sharpening.
This approach helps maintain a natural appearance while making the important parts of the screenshot easier to see.
Use Selective Sharpening
You do not always need to sharpen the entire GTA 6 image.
Selective sharpening can be more effective.
For example, if the image contains a character in front of a city background, you can focus enhancement on:
- Face
- Hair
- Clothing
- Vehicle
- Main object
The distant buildings and sky can receive much less sharpening.
This prevents the background from becoming noisy while keeping attention on the main subject.
Selective editing is especially useful when preparing GTA 6 images for YouTube thumbnails because thumbnails are viewed at small sizes.
Improve Colors Without Making the Image Fake
Color enhancement can make a GTA 6 image look more attractive, but excessive saturation can quickly make it look unrealistic.
You can make small adjustments to:
- Saturation
- Contrast
- Exposure
- Highlights
- Shadows
- Temperature
- Vibrance
For example, if a nighttime screenshot looks too dark, slightly lifting the shadows can reveal more of the environment.
If the colors look washed out, a small contrast or vibrance adjustment may help.
Avoid pushing every setting to the maximum.
The goal is a cleaner and more balanced image, not an image that looks heavily filtered.
Fix a Blurry GTA 6 Image Step by Step
If you have one GTA 6 image that is particularly blurry, follow this workflow.
STEP 1 — Check the source
Find out whether a higher-quality version exists.
STEP 2 — Create a copy
Keep the original file unchanged.
STEP 3 — Upscale
Use a suitable image upscaling tool.
STEP 4 — Reduce artifacts
Clean excessive compression or noise if necessary.
STEP 5 — Sharpen
Apply moderate sharpening.
STEP 6 — Adjust contrast
Improve subject visibility with small adjustments.
STEP 7 — Inspect details
Check faces, vehicles, text, buildings, and other important areas.
STEP 8 — Compare
Place the original and enhanced versions side by side.
STEP 9 — Export
Save the final version at the resolution required for your project.
This process gives you more control than simply applying one strong "enhance" filter.
GTA 6 Images for YouTube Thumbnails
If you are enhancing a GTA 6 image for a YouTube thumbnail, the goal is slightly different from creating a wallpaper.
A thumbnail needs to remain recognizable when displayed at a small size.
Focus on:
- Clear main subject
- Strong subject-background separation
- Visible face
- Clean edges
- Limited background distractions
- Good contrast
- Readable text space
- Appropriate brightness
For a YouTube thumbnail, 1280 × 720 is a common target size.
However, starting with a larger source can give you more flexibility when cropping and editing.
After creating the thumbnail, view it at a small size.
If the character or main object is difficult to recognize when the thumbnail is small, more sharpening alone will not solve the problem. You may need to improve the composition instead.
GTA 6 Images for Wallpapers
For a GTA 6 wallpaper, resolution and composition become especially important.
Before enhancing the image, consider your screen orientation.
Desktop: Landscape images are usually suitable.
Phone: Portrait-oriented images may work better.
If the image does not match your screen ratio, crop it carefully rather than stretching it.
For example, stretching a landscape screenshot vertically can distort characters, cars, and buildings.
A better option is to crop the image or expand the background using an appropriate image-editing method.
Use Background Expansion When You Need a Different Aspect Ratio
Sometimes a GTA 6 image is high quality but does not fit the format you need.
For example, you may have a landscape screenshot but want to use it as a portrait phone wallpaper.
Instead of stretching the entire image, you can use background expansion tools to create additional space around the original image.
A practical workflow is:
- Keep the original subject unchanged.
- Expand the canvas.
- Generate or extend the surrounding background.
- Check the transition between the original and expanded areas.
- Correct obvious artifacts.
- Export the final image.
Be aware that AI-generated background areas are reconstructed content and should not be presented as original game footage if accuracy matters.
How to Make GTA 6 Images Clear Without Overprocessing
A common problem with AI enhancement is making the image look too processed.
Warning signs include:
- Extremely sharp edges
- Artificial skin texture
- Strange hair patterns
- Overly detailed buildings
- Fake-looking reflections
- Excessive saturation
- Halos around objects
- Plastic-looking surfaces
If you see these problems, reduce the intensity of the enhancement.
A useful rule is:
Enhance → Compare → Reduce → Compare again.
The best result is not necessarily the sharpest version.
A natural-looking image with slightly less detail can be more convincing than an extremely sharp image filled with artificial artifacts.
Common Mistakes When Enhancing GTA 6 Images
Here are some mistakes that can reduce the quality of your final image.
Starting With an Extremely Small Source
AI can improve a small image, but it cannot guarantee recovery of every missing detail.
Using Maximum Enhancement
Strong processing can create artificial textures and halos.
Sharpening Before Cleaning Noise
Sharpening can make noise more visible.
Repeatedly Saving Compressed Files
Multiple compression cycles can reduce quality.
Stretching the Image
Stretching can distort the original proportions.
Ignoring AI Artifacts
Always inspect faces, hands, vehicles, signs, and reflections.
Removing the Original
Keep an untouched copy so you can compare your enhancement.
Treating AI-Generated Details as Original Details
AI enhancement can reconstruct information rather than recover exact original pixels.
Ignoring Copyright
Improving an image does not automatically give you ownership or permission to republish the original copyrighted material.
Choosing an AI Image Enhancer
When choosing an image enhancement tool, focus on the features you actually need rather than choosing a tool simply because it claims to produce "4K" images.
Useful features can include:
- AI upscaling
- Noise reduction
- Sharpening
- Artifact removal
- Face enhancement
- Batch processing
- Adjustable enhancement strength
- Multiple output resolutions
- Preview before export
Also check the tool's export limitations, file-size limits, watermark policy, and privacy terms before uploading images.
For sensitive or unpublished material, review how the service handles uploaded files before using it.
Basic Upscaling vs AI Upscaling
Basic resizing is useful for simple size changes and is available in most image editors.
Its limitations are that it generally does not recover much detail and can produce soft results when enlarging an image significantly.
AI upscaling is better suited to larger enlargements and can improve perceived detail and edge quality.
However, AI upscaling also has limitations. Results depend heavily on the source image, and aggressive settings can create artificial details or unnatural textures.
For significant enlargement, AI upscaling can be useful, but it should still be treated as enhancement rather than guaranteed recovery of the original detail.
Complete GTA 6 Image Enhancement Workflow
Follow this complete workflow when you want to make a GTA 6 image HD and clear.
STEP 1 — FIND THE BEST SOURCE
Search for the original or highest-quality GTA 6 image you can legitimately obtain.
STEP 2 — CHECK RESOLUTION
Confirm the image dimensions before editing.
STEP 3 — SAVE THE ORIGINAL
Create a duplicate so the original remains untouched.
STEP 4 — CLEAN THE IMAGE
Reduce excessive noise and compression artifacts if necessary.
STEP 5 — UPSCALE
Use moderate AI upscaling when the image needs to be larger.
STEP 6 — SHARPEN
Apply controlled sharpening to important details.
STEP 7 — ADJUST LIGHTING
Correct exposure, highlights, shadows, and contrast if needed.
STEP 8 — CHECK COLORS
Make small adjustments to saturation or vibrance.
STEP 9 — INSPECT ARTIFACTS
Look closely at faces, vehicles, signs, reflections, and background details.
STEP 10 — COMPARE WITH ORIGINAL
Make sure the enhancement has actually improved the image.
STEP 11 — CROP FOR YOUR USE
Prepare the image for wallpaper, thumbnail, blog, or social media dimensions.
STEP 12 — EXPORT
Save the final version in an appropriate format and resolution.
STEP 13 — CHECK USAGE RIGHTS
Make sure your intended use is permitted before publishing or monetizing the image.
Before and After Example
Imagine you have a GTA 6 screenshot at 1280 × 720.
The image looks soft when displayed on a large monitor.
Instead of simply stretching it to 3840 × 2160, you could use this workflow:
1280 × 720 original ↓ AI upscaling ↓ Noise and compression cleanup ↓ Moderate sharpening ↓ Contrast adjustment ↓ Artifact inspection ↓ 3840 × 2160 final output
The result may look significantly cleaner and more suitable for a large display.
However, the final image should still be considered an enhanced version of the original rather than a guarantee of genuine native 4K detail.
Tips for Getting the Best Results
Keep these tips in mind:
- Start with the best source possible.
- Do not rely on a tiny search preview.
- Use moderate enhancement settings.
- Compare before and after versions.
- Check important details at 100% zoom.
- Avoid excessive sharpening.
- Avoid aggressive face enhancement.
- Reduce noise carefully.
- Do not assume AI-generated details are authentic.
- Choose the correct output resolution.
- Keep the original file.
- Check usage rights before publishing the image.
Part 2 Summary
Making GTA 6 images HD and clear requires a balance between resolution, detail, and natural appearance.
AI upscaling can help enlarge a small screenshot, while noise reduction, artifact removal, sharpening, contrast adjustments, and color correction can improve its overall appearance.
For the best result, avoid trying to make every part of the image extremely sharp. Focus enhancement on the main subject and keep backgrounds more natural.
The most important workflow is:
Best source → Clean → Upscale → Sharpen → Adjust → Inspect → Compare → Export
Always keep the original image because AI enhancement may reconstruct details that were not clearly present in the source.
Part 3 — Conclusion, FAQs, Schema, Links & SEO Checklist
Conclusion: How to Make GTA 6 Images HD and Clear
Learning how to make GTA 6 images HD and clear does not always mean you need to completely recreate the image. In many cases, a low-quality GTA 6 screenshot or picture can be improved with the right combination of upscaling, sharpening, noise reduction, color correction, and careful editing.
The most important step is to start with the highest-quality original image you can find. If the source image is already extremely small or heavily compressed, even the best enhancement tool may not be able to restore every missing detail.
For better results, use AI upscaling when you need to increase resolution, apply sharpening carefully to improve edges, reduce compression artifacts when necessary, and adjust colors without making the image look artificial.
If you are preparing GTA 6 images for a YouTube thumbnail, focus on clarity at small sizes. Characters, cars, important objects, and text should remain easy to recognize even when the thumbnail is displayed on a mobile screen.
For wallpapers, prioritize resolution, clean details, and a suitable aspect ratio. Avoid excessive sharpening or AI enhancement because it can create strange edges, artificial textures, and unwanted details.
A simple workflow can be:
Find the best source → Upscale → Reduce noise → Sharpen → Adjust colors → Check details → Export in the correct resolution
The goal is not simply to make the image bigger. The goal is to make it look cleaner, sharper, and more useful while keeping the original GTA 6 visual style as natural as possible.
Key Takeaways
Here are the most important things to remember when trying to make GTA 6 images HD and clear:
- Start with the highest-resolution source available.
- Avoid enlarging very small images without enhancement.
- Use AI upscaling when you need more resolution.
- Use sharpening carefully.
- Reduce compression artifacts before applying strong sharpening.
- Do not over-process faces, cars, or game environments.
- Adjust brightness and contrast only when necessary.
- Keep colors natural.
- Check the image at 100% zoom before exporting.
- Use the correct resolution for thumbnails, wallpapers, social media, or other purposes.
- Compare the enhanced image with the original before deciding whether the result is actually better.
- Save the final image in a suitable quality setting.
A cleaner image is usually better than an image that is simply larger.
Simple Formula to Make GTA 6 Images HD
If you want a quick process, use this formula:
High-quality source + AI upscaling + noise reduction + selective sharpening + color correction + final quality check = clearer GTA 6 image
For example, if you have a blurry GTA 6 screenshot:
- Find the original or highest-quality version.
- Upload it to an image enhancement or AI upscaling tool.
- Increase the resolution.
- Reduce visible noise or compression.
- Sharpen important details.
- Adjust brightness and contrast.
- Check faces, cars, text, and background details.
- Export the final image.
This approach can work for screenshots, wallpapers, thumbnails, social media graphics, and other personal image-editing projects.
CTA
Want to create cleaner and sharper gaming images?
Use the techniques in this guide to improve your GTA 6 screenshots, wallpapers, and thumbnail images without making them look overly processed.
If you regularly create gaming content, keep your original images, experiment with different enhancement levels, and always compare the final result with the original before publishing.
[CTA PLACEHOLDER: Add your image editing service, AI image enhancement tool, thumbnail service, or related offer here.]
Frequently Asked Questions
1. How can I make GTA 6 images HD and clear?
You can make GTA 6 images HD and clear by using AI upscaling, sharpening, noise reduction, and basic color correction. Start with the highest-quality original image available, upscale it carefully, remove unwanted artifacts, and then apply moderate sharpening.
2. Can I make a blurry GTA 6 image clearer?
Yes, you can often improve a blurry GTA 6 image with an AI image enhancer or upscaler. The result depends on the quality of the original image. Extremely blurry or heavily compressed images may have limited recoverable detail.
3. Can AI turn a GTA 6 image into 4K?
AI upscaling tools can increase the pixel dimensions of an image to a 4K-sized output. However, increasing resolution does not guarantee that the image will contain genuine original 4K detail. The result depends on the source image and the enhancement technology used.
4. How do I fix pixelated GTA 6 images?
To fix a pixelated GTA 6 image, use an AI upscaler or image enhancement tool designed to improve low-resolution images. Upscale the image gradually when possible, reduce artifacts, and apply moderate sharpening after enlargement.
5. How can I make GTA 6 screenshots sharper?
You can make GTA 6 screenshots sharper by applying controlled sharpening after upscaling. Avoid using excessive sharpening because it can create halos, jagged edges, and unnatural-looking details.
6. How can I improve GTA 6 images for YouTube thumbnails?
For YouTube thumbnails, increase the image resolution, improve subject clarity, remove distracting details, and make important characters or objects stand out. Always check the thumbnail at a small size because viewers may see it primarily on mobile devices.
7. How can I make GTA 6 images better for wallpapers?
For wallpapers, use the highest-resolution source you can find and choose an output size that matches the target screen. If the original image does not have the correct aspect ratio, expand or crop the background carefully instead of stretching the main subject.
8. Does sharpening make a low-quality image HD?
No. Sharpening can make edges appear clearer, but it does not create genuine missing resolution. For significant quality improvement, combine upscaling with artifact reduction and controlled sharpening.
9. Why does my enhanced GTA 6 image look fake?
An enhanced image may look fake when the AI enhancement is too strong. Excessive sharpening, unrealistic textures, aggressive facial enhancement, and strong color changes can make the result look unnatural. Try a lower enhancement level and compare it with the original.
10. What is the best way to make GTA 6 images clearer?
A practical approach is to use the best available source image, upscale it with a suitable image enhancement tool, reduce compression or noise, apply selective sharpening, adjust colors lightly, and inspect the final result before exporting.
Ready to optimize your images?
Every tool mentioned in this article is free to use. No upload, no signup, and no watermarks — ever.
Try our free toolsRelated articles
How to Download GTA 6 Images in HD Learn how to download GTA 6 images in HD from....
Learn how to download GTA 6 images in HD from reliable sources, find official screenshots and artwork, save high-quality images, and avoid low-resolution or misleading downloads.
How to Improve a YouTube Thumbnail With AI
Learn how to improve a YouTube thumbnail with AI using practical methods for better composition, text, backgrounds, colors, faces, and visual clarity. Discover how to use AI to enhance an existing thumbnail without making it look confusing or generic.

How to Create a YouTube Thumbnail With AI
Learn how to create a YouTube thumbnail with AI using simple prompts, image generation, editing, text placement, and mobile-friendly design tips.