
AI Image Extender: How to Expand a Photo Beyond Its Original Edges
Learn how an AI image extender expands photos beyond their original edges, adds realistic backgrounds, and changes image proportions without cropping.
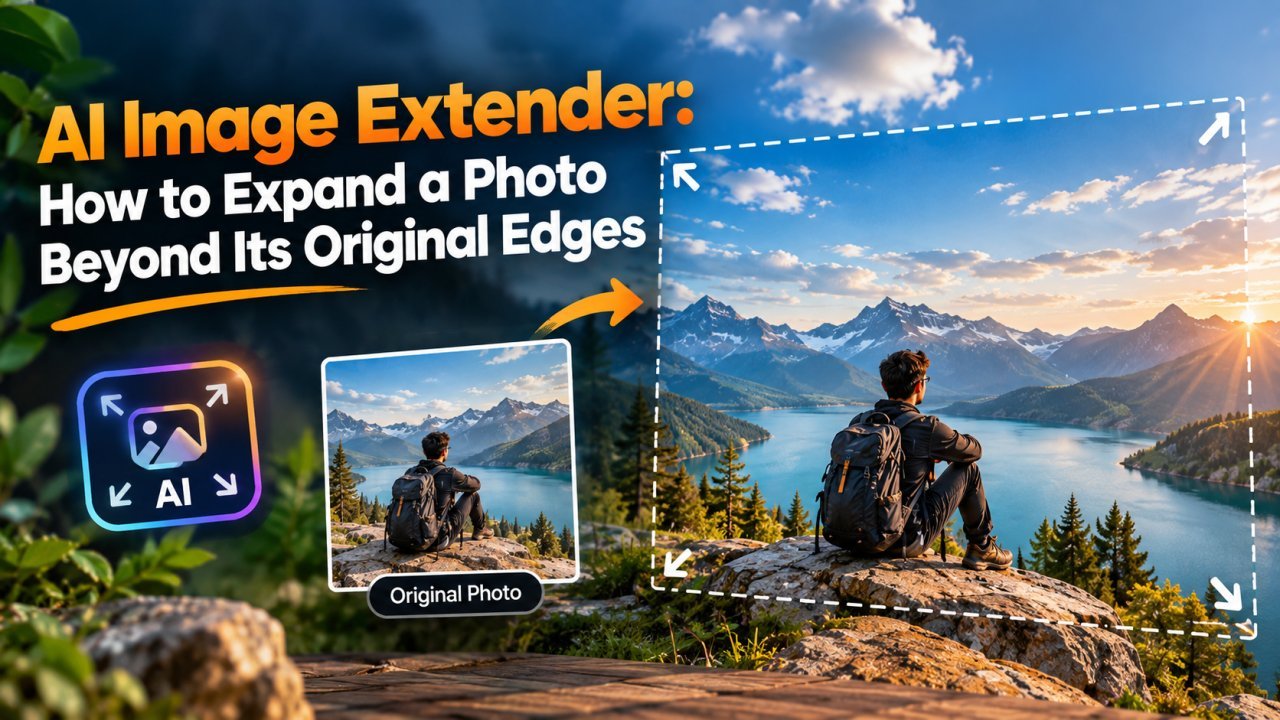
AI Image Extender: How to Expand a Photo Beyond Its Original Edges
Sometimes a photo looks good, but it does not have enough space for the layout you need.
Maybe the person is too close to the edge. Maybe you need a wider image for a website banner. Or perhaps you want to turn a portrait photo into a landscape image without cropping the subject.
This is where an AI image extender can help.
An AI image extender uses artificial intelligence to generate new content beyond the original edges of a photo. Instead of simply stretching the existing pixels, it analyzes the image and creates additional visual content that attempts to match the original scene.
For example, if you have a portrait of a person standing outdoors, an AI image extender may create more sky, ground, walls, trees, or other surrounding details beyond the original frame.
This process is commonly related to AI outpainting or generative image expansion.
In this guide, you will learn how AI image extenders work, when to use them, how they differ from normal resizing and cropping, and how to expand a photo while keeping the result natural.
All Image Tools
What Is an AI Image Extender?
An AI image extender is a tool or feature that uses generative AI to add new visual content around an existing image.
Instead of changing only the pixels that already exist, the AI generates additional content outside the original boundaries.
Imagine that your original photo looks like this:
Original image → AI generates content beyond the edges → Expanded image
The original part of the photo remains the reference.
The AI then attempts to continue the surrounding scene in a visually consistent way.
Depending on the image, the extension may include:
- More background
- Additional sky
- More floor or ground
- Extra walls
- More landscape
- Extended clothing or body areas
- Additional objects
- More room around a product
- A wider environment
The exact result depends on the image, the AI model, the selected expansion area, and the instructions provided to the tool.
What Is AI Outpainting?
You may also hear the term AI outpainting when researching image extenders.
Outpainting means generating new image content outside the original image boundaries.
It is different from traditional image editing because the new area does not already exist in the original photo.
For example, suppose you have a photograph showing a person from the waist up.
The original image may not contain anything beyond the left and right edges.
An AI outpainting tool can attempt to generate more of the surrounding environment.
The result can make the original image appear wider without simply stretching it.
How Does an AI Image Extender Work?
The basic process is easier to understand than it may sound.
An AI image extender generally starts with your existing image.
You then select the direction or area where you want more space.
For example, you might expand:
- Left
- Right
- Top
- Bottom
- All four sides
The AI analyzes the visible image and generates content for the new area.
It may examine elements such as:
- Colors
- Shapes
- Lighting
- Textures
- Objects
- Perspective
- Background patterns
- Edges
- Overall visual style
The generated area is then combined with the original image.
The goal is to make the transition between the original photo and the generated area appear natural.
AI Image Extender vs Normal Image Resizing
These two processes are very different.
Normal Image Resizing
When you resize an image, you change its dimensions.
For example:
1200 × 800 → 1800 × 1200
The software creates additional pixels through interpolation or other scaling methods.
The image becomes larger, but the software is not necessarily creating a new environment outside the original photo.
AI Image Extension
With AI expansion, the goal is different.
You might start with:
1200 × 800
and create a larger canvas such as:
1800 × 1200
The AI then generates content for the newly added area.
This can create more visual surroundings instead of simply enlarging the original photo.
That is why an AI image extender can be useful when you need more composition around the subject.
AI Image Extender vs Cropping
Cropping removes part of an image.
AI extension does the opposite.
Cropping
Original image → Remove edges → Smaller visible area
AI Expansion
Original image → Add new area → Larger composition
This difference is important.
Suppose a person's face is close to the edge of a photo.
Cropping may remove part of the subject or make the composition tighter.
An AI image extender can instead add more background around the person.
This gives the subject more breathing room.
Why Would You Need to Expand a Photo?
There are many reasons to extend an image.
1. Change the Aspect Ratio
A photo may be too narrow or too wide for the layout you need.
AI expansion can help create a different aspect ratio without simply cropping the original image.
For example:
Portrait → Square
or
Square → Landscape
or
Landscape → Wider banner
The AI fills the newly created areas.
2. Create More Space Around a Subject
A subject may be positioned too close to an edge.
Expanding the image can create more room around it.
This can make the composition feel less crowded.
3. Create Space for Text
AI image expansion can also be useful when designing promotional graphics.
For example, you may want a person or product on the right side and text on the left.
Instead of placing text directly over the subject, you can expand the image toward the left.
The generated area can provide additional visual space.
4. Prepare Images for Different Platforms
Different platforms and layouts use different image shapes.
A photo that works well in one format may not fit another.
Instead of immediately cropping it, you can expand the image to create a more suitable composition.
5. Repair a Tight Composition
Sometimes the photographer captures a subject too close to the edge.
If there is not enough surrounding background, AI expansion may help create additional breathing room.
This can be useful for portraits, products, landscapes, and other photographs.
When Should You Use an AI Image Extender?
An AI image extender is most useful when the surrounding scene can reasonably be continued.
For example, it may work well when the edges contain:
- Sky
- Grass
- Sand
- Walls
- Roads
- Water
- Simple backgrounds
- Clouds
- Plain surfaces
- Repeating textures
These areas often give the AI useful visual information for generating more surroundings.
For complicated scenes, the results may require more checking.
When AI Image Extension Can Be Difficult
AI does not actually know exactly what existed outside the original photograph.
It generates a plausible continuation based on the information available in the image and the model's learned patterns.
This means the extension can sometimes contain mistakes.
Problems may appear when the image includes:
- Faces
- Hands
- Text
- Logos
- Detailed architecture
- Complex objects
- Repeating patterns
- Multiple people
- Precise product designs
- Fine mechanical details
The AI may create something that looks realistic at first glance but contains details that were not actually present.
This is why you should always inspect the expanded area before using the final image.
How to Expand a Photo With an AI Image Extender
The exact controls vary between tools, but the general process is straightforward.
Step 1: Choose the Original Photo
Start with the highest-quality version of the image available.
Avoid using a heavily compressed screenshot if you have access to the original.
A clear source image gives the AI more visual information to work with.
Step 2: Upload the Image
Open your chosen AI image-extending tool and upload the photo.
The tool will usually display the original image inside an editing workspace.
At this point, check the edges.
Ask yourself where you need more space.
Do you need more room on the left?
Do you need more sky above the subject?
Do you need extra ground below?
Or do you need to expand the image in multiple directions?
Step 3: Select the Expansion Area
The tool may allow you to change the canvas size or drag the image boundaries outward.
For example, you might extend:
Left + Right
or
Top + Bottom
or all four sides.
Try not to expand more than necessary on the first attempt.
A smaller extension can often be easier for the AI to generate consistently.
Step 4: Choose the New Aspect Ratio
If you are expanding the image for a specific purpose, choose the target shape carefully.
For example:
- Square
- Landscape
- Portrait
- Wide banner
- Custom dimensions
The correct ratio depends on where you plan to use the image.
Do not choose a larger canvas simply because the tool allows it.
The final composition should still look balanced.
Step 5: Add a Prompt if the Tool Supports One
Some AI image-extending tools allow you to describe what should appear in the new area.
This can be helpful when the surrounding scene needs a specific continuation.
For example, you might describe:
- Clear blue sky
- Wooden floor
- Green grass
- Modern room
- Beach background
- Soft studio wall
Keep instructions clear and relevant to the original photo.
If the original image already contains enough information for a natural extension, a simple instruction may be better than an overly detailed prompt.
Step 6: Generate the Extension
Now generate the expanded area.
The AI will attempt to create content that matches the original image.
Depending on the tool, you may receive one or several variations.
Do not automatically choose the first result.
Compare the options carefully.
Step 7: Check the Transition
Look closely at where the original image meets the generated area.
Check whether:
- Lighting matches
- Colors match
- Perspective looks natural
- Textures continue properly
- Objects remain believable
- Shadows make sense
- The horizon is consistent
A good extension should not look like an obvious patch added around the photo.
How to Expand the Background With AI
Background expansion is one of the most common uses for AI image extenders.
Suppose you have a person standing against a simple outdoor background.
If you need more space around the person, you can expand the canvas and allow the AI to generate more of the surrounding environment.
The AI may continue elements such as:
- Sky
- Trees
- Buildings
- Ground
- Walls
- Clouds
- Landscape
The more visually consistent the original background is, the easier it may be for the generated area to blend into the scene.
How to Extend a Portrait Photo
Portraits can benefit from AI expansion when the subject is too close to the edge.
For example, if a person's face is near the right edge, you can expand the image toward the right to create additional background.
You can also expand both sides to create a wider composition.
However, portraits require extra attention.
Faces and bodies are visually important, so check the generated area carefully.
Look for unnatural:
- Facial features
- Hair
- Clothing
- Hands
- Body proportions
- Jewelry
- Accessories
If the AI-generated area includes part of a person, inspect it closely before publishing.
How to Extend a Landscape Photo
Landscape photos are often suitable for image expansion because they can contain large areas of sky, ground, water, or other relatively continuous backgrounds.
For example, a wide landscape can sometimes be extended horizontally.
A photo showing a large amount of sky may also be expanded upward.
The result can create a wider or taller composition without removing the original landscape.
When expanding landscapes, check the horizon carefully.
A distorted or broken horizon can make the generated area immediately noticeable.
How to Extend a Product Photo
AI image extension can also create additional background around products.
For example, suppose a product is centered but too close to the edges of the original photograph.
You can expand the canvas to create more space around the product.
This can be useful for:
- E-commerce graphics
- Advertisements
- Product banners
- Social media posts
- Website headers
- Marketing designs
However, be careful when the product itself is extended.
The generated version may change small product details.
If accurate product appearance is important, keep the original product intact and use AI primarily for the surrounding background.
How to Expand a Photo for Social Media
Social media designs often require different aspect ratios.
Instead of cropping a photo to fit a particular layout, AI expansion can create additional background around the original composition.
For example, a portrait image can be expanded into a wider design.
A landscape image can be expanded vertically.
A square image can be extended into a larger canvas.
The important thing is to keep the original subject in a strong position.
Do not let the AI-generated area become more visually dominant than the original photo.
How to Expand an Image Without Cropping
The basic principle is simple:
Do not reduce the original image to fit the new format. Increase the canvas and generate content around it.
For example:
Original: 1200 × 800 pixels
Expanded: 1600 × 1000 pixels
The original image remains part of the final composition.
The additional area is generated outside the original edges.
This is one of the main reasons AI image extenders are useful.
They can change the composition while preserving the visible content that was already captured.
How Much Should You Expand an Image?
There is no single amount that works for every photo.
Start with a reasonable extension.
For example, if you only need a little extra room, add a small amount of canvas.
If you need a completely different aspect ratio, you may need a larger expansion.
However, very large extensions can become more difficult for AI systems to generate convincingly.
A practical approach is to expand gradually.
Instead of asking the AI to generate a huge area around a small original photo, expand one section at a time when the tool allows it.
This gives you more control over the result.
Tips for Getting More Natural AI Extensions
Use a Good Source Image
The AI needs useful visual information.
A clear, high-quality image usually gives you a better starting point than a tiny, blurry image.
Expand in Logical Directions
Think about the scene before choosing where to expand.
If the image already contains sky at the top, extending upward may make sense.
If the subject is standing on a road, extending the road area may be more natural than extending an unrelated section.
Keep the Original Subject Protected
When possible, keep the main subject within the original image area.
Let the AI generate mostly background around it.
This reduces the chance of important details being changed.
Check Multiple Variations
If the tool provides multiple results, compare them.
One version may have better lighting.
Another may have a more natural background.
Another may preserve perspective more accurately.
Review the Final Image at Full Size
An AI extension can look good when viewed as a small thumbnail but reveal problems when enlarged.
Always inspect the final image at a useful viewing size before publishing it.
What Comes Next
In Part 2, we will move into practical AI image-extending workflows and cover how to expand images in different directions, how to write better prompts, how to extend backgrounds naturally, how to create wider and taller images, how to fix bad AI extensions, and how to avoid common AI-generated artifacts.
We will also look at practical use cases for portraits, products, social media graphics, wallpapers, thumbnails, and website banners.
Part 2: Practical Ways to Use an AI Image Extender
Now that you understand what an AI image extender does, it is time to look at practical ways to expand photos and get more natural results.
The most important idea is to treat AI expansion as a composition tool, not just a way to make an image bigger.
You are giving the AI additional space and asking it to continue the visual environment around your original photo.
How to Expand an Image to the Left
Suppose the main subject is positioned close to the left side of your photo and you need more room on that side.
You can expand the canvas toward the left and let the AI generate the missing background.
This can be useful when:
- A person is close to the edge.
- You need space for text on the left.
- A product needs more breathing room.
- You want a wider composition.
- You are creating a banner.
Before generating, look at the existing background on the left edge.
If the edge contains a simple wall, sky, road, grass, or other continuous background, the AI may have useful information to continue it.
How to Expand an Image to the Right
The same method works on the right side.
For example, imagine a portrait where the person is positioned toward the left and there is not enough room on the right.
Expanding the image toward the right can create more background.
This can be particularly useful when you want the subject to remain on one side of a design and leave open space for text or other elements.
Keep the original subject untouched whenever possible.
The AI should mainly generate the surrounding area.
How to Expand an Image Upward
Expanding upward is useful when you need more room above the subject.
This can work well with photos containing:
- Sky
- Clouds
- Plain walls
- Studio backgrounds
- Trees
- Simple architecture
For example, a portrait with very little space above the person's head can be extended upward.
This creates more breathing room and can make the composition feel less crowded.
Be careful with architectural scenes or complex backgrounds because lines and structures need to continue naturally.
How to Expand an Image Downward
You can also generate additional space below the original image.
This can be useful for:
- Ground
- Floors
- Roads
- Tables
- Simple backgrounds
- Product displays
For example, if a product photo is too close to the bottom edge, you can expand the canvas downward and generate more of the surface underneath it.
Check shadows carefully.
If the original object has a shadow, the AI-generated area should look consistent with the direction and softness of that shadow.
How to Expand an Image in All Directions
Sometimes you need more space on every side.
An AI image extender can create a larger canvas around the original photo and generate new content around all four edges.
This can be useful when changing a small image into a larger composition.
However, expanding in every direction at once can introduce more opportunities for inconsistencies.
A safer approach can be to expand gradually.
For example:
Step 1: Expand left and right.
Step 2: Review the result.
Step 3: Expand top and bottom.
Step 4: Review the final image again.
This gives you more control over the generated content.
How to Use AI Expansion to Change Aspect Ratio
One of the biggest advantages of AI image expansion is changing an image's aspect ratio without immediately cropping the original.
For example, you might have a portrait photo but need a wider design.
Instead of removing parts of the photo, you can extend the sides.
Similarly, if you have a landscape image and need a taller format, you can expand the top and bottom.
The basic workflow is:
Original image → Larger canvas → AI-generated surroundings → New aspect ratio
The original subject remains visible while the composition becomes more suitable for the new format.
How to Make a Portrait Photo Wider With AI
A vertical portrait can be difficult to use in a wide layout.
Cropping may remove part of the subject.
Stretching can distort the person.
AI expansion provides another option.
Expand the left and right sides and allow the AI to generate more of the surrounding background.
For example, if the person is standing outdoors, the AI may continue the surrounding landscape.
If the person is photographed in a studio, it may continue the wall or studio background.
Keep the person within the original image whenever possible.
This helps preserve the important facial and body details.
How to Make a Landscape Photo Taller With AI
Landscape images are naturally wide.
If you need a taller format, expand the image vertically.
For example, you could generate additional sky above and ground below.
This can be useful for:
- Posters
- Social media graphics
- Mobile wallpapers
- Vertical advertisements
- Story-style designs
The key is to understand what naturally exists beyond the original frame.
If the photo already has a large amount of sky, expanding upward may be relatively straightforward.
If the top edge contains a building, tree, or person, the AI has a more complicated task.
How to Create More Sky With an AI Image Extender
Sky is often a useful area for AI expansion because it can contain relatively smooth color transitions and recognizable cloud patterns.
Suppose a person's head is very close to the top of the image.
You can expand upward and ask the AI to continue the sky.
If the original image contains clouds, you can use a prompt that describes the existing atmosphere when the tool supports text instructions.
For example:
“Continue the soft blue sky with natural white clouds matching the original lighting.”
Keep prompts consistent with what is already visible.
Do not ask for a sunset if the original photo clearly shows a bright midday sky unless you intentionally want to change the scene.
How to Extend a Wall or Studio Background
Simple indoor backgrounds can also be suitable for AI expansion.
If the original image shows a plain wall, studio backdrop, or simple interior surface, expanding the sides may produce a clean result.
The main thing to watch is perspective.
If the wall contains horizontal or vertical lines, the AI needs to continue those lines in a believable way.
Look closely at:
- Wall edges
- Panels
- Shelves
- Tiles
- Frames
- Windows
- Shadows
Small inconsistencies can become obvious when the background contains strong straight lines.
How to Extend a Floor or Ground
When expanding downward, the AI may need to continue a floor, road, sand, grass, or another surface.
Perspective becomes especially important here.
Lines should generally continue toward the correct vanishing point.
Textures should also remain consistent.
For example, if the original image shows a wooden floor, the generated boards should follow the existing perspective rather than suddenly changing direction.
Always inspect the transition between the original and generated areas.
How to Expand a Background for a Product
Product images often need additional empty space for marketing layouts.
Suppose the product is centered but the image is too tight.
Instead of enlarging the product itself, expand the background.
This keeps the original product visible while giving you additional room around it.
For commercial images, this can be especially useful because changing the actual product can introduce unwanted visual differences.
If accuracy matters, keep the product inside the original image area whenever possible.
How to Create Space for Text With AI Expansion
AI expansion can help when you need to add text beside a subject.
Imagine a person standing on the right side of a photograph.
You need a headline on the left.
Instead of placing the headline over the person's face or body, expand the image toward the left.
The AI can generate additional background.
You can then place your text in the newly created area.
This creates a cleaner composition.
The generated background should ideally be simple enough that text remains easy to read.
How to Write Better Prompts for AI Image Expansion
Some AI image-extending tools allow prompts, while others rely mainly on the existing image.
If a prompt is available, keep it specific but simple.
A useful prompt usually describes the environment you want the AI to continue.
For example:
“Continue the existing outdoor park background with green grass, soft daylight, and natural trees.”
For an indoor image:
“Extend the existing neutral studio wall with matching soft lighting and subtle shadows.”
For a beach:
“Continue the sandy beach and calm blue water with the same daylight and horizon.”
The goal is not to describe every tiny detail.
The goal is to give the AI enough information to understand what should appear in the new area.
Avoid Contradicting the Original Image
One of the most common prompting mistakes is asking for something that does not match the original scene.
For example, if the original image is a bright outdoor photograph, a prompt requesting a dark indoor room can produce an unnatural transition.
Before writing a prompt, inspect the existing image.
Ask:
- What is the background?
- What is the lighting?
- What colors dominate?
- What direction is the perspective?
- What objects are near the edge?
- What should logically continue?
Then write a prompt that supports those existing characteristics.
Use Short Prompts When the Background Is Already Clear
You do not always need a long prompt.
If the image already clearly shows a simple background, the AI may have enough visual information to continue it.
For example, if you are extending a blue sky, a short instruction may be enough.
Long prompts can sometimes introduce unnecessary elements that were not part of the original composition.
A good starting point is to describe the environment, lighting, and important background elements.
How to Get a More Natural AI Extension
Natural-looking results usually depend on continuity.
The new area should match the original image in several ways.
Lighting
The direction and intensity of light should remain consistent.
Color
The new background should use colors that belong to the original scene.
Perspective
Lines, surfaces, and objects should follow the existing perspective.
Texture
Walls, floors, grass, sand, and other surfaces should maintain a similar texture.
Depth
Foreground, middle-ground, and background elements should remain visually consistent.
When these elements match, the extension is more likely to feel like part of the original photograph.
How to Fix a Bad AI Extension
Not every generation will look correct.
If the first result looks strange, do not immediately assume the entire image cannot be extended.
Try adjusting the expansion.
You can:
- Reduce the amount of new space.
- Expand one direction at a time.
- Simplify the prompt.
- Describe the background more clearly.
- Generate another variation.
- Keep the original subject protected.
- Use a simpler background.
- Crop away a small amount of a poor generated area if appropriate.
AI-generated content is not always consistent, so comparing multiple variations can help.
What to Do When the AI Adds Strange Objects
Sometimes an AI extender may create objects that were not intended.
For example, it might generate:
- Extra people
- Additional furniture
- Unexpected buildings
- Random shapes
- Unwanted signs
- Strange decorations
If this happens, simplify the prompt.
Instead of describing many objects, tell the tool to continue the existing background.
If the tool supports negative prompts or object removal, you may also be able to specify what should not appear.
The exact controls depend on the software.
What to Do When Faces Look Wrong
Faces require special attention.
If the AI-generated area overlaps or modifies a person's face, the result may contain unnatural details.
Whenever possible, keep the original face inside the original image.
Use AI expansion primarily around the person.
If the extension does affect the subject, zoom in and inspect:
- Eyes
- Nose
- Mouth
- Hairline
- Skin
- Ears
- Facial proportions
If something changes unexpectedly, regenerate the area or reduce the expansion.
What to Do When Hands Look Wrong
Hands can be difficult for generative image systems.
If the original photo contains hands near an edge, avoid expanding in a way that requires the AI to reconstruct the hand unless necessary.
If the generated area contains part of a hand, inspect it carefully.
Look for:
- Incorrect finger count
- Unnatural finger positions
- Distorted joints
- Strange hand shapes
- Inconsistent skin texture
A result that looks acceptable at thumbnail size may reveal obvious problems when viewed closely.
How to Fix Repeating Background Patterns
AI may sometimes create repeating patterns that look unnatural.
This can happen with:
- Brick walls
- Tiles
- Windows
- Bookshelves
- Fences
- Floorboards
- Decorative patterns
If the original background contains a repeating pattern, expand a smaller amount at a time.
You can also try generating another variation.
The goal is to make the pattern continue naturally without creating obvious duplication.
How to Fix a Broken Horizon
A horizon is an important visual reference in landscape images.
If the generated area causes the horizon to bend, rise, fall, or suddenly change position, the result may look artificial.
When extending a landscape, compare the horizon in the original image with the generated section.
The line should appear continuous.
If it does not, regenerate the extension or reduce the amount of expansion.
How to Fix Lighting Differences
A common problem is when the original image and generated background have different lighting.
For example, the original photo may have warm sunlight while the generated section looks cool.
This makes the extension easy to notice.
Try a prompt that references the existing lighting when the tool supports prompts.
You can also make small color adjustments after generation.
The goal is for the generated area to visually belong to the same scene.
How to Fix Shadows That Do Not Match
Shadows provide important clues about light direction.
If a person, product, or object has a shadow in the original image, check whether the generated area follows the same lighting logic.
A new shadow pointing in a completely different direction can make the image look artificial.
When possible, keep important shadows inside the original photo and let the AI extend simpler background areas.
How to Extend a Photo for a Website Banner
Website banners often require wide images.
A portrait or standard landscape photo may not naturally fit that shape.
Instead of cropping the subject heavily, use AI expansion to create additional space on the sides.
This can be especially useful when you need a subject on one side and empty space for website text on the other.
Before exporting, check the final image at the approximate size where it will appear on the website.
The image should remain visually balanced even when displayed at a smaller size.
How to Extend a Photo for a YouTube Thumbnail
YouTube thumbnails often benefit from clear subjects and enough room for text.
If the original photo is too tight, expand the background rather than shrinking the subject dramatically.
For example, you can place the person on one side and create more background space on the other.
Then add the thumbnail text in the expanded area.
Keep the text and subject visually separate.
The AI-generated background should support the thumbnail rather than compete with the main subject.
How to Extend a Photo for a Wallpaper
Wallpapers often need larger dimensions than ordinary photographs.
AI expansion can help create additional background around the original photo.
For a desktop wallpaper, you may need more horizontal space.
For a phone wallpaper, you may need more vertical space.
Before expanding, decide where important elements should remain.
If the wallpaper will contain icons or other interface elements, avoid placing the main subject directly where those elements may appear.
AI Image Extension for Social Media Posts
AI expansion can be useful when adapting existing images to different social layouts.
Instead of cropping the original photo to fit, expand the background and preserve the main subject.
For example:
Portrait → Wider social graphic
Landscape → Taller social graphic
Square → Vertical design
The best approach depends on the original image and the target layout.
Do not automatically expand every image.
If the original composition already fits the destination format, keeping it unchanged may produce a better result.
When You Should Not Use AI Image Extension
AI expansion is not always the right solution.
Avoid relying on it when exact visual accuracy is essential.
For example, be cautious with:
- Legal documents
- Technical diagrams
- Screenshots where every detail matters
- Product packaging
- Logos
- Important text
- Architectural documentation
- Evidence images
- Images where generated content could be mistaken for original photographic information
In these situations, generated content may change the meaning or create details that were not actually present.
For ordinary creative designs, however, AI expansion can be a useful editing technique.
How to Check an AI-Expanded Image Before Publishing
Before using the final image, perform a detailed review.
Check the Original Subject
Make sure the AI did not unintentionally modify the important parts of the original photo.
Check the Edges
Look for visible seams between the original and generated areas.
Check Perspective
Make sure lines, surfaces, and objects continue naturally.
Check Lighting
Look for changes in brightness, color temperature, or shadow direction.
Check Small Details
Zoom in on faces, hands, text, logos, jewelry, product details, and other important elements.
Check at Normal Viewing Size
An image can look strange when zoomed in extremely far but perfectly acceptable at normal viewing size.
Review it both ways.
A Simple AI Image Extender Workflow
For beginners, this workflow is a good starting point:
1. Choose a high-quality original photo.
2. Decide where you need more space.
3. Expand the canvas only as much as necessary.
4. Keep the original subject inside the original image area when possible.
5. Add a short, clear prompt if the tool supports one.
6. Generate several variations if available.
7. Compare lighting, perspective, and background continuity.
8. Check faces, hands, objects, text, and other important details.
9. Make small corrections if needed.
10. Export the final image in a suitable format.
This approach keeps the process simple while giving you enough control over the final result.
What We Will Cover in Part 3
In Part 3, we will finish the guide with best practices, common AI image-extension mistakes, a detailed troubleshooting section, FAQs, FAQ schema, internal and external link suggestions, keyword usage notes, image suggestions, and an SEO/E-E-A-T publishing checklist.
We will also summarize when an AI image extender is useful and what to check before publishing an AI-expanded photo.
AI Image Extender: Best Practices, Common Mistakes, FAQs, and SEO Checklist
An AI image extender can make a photo much more useful by creating new image content outside the original frame. But getting a natural result is not only about clicking an “Expand” or “Generative Expand” button. The quality of the final image depends on how far you extend the photo, what you ask the AI to generate, and how carefully you review the result.
In this final part, we will cover the best practices for AI image expansion, common mistakes, troubleshooting, frequently asked questions, SEO recommendations, and a final publishing checklist.
Best Practices for Using an AI Image Extender
A good AI-expanded image should look as if the extra area was naturally part of the original photograph.
Use these practices to improve your results.
1. Start With a Good-Quality Original
AI can generate new content, but it cannot completely fix a very poor source image.
Before expanding a photo, make sure the original image is reasonably sharp and has enough detail.
If the original image is extremely blurry, noisy, or heavily compressed, consider improving its quality first.
A simple workflow is:
Improve quality → Extend the image → Review → Make final adjustments
This can produce a cleaner result than trying to perform every edit at once.
2. Expand in Small Steps
Avoid extending a photo too far in one generation.
For example, if you need a wider image, first add a moderate amount of space to the left and right. Review the result and then expand further if necessary.
Small extensions are often easier for AI to generate naturally because the new area has more information from the original image to work with.
3. Match the Existing Background
Look carefully at the original background before expanding it.
Ask:
- Is the background plain or detailed?
- Does it contain a pattern?
- Is there a visible horizon?
- Are there shadows?
- Is the lighting bright or dark?
- Are objects positioned in a particular direction?
- Does the background have depth?
The AI should continue these visual characteristics rather than creating an unrelated scene.
4. Keep the Main Subject Protected
If the photo contains a person, product, vehicle, animal, or important object, make sure the AI expansion does not unnecessarily modify it.
The purpose of image expansion is normally to create additional space around the subject.
For example, if a person is standing near the center of a portrait, you may want to expand the sides while keeping the person unchanged.
5. Use Simple Prompts
A common mistake is writing a long prompt that introduces unnecessary details.
Instead, describe the environment that should continue.
For example:
Good prompt:
"Continue the same outdoor background with matching trees, lighting, and depth."
Another useful prompt:
"Extend the plain studio background naturally with the same soft lighting."
The prompt should support the original image instead of trying to redesign it.
6. Match Perspective
Perspective is especially important when expanding photographs of rooms, streets, buildings, tables, roads, and floors.
If straight lines in the original image move toward a vanishing point, the AI-generated area should follow the same visual direction.
A perspective mismatch can make the extension look artificial even when the colors are correct.
7. Check Shadows and Lighting
Lighting should remain consistent across the original and generated areas.
If the subject has a shadow falling toward the right, adding a new light source from the left may make the image look unnatural.
Look for:
- Light direction
- Shadow direction
- Brightness
- Contrast
- Reflections
- Highlights
- Color temperature
These small details can make a large difference.
Common AI Image Extension Mistakes
Even good AI image tools can produce imperfect results.
Here are some common problems to watch for.
Mistake 1: Expanding Too Much
Adding a large amount of new space can force the AI to invent many details.
This may result in:
- Strange objects
- Repeated patterns
- Incorrect architecture
- Unnatural textures
- Distorted backgrounds
Try expanding gradually instead.
Mistake 2: Ignoring the Image Composition
Adding space is not always automatically an improvement.
Think about where the subject sits in the frame and where the viewer's attention should go.
For example, if a person is looking toward the left side of the image, adding extra space on the right may not create the composition you want.
The direction of the subject's gaze, movement, or pose can influence where additional space works best.
Mistake 3: Using Contradictory Prompts
If the original photo shows a bright outdoor scene, asking the AI to create a dark indoor background can produce an obvious transition.
Your prompt should generally describe something that fits the existing image.
Mistake 4: Not Checking the Generated Area
Do not assume that an AI-generated extension is correct just because it looks good at first glance.
Zoom in and inspect the edges.
Look for:
- Strange lines
- Duplicate objects
- Distorted people
- Incorrect text
- Repeated patterns
- Unusual shadows
- Broken architecture
- Unnatural reflections
Mistake 5: Extending Text or Logos
AI tools can struggle with readable text.
If the original image contains a sign, logo, label, or printed text near the extension area, inspect it carefully.
If possible, add important text later using a normal design or editing tool instead of relying on AI to generate it.
How to Troubleshoot a Bad AI Expansion
Sometimes the first result is not usable. That does not necessarily mean the entire image-editing process has failed.
Try these fixes.
Problem: The New Background Looks Different
Possible cause: The AI misunderstood the original environment.
Solution: Use a more specific prompt.
Instead of:
"Extend the image."
Try:
"Continue the same beige wall with the existing soft indoor lighting and subtle texture."
The second prompt gives the AI more useful visual direction.
Problem: The Horizon Is Broken
This can happen when expanding landscapes, beaches, roads, or outdoor scenes.
Try to preserve the original horizon level.
If the horizon is clearly visible, describe it in the prompt or use an editing tool that lets you control the expansion area more precisely.
Problem: The Floor Looks Wrong
Floor extensions can be difficult because they contain perspective lines and shadows.
Try a prompt such as:
"Continue the same wooden floor with matching perspective, texture, lighting, and shadows."
Always inspect the floor near the original boundary.
Problem: A Person Appears in the New Area
AI may sometimes invent people or objects that were not present in the original image.
If this happens, regenerate the area with a simpler prompt.
You can also specify what should remain empty.
For example:
"Continue the outdoor background with open empty space and no additional people."
Problem: Objects Are Repeated
A common AI artifact is duplication.
A tree, chair, window, plant, or other object may appear twice when only one should exist.
Try regenerating that section or using a simpler background description.
Problem: The Extension Has a Visible Seam
A visible boundary usually means the generated area does not match the original closely enough.
Check:
- Color
- Brightness
- Texture
- Shadows
- Perspective
- Depth
- Object placement
Regenerating a smaller area can also help.
Problem: The Image Looks Too Artificial
The AI may have added too many details.
Try a simpler prompt and a smaller expansion.
For example:
"Continue the same natural background with matching lighting and texture."
Simple instructions can sometimes produce a more believable result.
AI Image Extender for Different Image Types
The best approach depends on the type of image you are editing.
Portraits
For portraits, expanding sideways is often useful when converting a vertical photo into a wider format.
Useful applications include:
- Social media banners
- Website headers
- Profile layouts
- Desktop wallpapers
- Creative posters
Keep the person's face and body unchanged whenever possible.
Product Photos
Product photos usually need a clean and controlled background.
You can expand the background to create more room around the product while keeping the product itself unchanged.
This can be useful for:
- E-commerce banners
- Product advertisements
- Website sections
- Social media posts
Check carefully for unwanted objects or reflections.
Landscape Photos
Landscape photos can often be extended horizontally to create wider compositions.
Pay special attention to:
- Sky
- Mountains
- Buildings
- Water
- Trees
- Horizon lines
Natural landscapes may tolerate some creative generation, but important structures should still be checked carefully.
Social Media Images
Different platforms and content formats often require different image proportions.
Instead of cropping the original subject, an AI image extender can create additional background space.
This can help preserve the main subject while preparing the image for a different layout.
Website Images
Website banners often require wide dimensions.
If your original image is too narrow, AI expansion can create additional background space.
This is particularly useful when the subject occupies only one side of the image and the other side needs to remain visually simple.
When You Should Not Use AI Image Expansion
AI expansion is useful, but it is not always the best solution.
Avoid relying on it when:
- The extension contains important factual information.
- Exact architecture must be preserved.
- Product details must remain technically accurate.
- Text must be reproduced perfectly.
- Legal or technical diagrams must remain exact.
- The generated area could change the meaning of the image.
- You need a historically accurate reconstruction.
- The original image contains very little useful background information.
In these situations, manual editing or a source image with a larger original canvas may be safer.
A Simple Final Workflow
If you are a beginner, use this workflow:
Step 1: Choose the Original Photo
Select the highest-quality version available.
Step 2: Decide the Final Size
Know whether you need:
- Square
- Portrait
- Landscape
- Wide banner
- Wallpaper
- Social media format
Step 3: Select the Expansion Area
Choose which side or sides need additional space.
Step 4: Add a Simple Prompt
Describe the background that should continue.
Step 5: Generate
Let the AI create the missing area.
Step 6: Inspect the Result
Zoom in and check the transition between the original and generated areas.
Step 7: Regenerate if Necessary
Do not settle for the first result if it contains obvious artifacts.
Step 8: Make Final Adjustments
You may need to adjust:
- Brightness
- Contrast
- Sharpness
- Color
- Cropping
- Text placement
Step 9: Export the Final Image
Use an appropriate file format and quality level for the final destination.
Final Quality Checklist
Before downloading or publishing your AI-expanded image, ask:
- Does the new background look natural?
- Does the lighting match?
- Does the perspective match?
- Are the shadows consistent?
- Is the main subject unchanged?
- Are there duplicate objects?
- Are faces and hands correct?
- Are there strange lines or textures?
- Is any generated text readable?
- Does the final aspect ratio fit the intended platform?
- Is the final resolution high enough?
- Does the image look believable at normal viewing size?
If the answer is yes across the checklist, the image is generally ready for its intended use.
Frequently Asked Questions About AI Image Extenders
1. What is an AI image extender?
An AI image extender is a photo-editing tool that uses artificial intelligence to generate new visual content outside the original boundaries of an image. It can expand backgrounds, change image proportions, and create additional space without simply stretching the existing pixels.
2. How does an AI image extender work?
The tool analyzes the existing image and generates new pixels beyond the original edges. It uses information such as colors, textures, objects, lighting, and composition to create an extension that matches the original scene.
3. Can an AI image extender expand a photo without cropping?
Yes. AI image expansion can add new space around the original photo instead of removing parts of it. This makes it useful when you need a different aspect ratio but want to keep the original subject visible.
4. Is AI image extension the same as resizing?
No. Resizing changes the dimensions of the existing image. AI image extension creates additional visual content outside the original boundaries.
5. Can I make a portrait photo wider with AI?
Yes. An AI image extender can add space to the left and right sides of a portrait photo, allowing it to fit a wider layout while preserving the main subject.
6. Can AI extend the background of a photo?
Yes. Background extension is one of the most common uses of AI image expansion. The tool can generate additional sky, walls, floors, landscapes, studio backgrounds, or other surrounding elements.
7. Can AI image extenders create more sky?
Yes. If the original photo already contains sky, an AI tool can often generate additional sky above the original frame. Results can vary depending on clouds, lighting, and other details.
8. Can AI expand a photo for social media?
Yes. AI expansion can help adapt an image to different social media layouts without immediately cropping important parts of the original photo.
9. Why does my AI-expanded image look unnatural?
The AI may have misunderstood the background, perspective, lighting, or objects in the scene. Try expanding a smaller area, simplifying the prompt, or regenerating the problematic section.
10. Can AI image extenders preserve a person's face?
They are generally designed to preserve the original image while generating new surrounding content, but results vary by tool and image. Always check the face, hair, hands, and body after editing.
11. Can AI expand product photos?
Yes. AI can create additional background space around products. However, inspect the product edges, reflections, labels, and shadows carefully because commercial product images often require high accuracy.
12. What prompt should I use for AI image expansion?
A useful prompt describes the existing environment and asks the AI to continue it naturally. For example:
"Continue the same background with matching lighting, texture, perspective, and depth."
The exact prompt should depend on the photo.
13. Can AI image expansion increase image quality?
Not necessarily. Image expansion primarily creates additional content outside the original image. It is different from image upscaling, which focuses on increasing the resolution or detail of the existing image.
14. How much should I expand an image?
There is no single ideal amount. A moderate expansion is often easier to make look natural than a very large extension. Start small and increase the canvas gradually if needed.
15. Is AI image expansion suitable for professional use?
It can be useful for many professional applications, including marketing graphics, website banners, social media content, and creative photography. However, important commercial images should always be reviewed carefully before publication.
Ready to optimize your images?
Every tool mentioned in this article is free to use. No upload, no signup, and no watermarks — ever.
Try our free toolsRelated articles
How to Add Space Around an Image Without Cropping
Learn how to add space around an image without cropping using canvas resizing, borders, padding, and simple background techniques.
How to Make 1980s AI Photos With Your Own Picture
Learn how to make 1980s AI photos with your own picture using AI tools, retro outfits, vintage backgrounds, film effects, and detailed prompts.
How to Remove Unwanted Objects From Photos With AI: Easy Guide
Learn how to remove unwanted objects from photos with AI using simple editing techniques. Discover how AI object removal works, useful tips, common mistakes, and ways to get natural-looking results.