
How to Reduce Image Size in KB Without Losing Quality
Learn how to reduce image size in KB without losing quality using smart compression, resizing, format selection, and practical image optimization techniques.
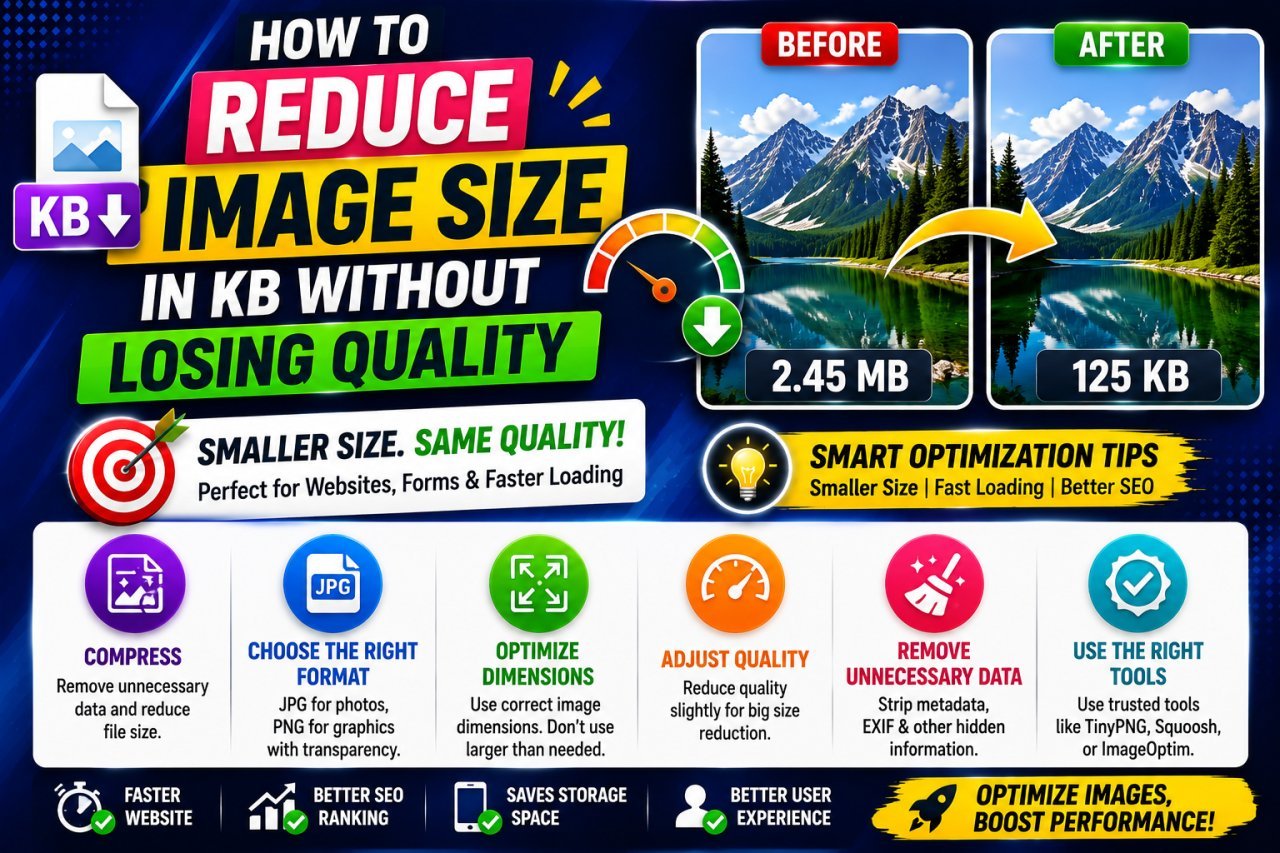
How to Reduce Image Size in KB Without Losing Quality
Introduction
Large image files can be a problem when you need to upload a photo to a website, send it by email, submit an online form, or improve page loading speed.
You may have an image that looks perfectly fine but takes several megabytes of storage. In many situations, you do not actually need such a large file.
The good news is that you can often reduce image size in KB without losing noticeable quality.
The key is to use the right combination of image dimensions, compression, file format, and quality settings.
For example, a photograph that is 3 MB may be reduced substantially while still looking clear enough for a website or everyday use. The exact result depends on the original image, its dimensions, format, and how much compression is applied.
This guide explains how image file size works, why some images are much larger than others, and how beginners can reduce an image's KB size without making it visibly poor. All Blogs
Why This Topic Matters
Image optimization is useful for more than saving storage space.
Smaller image files can make it easier to:
- Upload images to websites
- Meet file-size limits on online forms
- Send photos through email
- Share images more quickly
- Store more photos on a device
- Reduce unnecessary website data
- Prepare images for blogs and online stores
However, reducing the file size does not mean you should compress an image as much as possible.
If you reduce a 2 MB photograph to a tiny file without considering quality, visible artifacts may appear.
The goal should be:
Small enough for the intended purpose while still looking good.
all Tools
What Does Image Size in KB Actually Mean?
When people say an image is "large," they can mean two different things.
They may be talking about the image's file size or its pixel dimensions.
These are not the same.
File Size
File size refers to how much storage the image uses.
It may be shown as:
- KB
- MB
- GB
For example:
850 KB is the storage size of the image file.
Image Dimensions
Dimensions describe the number of pixels in the image.
For example:
2,000 × 1,500 pixels
This tells you the width and height of the image.
An image can have large dimensions but a relatively small file size, or smaller dimensions but a surprisingly large file size.
| Term | Example | Meaning |
|---|---|---|
| File size | 750 KB | Storage required by the file |
| Width | 2,000 px | Horizontal pixel count |
| Height | 1,500 px | Vertical pixel count |
| Resolution | 2,000 × 1,500 px | Image dimensions |
Understanding this difference is important when trying to reduce an image's KB size.
What Makes an Image File Large?
Several factors influence an image's file size.
1. Image Dimensions
A 4,000 × 3,000 pixel photograph contains far more pixels than an 800 × 600 pixel image.
More pixels often mean more information that needs to be stored.
If you are uploading an image to a website that only displays it at a small size, keeping extremely large dimensions may be unnecessary.
2. File Format
Different formats store image information differently.
Common formats include:
- JPEG or JPG
- PNG
- WebP
- AVIF
- GIF
The best format depends on what the image contains.
3. Compression
Compression reduces the amount of data stored in the image.
Some compression methods remove information that may not be easily noticed by the viewer. This is commonly called lossy compression.
Other methods preserve the image information but may not reduce the file as much. These are generally called lossless compression methods.
4. Image Content
A photograph with complicated textures, fine details, and lots of visual variation may produce a different file size from a simple graphic of the same dimensions.
5. Metadata
Some image files contain additional information such as camera details, timestamps, or editing information.
Removing unnecessary metadata can sometimes reduce file size, although the amount saved varies.
The Best Ways to Reduce Image Size in KB
There are several practical ways to reduce an image's file size.
The most useful methods are:
- Resize the image when the dimensions are larger than necessary.
- Choose an appropriate file format.
- Apply sensible compression.
- Remove unnecessary metadata when appropriate.
- Avoid repeated editing and exporting.
- Use modern image formats when supported.
- Check the final image visually before using it.
You do not necessarily need to use every method.
The right combination depends on what you are doing with the image.
1. Reduce the Image Dimensions
One of the simplest ways to reduce file size is to reduce the image's dimensions.
Suppose you have a photo that is:
4,000 × 3,000 pixels
But your website only needs an image displayed around:
1,200 × 900 pixels
Keeping the original 4,000 × 3,000 image may be unnecessary for that particular use.
Reducing the dimensions can significantly reduce the amount of image data.
Example
| Version | Dimensions | Possible Use |
|---|---|---|
| Original | 4,000 × 3,000 px | High-resolution master |
| Large web version | 2,000 × 1,500 px | Large display |
| Standard web version | 1,200 × 900 px | Blog or website |
| Small version | 800 × 600 px | Thumbnail or preview |
These are examples rather than fixed recommendations.
The correct dimensions depend on where the image will be displayed.
Important point
Do not reduce dimensions blindly.
If an image will be printed or used as a large background, making it extremely small may cause visible quality problems.
Always consider the final purpose first.
2. Choose the Right Image Format
The image format you choose can have a major effect on file size.
JPEG or JPG
JPEG is widely used for photographs.
It can provide a substantial reduction in file size while maintaining good visual quality when compression is used sensibly.
It is often suitable for:
- Photos
- Travel images
- Product photographs
- Blog images
- Social media graphics containing photographic content
PNG
PNG is useful when you need features such as transparency or when preserving crisp graphical elements is important.
It is often useful for:
- Logos
- Icons
- Screenshots
- Graphics
- Images requiring transparency
However, PNG can produce much larger files than JPEG for some photographic images.
WebP
WebP can provide efficient compression and supports both photographic and graphical use cases.
It is widely supported by modern browsers and can be a useful choice for websites.
AVIF
AVIF is another modern image format designed for efficient compression and high visual quality.
It can be useful when your website platform and target browsers support it properly.
Quick comparison
| Format | Common Strength | Typical Use |
|---|---|---|
| JPG/JPEG | Efficient for photos | Photography |
| PNG | Transparency and graphics | Logos, screenshots, graphics |
| WebP | Efficient web delivery | Websites |
| AVIF | Modern compression efficiency | Modern websites |
| GIF | Simple animation | Basic animated graphics |
There is no universally "best" format.
Choose based on the image and where it will be used.
3. Adjust Compression Carefully
Compression is one of the most common ways to reduce an image's KB size.
When exporting an image, many editing tools allow you to choose a quality level.
For example, you might see a quality scale from low to high.
Higher quality usually means a larger file.
Lower quality usually means a smaller file.
The trick is to find the point where the file becomes meaningfully smaller without introducing obvious visual problems.
What happens with too much compression?
Excessive compression can create:
- Blocky areas
- Blurry details
- Color problems
- Ringing around edges
- Loss of fine texture
This is why "smallest possible file" is not always the right goal.
Instead, aim for:
Small file + acceptable visual quality.
4. Compare Before and After
Never assume that an image is still good just because the file size is smaller.
Open the compressed version and compare it with the original.
Look closely at:
- Faces
- Hair
- Text
- Product edges
- Fine textures
- Shadows
- High-contrast areas
If you can see obvious compression artifacts, increase the quality slightly and export again.
This simple comparison can prevent many image-quality problems.
5. Remove Unnecessary Metadata
Images can contain metadata.
Depending on the file and software, metadata may include:
- Camera model
- Lens information
- Date and time
- GPS information
- Software information
- Editing details
Some metadata can be useful, especially for photographers and professional workflows.
But if you are preparing an image for a website or basic upload and do not need the metadata, removing unnecessary information may help reduce file size.
There is also a privacy consideration.
If a photograph contains location metadata, removing it before publicly sharing the image can prevent that information from being distributed unintentionally.
6. Avoid Repeated Compression
A common mistake is repeatedly opening and saving a JPEG.
For example:
Original → Edit → Save → Edit Again → Save → Resize → Save Again
Every lossy export can potentially change the image.
A better approach is to keep an original master file and create the final optimized version from that original whenever possible.
Better workflow
Original Master
      ↓
Edit
      ↓
Resize if needed
      ↓
Compress / Export
      ↓
Final Web or Upload Version
This gives you a clean source for creating different versions later.
What Does "Without Losing Quality" Really Mean?
This phrase needs some clarification.
Reducing the file size usually involves some trade-off.
There is a difference between:
No visible quality loss
and
No information loss at all
These are not necessarily the same.
A carefully compressed photograph may technically lose some image information but still look almost identical to the original at normal viewing size.
For everyday website use, that may be completely acceptable.
The practical goal is usually perceptual quality: the image should remain clear and natural for its intended use.
Example: Reducing a Large Website Image
Imagine you have a product photograph that is:
3.5 MB
The website only needs a reasonably sized product image.
Instead of immediately applying maximum compression, you could:
Step 1
Check the image dimensions.
If the original is much larger than the website needs, resize it.
Step 2
Choose an appropriate format.
For a normal product photograph, a suitable web-friendly format may be preferable to a very large uncompressed file.
Step 3
Apply moderate compression.
Start with a reasonable quality setting.
Step 4
Inspect the result.
Zoom in on product edges, labels, and important details.
Step 5
Adjust if necessary.
If the image looks too compressed, increase quality slightly.
This approach is much safer than trying to force every image below an arbitrary KB number.
How Small Should an Image Be?
There is no single KB target that works for every image.
The correct size depends on:
- Image dimensions
- Image content
- Website layout
- Upload requirements
- Quality expectations
- Device usage
- File format
For example, a small thumbnail and a full-width website banner should not necessarily have the same file size.
If an online form says:
"Maximum file size: 200 KB"
then your goal is different from optimizing an image for a blog where there is no strict 200 KB limit.
The practical rule
Use the smallest file that still provides the quality required for its purpose.
Quick Beginner Checklist
Before uploading or sharing an image, check:
- Is the image larger than necessary?
- Are the pixel dimensions appropriate?
- Is the file format suitable?
- Have you applied reasonable compression?
- Does the final image still look clear?
- Are there visible compression artifacts?
- Does the image contain unnecessary metadata?
- Did you keep the original file?
- Are you meeting the required KB limit?
These checks can save time and prevent poor-quality images from being published.
How to Reduce Image Size in KB Without Losing Quality — Part 2
Advanced Ways to Reduce Image Size Without Noticeable Quality Loss
Reducing an image from a large file to a smaller one is easy.
The difficult part is doing it without making the image look noticeably worse.
A good optimization process considers the image's purpose, dimensions, format, compression level, and final viewing environment.
Instead of using the same settings for every image, use a workflow based on the type of image you are working with.
1. Resize Before Compressing
One of the most effective techniques is to remove unnecessary pixels before applying compression.
Suppose your original photograph is:
5,000 × 3,333 pixels
but it will appear on a website at approximately:
1,000 × 667 pixels
Sending the full 5,000-pixel image may be unnecessary.
Reducing the dimensions first can remove a large amount of data before the compression stage.
A practical workflow
Large Original
      ↓
Choose Required Dimensions
      ↓
Resize
      ↓
Compress
      ↓
Inspect Quality
      ↓
Export
This is often more effective than keeping huge dimensions and relying only on compression.
2. Use Different Settings for Different Image Types
A photograph, logo, screenshot, and illustration should not always be compressed in the same way.
Photographs
Photographs usually contain many colors and subtle variations.
JPEG, WebP, or AVIF can often be suitable depending on your requirements and platform support.
Logos and Graphics
Graphics with sharp edges, solid colors, or transparency may benefit from a format designed to preserve those characteristics.
PNG may be appropriate in some cases, while modern formats such as WebP can also be useful.
Screenshots
Screenshots often contain text and sharp interface elements.
Heavy compression can make small text difficult to read.
For these images, inspect text carefully after compression.
Comparison Table
| Image Type | What to Prioritize | What to Watch |
|---|---|---|
| Photograph | Natural detail | Compression artifacts |
| Logo | Clean edges | Blurry borders |
| Screenshot | Readable text | Blocky text |
| Product image | Detail and edges | Loss of texture |
| Illustration | Clean colors | Color changes |
| Thumbnail | Small file size | Excessive softness |
3. Use a Target File Size Instead of Maximum Compression
If you need an image under a specific limit, such as 200 KB, work toward that target instead of simply choosing the lowest quality setting.
For example:
Original: 1.8 MB Target: Under 200 KB
You can gradually adjust:
- Dimensions
- Format
- Compression quality
Then check the result.
If the image is 190 KB and still looks good, there may be no reason to push it down to 100 KB.
Why this works
The last few KB may require a significant reduction in quality.
If the image already meets the upload requirement, further compression may provide little practical benefit.
4. Understand the Quality Slider
Many image editors provide a quality slider.
The exact numbers differ between programs, so a setting of "80" in one application does not necessarily produce the same result as "80" somewhere else.
That means you should not treat a particular number as a universal rule.
Instead:
Use the slider as a starting point and judge the exported image visually.
Look for these warning signs
If quality is too low, you may notice:
- Block patterns
- Smudged textures
- Blurred edges
- Color banding
- Loss of small details
- Artifacts around text
If these problems are visible, increase the quality or reduce the amount of resizing.
5. Use Two Versions of Important Images
For important photographs or website assets, keep:
Master Version
The original or highest-quality edited version.
Optimized Version
The smaller version prepared for uploading, publishing, or sharing.
This gives you flexibility.
If you later need the image at a different size, you can return to the master instead of enlarging or recompressing an already reduced file.
Example
product-photo-master.jpg
        ↓
product-photo-1200px.webp
        ↓
product-photo-800px.webp
        ↓
product-photo-thumbnail.webp
The exact naming system is up to you, but keeping separate versions can make image management much easier.
Image Compression vs. Image Resizing
These two techniques are related but solve different problems.
Image Resizing
Resizing changes the pixel dimensions.
Example:
3,000 × 2,000 → 1,500 × 1,000 pixels
Image Compression
Compression changes how efficiently the image data is stored.
The dimensions may remain exactly the same.
Example:
1,500 × 1,000 pixels at a higher quality → 1,500 × 1,000 pixels at a lower file size
Which one should you use?
Often, the best result comes from combining both.
| Method | Changes Dimensions? | Can Reduce File Size? |
|---|---|---|
| Resizing | Yes | Usually |
| Compression | No | Yes |
| Format conversion | Not necessarily | Often |
| Metadata removal | No | Sometimes |
Best Method for Reducing JPG Size
JPG is commonly used for photographs because it can produce relatively small files.
To reduce a JPG without noticeably damaging it:
- Start with the original JPG or another high-quality source.
- Check whether the dimensions are larger than necessary.
- Resize if appropriate.
- Export using a sensible quality setting.
- Compare the result with the original.
- Stop when the image meets your file-size requirement.
Avoid repeated JPG exports
If possible, do not repeatedly save the same compressed JPG.
Instead, return to the master image and create a fresh optimized version.
Best Method for Reducing PNG Size
PNG is different from JPG.
PNG is often useful for graphics, transparency, logos, and screenshots, but some photographic PNG files can become unnecessarily large.
If you have a photograph saved as PNG, consider whether the format is actually necessary.
For a photographic image that does not need transparency, another format may produce a significantly smaller file.
However, do not convert every PNG automatically.
If the image contains transparency or sharp graphical elements, evaluate the result before changing formats.
WebP and AVIF for Website Images
Modern websites can use newer image formats to reduce image payloads while maintaining good visual quality.
WebP
WebP supports both lossy and lossless compression and can be useful for many website images.
AVIF
AVIF is another modern format designed for efficient image compression.
It can produce small files while maintaining good visual quality, although compatibility and workflow support should be considered for your particular website setup.
Simple comparison
| Format | Best Consideration |
|---|---|
| JPG | Traditional photographic images |
| PNG | Transparency and certain graphics |
| WebP | Modern web image delivery |
| AVIF | Efficient modern web delivery |
The right choice depends on your website platform and the browsers or systems your visitors use.
Pros and Cons of Different Image Optimization Methods
Resizing
Pros
- Can dramatically reduce unnecessary data
- Simple to understand
- Useful for website images
- Helps prevent oversized uploads
Cons
- Reduces pixel dimensions
- May not be suitable for large prints
- Excessive resizing can make images too small
Compression
Pros
- Reduces file size without necessarily changing dimensions
- Useful when a strict KB limit exists
- Easy to apply
Cons
- Excessive compression can create visible artifacts
- Results vary depending on image content
- Repeated lossy compression can reduce quality
Format Conversion
Pros
- Can significantly reduce file size
- Modern formats can be efficient
- Useful for websites
Cons
- Some workflows may not support every format
- Conversion can change image characteristics
- Transparency and other features need to be considered
Metadata Removal
Pros
- May reduce unnecessary file information
- Can help with privacy
- Easy to include in an optimization workflow
Cons
- File-size savings may be small
- Some metadata may be useful
- Removing metadata can affect professional workflows
Common Mistakes When Reducing Image Size
Mistake 1: Using Maximum Compression
Some people immediately choose the lowest quality setting.
This can make the file tiny, but the image may look terrible.
Better approach: reduce the file gradually and inspect the result.
Mistake 2: Reducing Dimensions Too Much
If you only need a 1,200-pixel image, there is no reason to turn it into 300 pixels unless the final use requires that size.
But the opposite is also true.
If the image only needs to appear as a small thumbnail, keeping a massive original dimension may waste storage and bandwidth.
Better approach: match dimensions to the actual display requirement.
Mistake 3: Choosing a Format Without Considering the Image
A format that works well for photographs may not be ideal for every graphic.
Better approach: consider whether the image contains photographs, transparency, text, illustrations, or animation.
Mistake 4: Ignoring the Final Display Size
An image may look excellent when viewed at 100% zoom but may be displayed at a much smaller size on your website.
Likewise, an image that looks acceptable at a tiny preview size may look poor when opened full-screen.
Better approach: judge quality at the size users will actually see.
Mistake 5: Over-Optimizing
Making every image as small as technically possible is not always beneficial.
For example, reducing an important product image from 400 KB to 60 KB may save storage but could noticeably reduce product detail.
Better approach: prioritize the viewer's experience over an arbitrary file-size target.
Practical Example: Getting an Image Under 100 KB
Suppose an online application requires:
Maximum file size: 100 KB
Your original photo is:
2.4 MB
Trying to reach 100 KB by compression alone may create visible quality problems.
Instead, use a combination of techniques.
Step 1: Check dimensions
If the original is 4,000 × 3,000 pixels, determine whether the application actually needs that resolution.
Step 2: Resize
Reduce it to a reasonable dimension for the application.
Step 3: Choose a suitable format
For a normal photograph, a compressed photographic format may be appropriate.
Step 4: Adjust quality
Export and check the resulting file size.
Step 5: Inspect the image
Make sure important details remain readable.
Step 6: Make small adjustments
If the file is 110 KB, you may only need a small change to get under 100 KB.
You do not necessarily need to reduce it dramatically.
How to Reduce Image Size for a Website
Website images need a slightly different approach.
The goal is not simply to make every image as small as possible.
You want a balance between:
- Visual quality
- File size
- Display dimensions
- Browser support
- User experience
A practical website workflow
Original Image
      ↓
Determine Display Size
      ↓
Resize to Appropriate Dimensions
      ↓
Choose Suitable Format
      ↓
Compress
      ↓
Inspect Quality
      ↓
Upload Optimized Version
For websites, it can also be useful to create multiple image sizes so that the appropriate version can be delivered depending on the visitor's device and display size.
How to Reduce Image Size for Email
Email attachments may have size limits depending on the email service.
If you only need to send a normal photograph, there may be no reason to attach a huge camera-original file.
You can:
- Resize the image
- Choose a suitable format
- Compress it moderately
- Check the final attachment size
If the recipient needs the original high-resolution file, however, reducing it may not be appropriate.
In that situation, sharing the original through a suitable file-sharing method may be better than heavily compressing the image.
How to Reduce Image Size for Online Forms
Online forms often specify a maximum file size.
You may see requirements such as:
"Image must be below 200 KB."
or
"Maximum file size: 1 MB."
When a form provides specific requirements, follow those requirements rather than using a generic compression setting.
Also check whether it specifies:
- Maximum width
- Maximum height
- Accepted formats
- Minimum resolution
- Maximum file size
Meeting all of these requirements is more important than simply reducing the KB value.
How to Preserve Text Quality
Images containing text need extra attention.
A photograph can tolerate some compression because small changes may not be obvious.
Small text is different.
Compression can make letters appear:
- Fuzzy
- Blocky
- Jagged
- Difficult to read
If you are optimizing a screenshot, document image, infographic, or scanned page, zoom in and inspect the text after compression.
If readability decreases, try:
- A different format
- Less compression
- A larger image dimension
- A lossless workflow where appropriate
Best Practices for Image Compression
Follow these habits for more consistent results.
Keep the original
Never depend on an already compressed copy if you can avoid it.
Resize intelligently
Match the dimensions to the final use.
Compress gradually
Do not immediately choose the lowest quality setting.
Choose the right format
Consider the actual content of the image.
Inspect the final version
Always check the image after optimization.
Keep multiple versions when necessary
A website image, social media image, and print image may require different dimensions and settings.
Avoid unnecessary conversions
Changing formats repeatedly can complicate your workflow and may affect quality.
A Simple Decision Guide
Use this quick guide when you are unsure what to do.
| Your Situation | First Step |
|---|---|
| Image is huge in dimensions | Resize it |
| Image dimensions are correct but file is large | Compress it |
| Photograph saved as a huge PNG | Consider a photographic format |
| Website image is too large | Resize + optimize |
| Form has a strict KB limit | Resize + compress toward the target |
| Logo needs transparency | Preserve a format that supports it |
| Screenshot contains small text | Use gentle compression |
| Image already looks poor | Find a better original if possible |
The Most Important Rule
When reducing image size, do not ask only:
"How small can I make this file?"
Ask:
"What is the smallest file that still looks good for its intended purpose?"
That small change in thinking can prevent many image-quality problems.
A 500 KB image that looks excellent may be a better choice than a 100 KB image that looks blurry or damaged.
Image optimization is about finding the right balance.
Final Practical Workflow
For most everyday images, this workflow is a good starting point:
1. Keep the original.
2. Decide where the image will be used.
3. Determine the required dimensions.
4. Resize if the original is unnecessarily large.
5. Choose an appropriate format.
6. Apply moderate compression.
7. Check the final KB size.
8. Inspect the image at its intended viewing size.
9. Adjust if necessary.
10. Save the optimized copy separately from the original.
This approach gives you much more control than simply dragging a quality slider to the lowest possible setting.
Key Point
The best way to reduce image size in KB without losing noticeable quality is usually not one single trick.
It is a combination of correct dimensions, suitable file format, sensible compression, and careful visual checking.
Once you understand how these factors work together, you can create smaller image files without unnecessarily sacrificing the quality people actually see.
Conclusion
Reducing an image's file size does not have to mean making it visibly worse.
The most effective approach is to understand what the image is being used for and optimize it accordingly.
Resize oversized images, choose an appropriate format, apply compression carefully, and always inspect the final result.
Most importantly, keep your original high-quality files.
That way, you can create a new optimized version whenever you need a different size or file-size limit without damaging your master image.
Frequently Asked Questions
1. How can I reduce image size in KB without losing quality?
You can reduce image size by resizing unnecessary dimensions, choosing a suitable format, and applying moderate compression. Always compare the optimized image with the original to make sure the quality remains acceptable.
2. Does reducing image dimensions reduce file size?
Yes. Reducing the width and height decreases the number of pixels that need to be stored, which can significantly reduce the file size.
3. What is the best image format for a smaller file size?
There is no single best format for every image. JPG is commonly useful for photographs, while PNG can be useful for graphics and transparency. WebP and AVIF can also be efficient options for many websites.
4. How do I reduce a JPG image size without making it blurry?
Resize the JPG if its dimensions are unnecessarily large, then apply moderate compression. Avoid extremely low quality settings and inspect important details after exporting.
5. Can I reduce a 2 MB image to 200 KB?
Often, yes, depending on the image. You may need to combine resizing, format selection, and compression to reach 200 KB while maintaining acceptable visual quality.
6. Does compressing an image reduce its quality?
It can. Lossy compression removes some image information, and excessive compression can create visible artifacts. Moderate compression can sometimes reduce file size while keeping the image looking very similar.
7. Should I resize an image before compressing it?
In many cases, yes. If the image dimensions are much larger than necessary, resizing first can remove unnecessary pixels and make compression more effective.
8. Is PNG better than JPG for image quality?
Not necessarily. PNG and JPG use different approaches and are suited to different types of images. PNG can be useful for graphics and transparency, while JPG is often more practical for photographs.
9. How small should an image be for a website?
There is no universal KB limit for every website image. The appropriate file size depends on the image dimensions, format, display size, and required visual quality.
10. How can I reduce image size for an online form?
First check the form's exact requirements for file size, dimensions, and accepted formats. Then resize and compress the image until it meets those requirements while remaining readable and clear.
Ready to optimize your images?
Every tool mentioned in this article is free to use. No upload, no signup, and no watermarks — ever.
Try our free toolsRelated articles
How to Reduce Image File Size Without Losing Quality: Complete Guide
Learn how to reduce image file size without losing quality using compression, resizing, format conversion, and practical optimization techniques. This beginner-friendly guide explains how to compress JPG, PNG, and WebP images for websites, email, social media, uploads, and everyday use.
How to Make an Image 100KB, 200KB, or 500KB Online
Learn how to make an image 100KB, 200KB, or 500KB online without making it look blurry. This guide explains how to resize and compress JPG, PNG, and WebP images to meet specific file-size limits.
How to Compress an Image to 50KB Without Losing Quality
Learn how to compress an image to 50KB without losing quality using resizing, compression, WebP, JPG, and practical online image optimization techniques.