
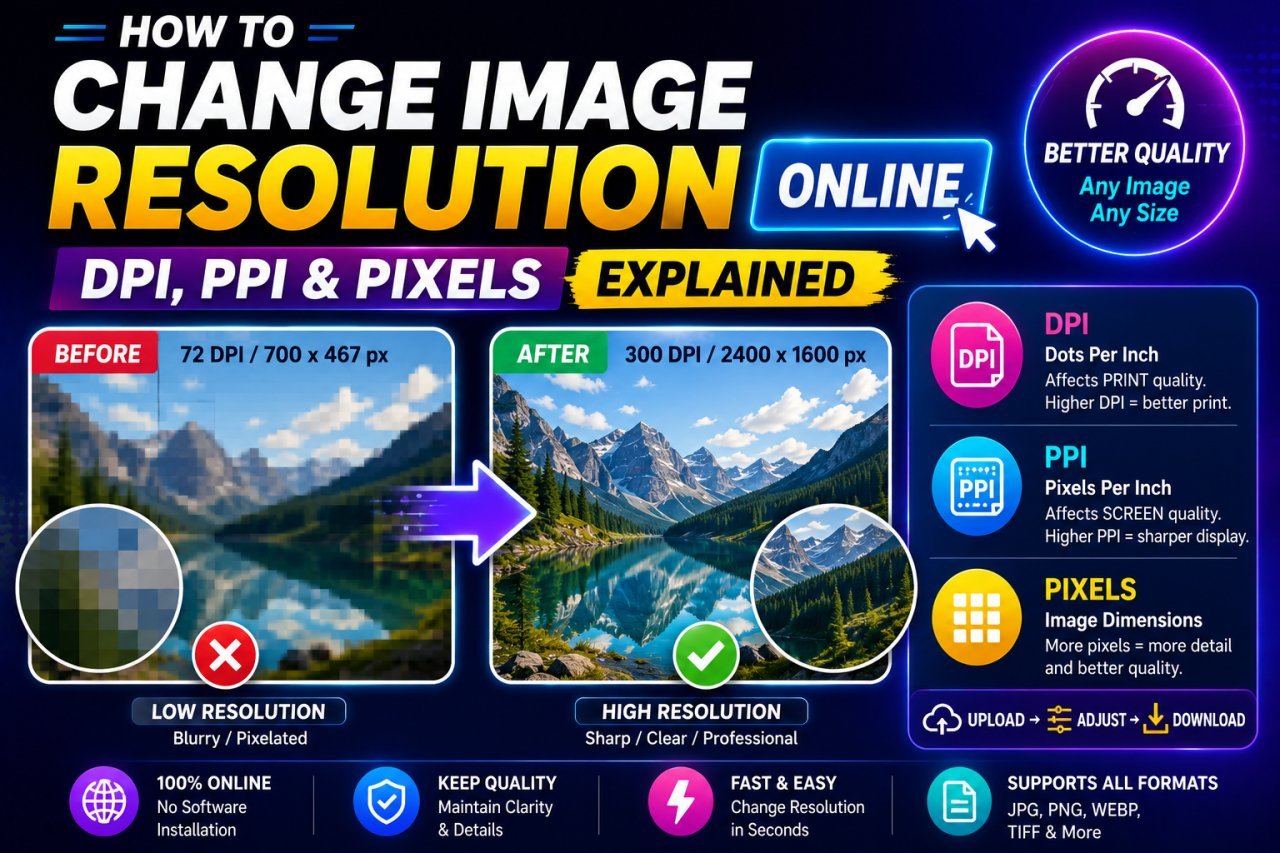
How to Change Image Resolution Online: DPI, PPI & Pixels Explained
Learn how to change image resolution online and understand DPI, PPI, and pixels. Discover the difference between digital image size and print resolution.
How to Change Image Resolution Online: DPI, PPI & Pixels Explained
Introduction
If you have ever tried to print a photo and seen a message about DPI, PPI, or image resolution, you may have wondered what those terms actually mean.
You may also have searched for a way to change image resolution online because a website, printer, application, or document requires a particular resolution.
The confusing part is that pixels, DPI, and PPI are related but they are not the same thing.
Pixels describe the digital dimensions of an image. PPI describes pixel density when an image is displayed or prepared for physical output. DPI technically refers to dots produced by a printer or other output device.
Understanding these differences can help you choose the right settings instead of changing numbers randomly.
In this guide, you will learn:
- What image resolution means
- What pixels are
- What DPI means
- What PPI means
- The difference between DPI and PPI
- How digital image size differs from print size
- When changing resolution actually matters
- How to change image resolution online
- Why increasing resolution does not automatically create more detail
Why This Topic Matters
Image resolution becomes important whenever you need an image for a specific purpose.
For example, you might need to:
- Prepare a photo for printing
- Upload an image to a website
- Create a document
- Submit a passport-style photograph
- Prepare artwork for a printer
- Change an image's DPI metadata
- Reduce an image's dimensions
- Meet a specific image requirement
- Prepare photographs for a presentation
A common mistake is assuming that changing the DPI number will automatically make a blurry image sharper.
It does not.
If the original image contains limited pixel information, simply changing its resolution settings cannot magically recreate all the missing detail.
That distinction is important.
What Is Image Resolution?
Image resolution generally refers to the amount of visual information an image contains and, depending on context, how densely that information is represented.
For digital images, people often talk about resolution in terms of pixel dimensions.
For example:
1920 × 1080 pixels
means the image contains:
- 1920 pixels across
- 1080 pixels vertically
The total number of pixels is:
1920 × 1080 = 2,073,600 pixels
So the image contains roughly 2.07 million pixels.
However, pixel dimensions and print resolution are not interchangeable concepts.
What Are Pixels?
A pixel is a small individual unit of a digital image.
A photograph displayed on a screen is made from many pixels arranged in rows and columns.
For example:
1000 × 1000 pixels
creates a square image containing:
1,000,000 pixels
Likewise:
4000 × 3000 pixels
contains:
12,000,000 pixels
More pixels can provide more flexibility when you need to crop, resize, or print an image at a larger physical size.
But pixel count is not the only factor that determines whether an image looks good.
Image quality can also depend on:
- Camera quality
- Focus
- Lighting
- Lens quality
- Compression
- Noise
- Editing
- Original file quality
What Does DPI Mean?
DPI stands for dots per inch.
It traditionally describes how many individual dots a printer places within one inch.
For example, a printer may use a particular dot density when producing a physical print.
DPI is therefore primarily associated with printing and output devices.
However, DPI is commonly used in everyday image-editing conversations to describe an image's print-resolution setting.
That is one reason the term can be confusing.
What Does PPI Mean?
PPI stands for pixels per inch.
It describes how many image pixels are represented within one inch when determining physical display or print dimensions.
For example, an image set to:
300 PPI
would be interpreted as containing 300 pixels per inch for the specified physical output size.
PPI is especially useful when discussing the relationship between:
- Pixel dimensions
- Physical print size
- Image density
DPI vs PPI: What Is the Difference?
The simplest distinction is:
PPI = pixels per inch
DPI = dots per inch
PPI relates to the digital image's pixels.
DPI technically relates to the physical dots produced by a printer or output device.
| Term | Full form | Mainly refers to |
|---|---|---|
| Pixel | Picture element | Digital image information |
| PPI | Pixels per inch | Pixel density and physical image dimensions |
| DPI | Dots per inch | Printer/output dot density |
Because image-editing software and print workflows sometimes use DPI terminology for a resolution field, you may see "DPI" used when the underlying concept is actually related to PPI.
For practical purposes, it is important to understand what the software or printer is asking for rather than focusing only on the label.
Pixels vs DPI vs PPI
These three concepts answer different questions.
Pixels Ask:
How many pixels does the image contain?
Example:
3000 × 2000 pixels
PPI Asks:
How densely are those pixels assigned to a physical inch?
Example:
300 PPI
DPI Asks:
How densely can an output device place dots?
Example:
A printer's specified dot output
This is why changing one number does not necessarily change the others in the way people expect.
Does Changing DPI Increase Image Quality?
Usually, simply changing the DPI value does not create additional image detail.
Suppose you have an image measuring:
1200 × 800 pixels
Changing its metadata from 72 PPI to 300 PPI does not automatically create millions of new pixels.
The image still contains:
1200 × 800 pixels
unless you also resample or resize it.
This is one of the most important concepts to understand.
Example
Imagine you have:
1200 × 800 pixels at 72 PPI
and change the setting to:
1200 × 800 pixels at 300 PPI
If you change only the resolution metadata without resampling, the pixel dimensions can remain exactly the same.
The file has not suddenly gained additional photographic detail.
What Happens When You Resample?
Resampling is different.
When you resample an image, software changes the number of pixels.
For example:
1000 × 1000 pixels → 2000 × 2000 pixels
The software creates additional pixels based on the existing image information.
This is often called upscaling.
The opposite process is:
2000 × 2000 pixels → 1000 × 1000 pixels
This reduces the number of pixels and is commonly called downsampling.
Changing Resolution vs Resizing an Image
These actions are often confused.
Changing Resolution Without Resampling
The pixel dimensions remain unchanged.
The physical print dimensions may change depending on the new PPI setting.
Resizing With Resampling
The number of pixels changes.
For example:
2000 × 1500 → 1000 × 750
The image now contains fewer pixels.
Comparison
| Action | Pixel dimensions change? | Can physical size change? |
|---|---|---|
| Change PPI without resampling | No | Yes |
| Resize with resampling | Yes | Yes |
| Crop | Yes | Usually |
| Stretch | Yes | Yes, but can distort |
Understanding this difference can prevent many common mistakes.
A Simple Example of PPI and Print Size
Suppose you have an image that is:
3000 × 2000 pixels
If you assign it a resolution of:
300 PPI
the theoretical physical dimensions become:
10 × 6.67 inches
because:
3000 ÷ 300 = 10 inches
and:
2000 ÷ 300 ≈ 6.67 inches
The same 3000 × 2000 pixel image at:
150 PPI
would correspond to:
20 × 13.33 inches
because:
3000 ÷ 150 = 20 inches
and:
2000 ÷ 150 ≈ 13.33 inches
Notice what happened.
The pixel dimensions did not need to change.
Changing the PPI setting changed the implied physical size.
Why 300 PPI Is Commonly Mentioned
You may often hear that images should be 300 DPI for printing.
This is a common rule of thumb for certain high-quality print workflows, but it should not be treated as a universal requirement for every printer, image, or printing process.
The appropriate resolution depends on:
- Printing method
- Viewing distance
- Physical print size
- Printer requirements
- Image content
- Source resolution
- Intended quality
For example, a large poster viewed from a distance does not necessarily need the same pixel density as a small photograph viewed closely.
Always check the specifications provided by the printer or production service when exact requirements are given.
How to Check an Image's Resolution
Before changing anything, check the original image.
You may find information such as:
- Width
- Height
- Pixel dimensions
- Resolution
- File format
- File size
- Color information
The exact location of these details depends on your operating system, image editor, or online tool.
The most important numbers to identify first are usually the pixel dimensions and the intended physical output size.
How to Change Image Resolution Online
If you want to change image resolution online, the general process is straightforward.
Step 1: Choose an Online Image Tool
Use an image editor or image-resizing service that provides resolution or image-size controls.
Check whether the tool allows you to:
- Upload an image
- View pixel dimensions
- Change PPI/DPI
- Resize the image
- Preserve aspect ratio
- Resample the image
- Export the final file
Step 2: Upload Your Image
Select the original image from your device.
Whenever possible, use the highest-quality version available.
Avoid starting with a small thumbnail or screenshot if you have access to the original file.
Step 3: Check the Current Dimensions
Before changing the resolution, note the image's current pixel dimensions.
For example:
2400 × 1600 pixels
This helps you understand what you are starting with.
Step 4: Decide What You Actually Need
Ask:
Do I need different pixel dimensions?
or
Do I only need a different print-resolution setting?
This distinction matters.
If a printer asks for a specific PPI value, you may only need to change the resolution metadata.
If a website asks for a specific pixel size, you need to resize the image.
Step 5: Enter the Required Resolution
If your tool provides a DPI or PPI field, enter the value required for your intended use.
For example:
300 PPI
But check whether the tool changes pixel dimensions automatically.
Some tools have a resample or resize option that changes the number of pixels.
Step 6: Decide Whether to Resample
If you only need to change the print-resolution setting, you may not want to change the pixel dimensions.
If you need a different pixel size, resampling may be necessary.
Read the tool's settings carefully before exporting.
Step 7: Export the Image
Save the processed image as a new file.
Keep your original image unchanged.
When Should You Change DPI or PPI?
Changing DPI/PPI can be useful when:
- Preparing a file for print
- Setting a specific physical print size
- Meeting a production specification
- Adjusting image metadata
- Preparing an image for a document workflow
It may not be necessary when a website only asks for pixel dimensions.
For example, if a website says:
Upload an image at 1200 × 800 pixels
then changing the image from 72 PPI to 300 PPI may not solve the actual requirement.
The website is asking about pixel dimensions.
When Should You Change Pixels Instead?
Change the pixel dimensions when a platform specifies an image size such as:
- 1080 × 1080
- 1200 × 800
- 1920 × 1080
- 800 × 1200
In these cases, the important measurement is the image's width and height in pixels.
For example:
1200 × 800 pixels
is a pixel-dimension requirement.
A PPI setting does not replace that requirement.
What Happens If You Increase Resolution Too Much?
If you increase the pixel dimensions dramatically, the software has to generate additional pixels.
For example:
800 × 600 → 3200 × 2400
The output contains more pixels, but that does not mean the original image suddenly contains four times as much real detail in each direction.
Depending on the source image and resampling method, the enlarged image may look:
- Soft
- Artificial
- Pixelated
- Noisy
- Over-sharpened
This is why increasing resolution should not be confused with restoring missing image detail.
What Happens If You Lower Resolution?
Reducing pixel dimensions can make a file smaller and easier to use online.
For example:
4000 × 3000 → 1600 × 1200
This removes pixels from the image.
The resulting file may still look excellent at its intended display size.
For websites, reducing unnecessarily large images can also make them more practical to upload and display.
However, keep a high-quality original so you can create other versions later.
Beginner's Rule of Thumb
When you are unsure what to change, identify the requirement first.
If the requirement says:
"1200 × 800 pixels"
→ Change the pixel dimensions.
If the requirement says:
"300 PPI for printing"
→ Check the PPI/DPI setting and the required physical size.
If the requirement says:
"High-resolution image"
→ Ask for the actual pixel or print specifications if possible.
"High resolution" by itself is not a precise technical measurement.
Quick Reference Table
| Requirement | What to focus on |
|---|---|
| Website image size | Pixels |
| Social media dimensions | Pixels + aspect ratio |
| Print size | Physical dimensions + PPI |
| Printer specification | Printer's stated requirements |
| File size limit | Compression + pixel dimensions |
| Image quality | Source quality + pixels + compression |
| Physical photo size | Pixels + PPI |
| Digital display | Pixel dimensions |
Final Advice for Part 1
The easiest way to understand image resolution is to separate the concepts.
Pixels tell you how much digital image information you have.
PPI describes how those pixels are assigned to physical inches.
DPI technically describes the dots produced by a printer or output device.
When you change image resolution online, first determine whether you actually need to change the PPI/DPI setting, the pixel dimensions, or both.
Changing a number from 72 to 300 does not automatically make a low-quality photo high quality. If you need more pixels, you are dealing with resizing or resampling, not simply changing the resolution metadata.
Keep your original image, understand the requirement, and make the smallest necessary change.
-> All Tools -> AI Old Photo Restoration -> YouTube Thumbnail Enhancer -> Watermark & Object Remover
How to Change Image Resolution Online: Advanced Tips, Examples & Best Practices
How to Choose the Right Image Resolution
There is no single resolution value that is perfect for every image.
The correct setting depends on what you are doing with the image.
A photo for a website and a photo being prepared for professional printing have different requirements.
Before changing anything, identify these three things:
- Where the image will be used
- What physical or pixel dimensions are required
- Whether the requirement refers to pixels, PPI/DPI, or both
This prevents unnecessary changes.
Digital Images vs Printed Images
One of the easiest ways to understand resolution is to separate digital use from physical printing.
Digital Use
For websites, apps, social media, and many digital documents, pixel dimensions are usually more important.
For example:
1200 × 800 pixels
describes the actual digital dimensions of the image.
Print Use
For printing, you also need to consider:
- Physical dimensions
- PPI
- Printer requirements
- Viewing distance
- Printing method
For example, you might have a photo intended to print at:
8 × 10 inches
The required pixel dimensions depend on the PPI used for the print workflow.
PPI and Physical Print Size
The relationship can be expressed simply as:
Pixels ÷ PPI = physical size in inches
For example, if an image is:
2400 × 3000 pixels
and you use:
300 PPI
the theoretical print size is:
- 2400 ÷ 300 = 8 inches
- 3000 ÷ 300 = 10 inches
So the image can correspond to an:
8 × 10 inch print at 300 PPI
The same image at 150 PPI corresponds to:
- 2400 ÷ 150 = 16 inches
- 3000 ÷ 150 = 20 inches
The pixel count has not changed. The relationship between those pixels and the physical output size has changed.
Important: PPI Does Not Create Detail
This is one of the most important points in the entire topic.
Suppose an image contains:
1200 × 800 pixels
Changing its setting from:
72 PPI → 300 PPI
does not automatically create new photographic detail if the image is not resampled.
You still have:
1200 × 800 pixels
The setting changes how those pixels are interpreted for physical output.
If you need more pixels, you need to resize or resample the image.
Resampling vs Changing Resolution
Consider the following example.
Scenario A: Change PPI Only
Original:
1200 × 800 pixels at 72 PPI
New:
1200 × 800 pixels at 300 PPI
Pixel dimensions remain the same.
Scenario B: Resample
Original:
1200 × 800 pixels
New:
2400 × 1600 pixels
Pixel dimensions increase.
The software creates additional pixels through an interpolation or resampling process.
These two operations should not be treated as identical.
| Operation | Pixel count changes? | Main purpose |
|---|---|---|
| Change PPI without resampling | No | Adjust physical-size interpretation |
| Resample upward | Yes | Create a larger pixel image |
| Resample downward | Yes | Reduce pixel dimensions |
| Crop | Yes | Remove unwanted image areas |
| Change compression | No | Reduce or alter file size |
How to Change DPI Online for Printing
If a print service asks for a particular DPI or PPI value, first check exactly what they mean.
Some services may specify:
- 300 DPI
- 300 PPI
- Minimum pixel dimensions
- Physical print dimensions
- A combination of these
Do not assume that entering 300 into a resolution field is enough.
General Workflow
- Open your image in an online image editor.
- Check the current pixel dimensions.
- Look for an image-size, resize, or resolution option.
- Find the DPI/PPI field.
- Enter the value requested by the printer.
- Check whether "resample" is enabled.
- If you do not want the pixel dimensions changed, disable resampling if the tool allows it.
- Confirm the resulting physical dimensions.
- Export the image.
- Check the final file before sending it to the printer.
The exact controls vary between tools.
How to Change PPI Without Changing Pixel Dimensions
If your goal is only to change the resolution metadata, look for an option similar to:
Resample: Off
or
Change resolution without resampling
The wording varies between image editors.
For example:
Original:
3000 × 2000 pixels at 72 PPI
After changing the resolution setting:
3000 × 2000 pixels at 300 PPI
The pixel dimensions can remain unchanged.
The theoretical print size changes from approximately:
41.67 × 27.78 inches
to:
10 × 6.67 inches
The image did not gain or lose pixels in this example.
How to Increase Pixel Resolution
If you need a larger digital image, you need to increase the pixel dimensions.
For example:
1000 × 750 → 2000 × 1500 pixels
This is an upscale.
An online image editor may use interpolation or an enhancement algorithm to generate the additional pixels.
However, the result depends heavily on the original.
A clean, well-focused source generally gives you a better starting point than a tiny, blurry, compressed image.
Can You Make a Low-Resolution Image High Resolution?
You can increase its pixel dimensions, but that does not guarantee that the image will contain the same level of detail as a photograph originally captured at the larger resolution.
For example:
500 × 500 → 2000 × 2000
creates a much larger file in pixel dimensions.
But the original image only contained 250,000 pixels.
The software must estimate the information needed for the additional pixels.
Modern image-processing systems can sometimes improve enlarged images, but enlargement has limits.
Therefore, if the original high-resolution file is available, use it instead.
How to Reduce Image Resolution Online
Reducing resolution is often easier because you are removing pixels rather than inventing additional ones.
For example:
4000 × 3000 → 1600 × 1200
This can be useful when:
- A website has an upload limit
- A photo is unnecessarily large
- You want a smaller file
- You need a specific display size
- You are preparing images for faster web delivery
Keep the original high-resolution version separately.
Example: Preparing a Photo for a Website
Suppose your original image is:
6000 × 4000 pixels
The website only needs:
1200 × 800 pixels
In this situation, changing the image from 72 PPI to 300 PPI is usually not the main task.
The website needs a specific pixel dimension.
A sensible workflow is:
- Open the original.
- Check the required aspect ratio.
- Crop if necessary.
- Resize to 1200 × 800 pixels.
- Export in an appropriate web format.
- Check the final image.
This creates a version appropriate for the digital requirement while keeping your original intact.
Example: Preparing a Photo for an 8 × 10 Print
Suppose you have:
2400 × 3000 pixels
and want an:
8 × 10 inch print
At 300 PPI:
8 × 300 = 2400 pixels
10 × 300 = 3000 pixels
The image dimensions match the physical size exactly at 300 PPI.
This is a straightforward example because the pixel dimensions and intended print size align.
Example: Preparing a Photo for a 4 × 6 Print
Suppose you have:
1800 × 1200 pixels
and want a:
4 × 6 inch print
At 300 PPI:
4 × 300 = 1200 pixels
6 × 300 = 1800 pixels
So the image has enough pixels for a 4 × 6 inch output at 300 PPI under this simple calculation.
However, the aspect ratio must also match.
A 4 × 6 print has a:
2:3 ratio
The image is also:
1200:1800
which is 2:3.
This means no additional cropping is required for the aspect ratio in this example.
Example: Same Pixels, Different Print Sizes
Consider an image with:
3000 × 2000 pixels
At 300 PPI:
10 × 6.67 inches
At 150 PPI:
20 × 13.33 inches
At 100 PPI:
30 × 20 inches
The pixel dimensions remain:
3000 × 2000
Only the pixel density assigned to the physical output changes.
This demonstrates why PPI and pixel dimensions should not be confused.
Common Resolution Mistakes
Mistake 1: Believing 300 DPI Automatically Improves a Photo
Changing the resolution number does not automatically add detail.
Better approach: Check the pixel dimensions and source quality.
Mistake 2: Confusing DPI With Pixel Dimensions
A website may ask for 1200 × 800 pixels.
Entering 300 DPI does not satisfy that requirement if the pixel dimensions are wrong.
Better approach: Follow the actual specification.
Mistake 3: Increasing Resolution Too Much
Turning a tiny image into a huge one can create a larger file without producing equivalent real-world detail.
Better approach: Use the highest-quality source available.
Mistake 4: Ignoring Physical Size
For print projects, the final physical dimensions matter.
Better approach: Calculate the relationship between pixels, PPI, and inches.
Mistake 5: Resampling When You Only Need to Change Metadata
If the printer only asks for a different PPI setting, unnecessary resampling can change the pixel dimensions.
Better approach: Check whether resampling is enabled.
Mistake 6: Changing DPI Without Checking the Print Requirement
A printer may have its own specifications.
Better approach: Follow the printer's instructions instead of relying on a generic number.
Mistake 7: Editing the Only Original
Repeated editing can make it harder to recover the original quality.
Better approach: Always create a new working copy.
Pros and Cons of Changing Image Resolution Online
Pros
- Convenient
- No desktop software may be required
- Useful for quick image preparation
- Can change pixel dimensions
- Some tools can modify PPI/DPI settings
- Useful for print preparation
- Easy to create different versions of one image
Cons
- Features vary between online tools
- Some tools may compress exported images
- Uploading private images may raise privacy concerns
- Some free tools impose file-size limits
- Advanced color or print controls may be unavailable
- Increasing pixel dimensions cannot guarantee additional real detail
For sensitive or private photographs, check the service's privacy and file-handling policies before uploading.
Best Practices for Changing Image Resolution
1. Keep the Original
Never overwrite your only high-quality copy.
Create a separate version for editing.
2. Know the Destination
Determine whether the image is for:
- Website
- Social media
- Document
- Digital display
- Home printing
- Professional printing
3. Check the Actual Requirement
Do not assume "300 DPI" is the answer to every image-resolution problem.
Find out whether the requirement concerns:
- Pixels
- PPI
- DPI
- Physical dimensions
- File size
4. Preserve the Aspect Ratio
If you resize an image, keep the original proportions unless you intentionally want to crop or distort it.
5. Avoid Excessive Upscaling
A larger pixel count does not automatically mean greater photographic detail.
6. Export Once
Complete your edits before creating the final compressed version whenever possible.
7. Inspect the Final File
Check:
- Pixel dimensions
- File format
- File size
- Sharpness
- Physical dimensions if relevant
- Overall appearance
Resolution Decision Table
| Your goal | What you should usually change |
|---|---|
| Make an image smaller for a website | Pixel dimensions |
| Make an image larger digitally | Pixel dimensions/resampling |
| Prepare a specific print size | Pixel dimensions + PPI |
| Change PPI metadata only | PPI without resampling |
| Reduce file size | Pixel dimensions and/or compression |
| Fit a specific shape | Crop/aspect ratio |
| Improve a blurry photo | Source quality or image enhancement; DPI alone will not fix it |
| Meet a printer's specification | Follow the printer's exact requirements |
DPI, PPI and Pixels: Quick Comparison
| Term | Meaning | Example |
|---|---|---|
| Pixels | Digital image units | 2000 × 1500 |
| PPI | Pixels per inch | 300 PPI |
| DPI | Dots per inch from an output device | Printer dot density |
| Pixel dimensions | Width × height | 2000 × 1500 |
| Physical size | Printed dimensions | 10 × 7.5 inches |
A Practical Formula
For basic print calculations:
Physical size in inches = Pixel dimension ÷ PPI
And:
Required pixels = Physical size in inches × PPI
Example
You want a:
6 × 4 inch
print at:
300 PPI
Required dimensions:
6 × 300 = 1800 pixels
4 × 300 = 1200 pixels
So you would need approximately:
1800 × 1200 pixels
for that straightforward 300 PPI calculation.
Remember that the actual printing workflow can have additional requirements.
How to Tell Whether You Need More Pixels
Ask yourself:
Does my final image need to be physically larger?
If yes, you may need more pixels.
Does my image already have enough pixels but the PPI setting is different?
If yes, you may only need to change the PPI metadata.
Does a website require exact dimensions?
If yes, follow the pixel requirement.
Is the original image blurry?
If yes, changing DPI or PPI alone will not fix the underlying blur.
How to Preserve Quality When Changing Resolution
Use this workflow:
Original → Check dimensions → Identify requirement → Crop if needed → Resize if needed → Set PPI if required → Export → Check
Do not automatically change every setting.
Only modify what the final use actually requires.
Online Resolution Editing: Privacy Considerations
When using an online image editor, remember that your image is being uploaded to a third-party service.
Before uploading sensitive photographs, check:
- Privacy policy
- File retention policy
- Whether files are automatically deleted
- Whether accounts are required
- Whether the service uses uploaded content for other purposes
- Whether the service offers local/browser-based processing
For ordinary public images, this may be less concerning. For personal documents, identification photos, confidential business images, or private family photographs, privacy should be part of your decision.
Final Advice for Part 2
The most useful skill is not memorizing one "perfect" DPI value.
It is understanding what the requirement actually asks for.
If a website wants pixel dimensions, work with pixels.
If a print workflow specifies PPI and physical dimensions, calculate the required pixel dimensions and check the PPI setting.
If you only need to change resolution metadata, avoid unnecessary resampling.
And if an image is already low quality, increasing the DPI number will not magically restore lost detail.
A simple rule is:
Pixels control digital dimensions. PPI connects pixels with physical size. DPI describes output-device dots.
Understanding that difference makes image-resolution work much easier and helps you avoid unnecessary quality loss.
Conclusion
Understanding how to change image resolution online becomes much easier once you separate pixels, PPI, and DPI.
Pixels describe the actual digital dimensions of an image. PPI describes how those pixels relate to physical size, while DPI technically refers to the dots produced by a printer or other output device.
The most important thing is to identify what your project actually requires.
If a website asks for 1200 × 800 pixels, focus on pixel dimensions.
If a printing service asks for a particular physical size and PPI, consider both the pixel dimensions and the required PPI.
If you only need to change the PPI information without changing the number of pixels, make sure your image editor does not unnecessarily resample the image.
Most importantly, changing a resolution number does not automatically add missing image detail. A small, blurry image cannot become a genuinely detailed photograph simply because its DPI or PPI value was increased.
For the best results, keep the original image, make a copy for editing, preserve the aspect ratio when appropriate, and check the final file before using or printing it.
The simplest workflow is:
Check the requirement → inspect the original → decide between pixels and PPI → resize or change metadata as needed → export → verify the final image.
That approach helps you avoid unnecessary editing and gives you a better chance of preserving the quality you already have.
Key Takeaways
- Pixels determine the digital dimensions of an image.
- PPI means pixels per inch.
- DPI means dots per inch and technically relates to output devices such as printers.
- Changing PPI without resampling does not automatically create additional pixels.
- Increasing pixel dimensions involves resizing or resampling.
- A higher DPI/PPI number does not automatically make a blurry image sharper.
- For websites, pixel dimensions are usually more important than PPI.
- For printing, consider pixel dimensions, PPI, physical size, and the printer's requirements.
- Use the highest-quality original available.
- Avoid excessive upscaling when possible.
- Keep the original file before making changes.
- Always check the final dimensions and exported file before publishing or printing.
Call To Action
Need to prepare an image for a website, document, or print project?
Before changing the resolution, check whether you need to change pixels, PPI, DPI, or physical dimensions. Once you know the actual requirement, make only the necessary adjustment and keep your original image safely stored.
Choose the right resolution for the job—not simply the biggest number.
Frequently Asked Questions
1. How can I change image resolution online?
You can use an online image editor or image-resizing tool that supports pixel dimensions and, when required, DPI/PPI settings. Upload the image, identify the required resolution, choose whether you need to resize or only change the resolution metadata, and export the result.
2. Does changing DPI improve image quality?
No. Simply changing the DPI number does not automatically add detail to an image. If the pixel dimensions remain unchanged, the image still contains the same number of pixels.
3. What is the difference between DPI and PPI?
PPI means pixels per inch and relates to the density of digital image pixels for physical output. DPI means dots per inch and technically refers to the dots produced by an output device such as a printer.
4. How do I change an image from 72 DPI to 300 DPI?
Use an image editor that allows you to change the resolution setting. If you only need to change the resolution metadata, make sure resampling is disabled so the pixel dimensions do not change unnecessarily.
5. Does 300 DPI mean an image is high quality?
Not necessarily. Image quality also depends on pixel dimensions, focus, sharpness, compression, source quality, and other factors. A small blurry image set to 300 DPI is still a small blurry image.
6. What resolution should an image have for printing?
The appropriate resolution depends on the printing method, physical print size, viewing distance, and printer requirements. A commonly used target for many high-quality photographic prints is 300 PPI, but you should follow the specifications provided by the printing service when available.
7. How do I increase the resolution of a low-resolution image?
You can increase its pixel dimensions using an image-resizing or upscaling tool. However, increasing the number of pixels does not guarantee that missing original detail will be recreated accurately. Starting with a higher-resolution original is preferable whenever possible.
8. Is DPI more important than pixels?
Neither is universally more important. For digital use, pixel dimensions are often the key requirement. For physical printing, pixel dimensions, PPI, physical size, and printer specifications can all matter.
9. Can I change image resolution without changing its size?
Yes. If by "size" you mean pixel dimensions, you can often change the PPI setting without resampling the image. For example, an image can remain 2000 × 1500 pixels while its PPI setting changes.
10. What is the best resolution for website images?
There is no universal resolution for every website image. The appropriate pixel dimensions depend on the image's display size, layout, responsive design, and performance requirements. Follow the dimensions recommended by the website or design specification.
Ready to optimize your images?
Every tool mentioned in this article is free to use. No upload, no signup, and no watermarks — ever.
Try our free toolsRelated articles
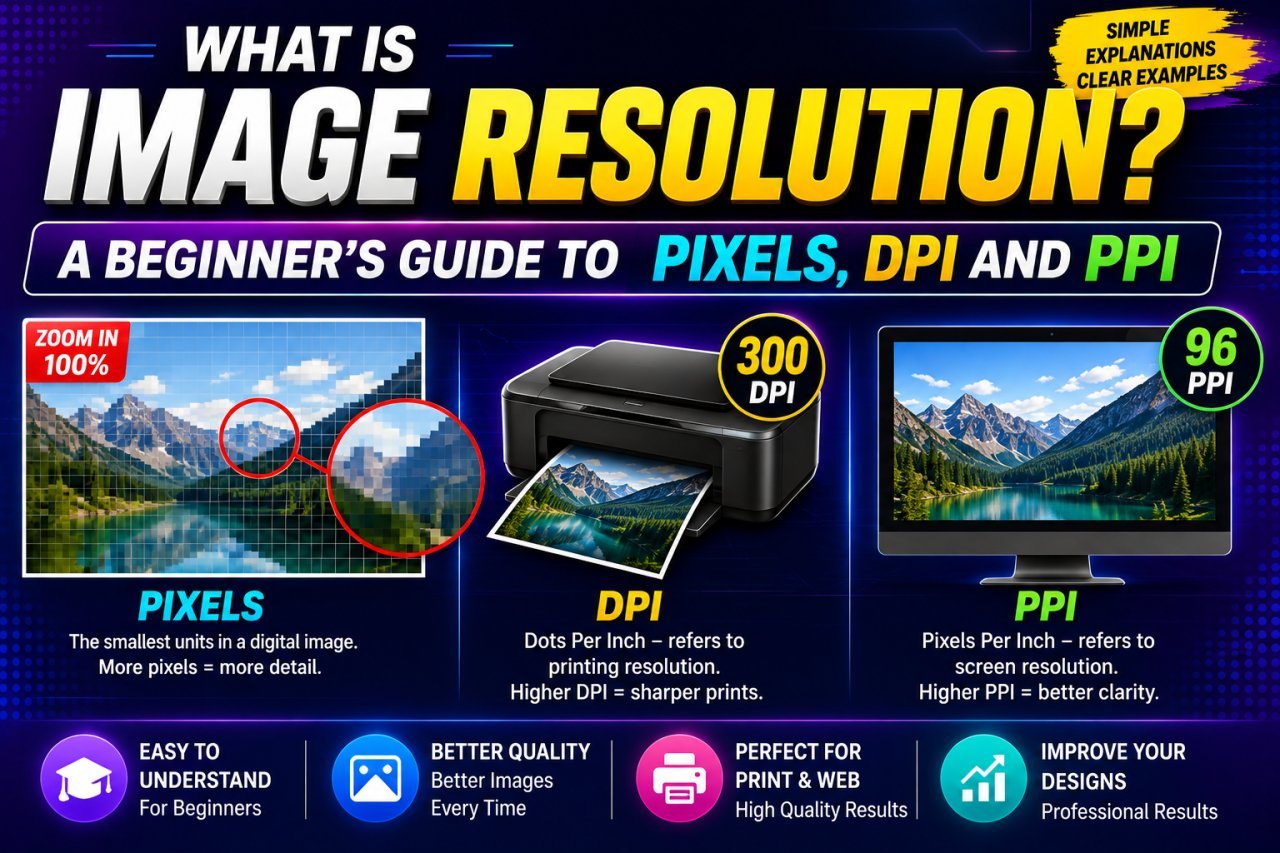
What Is Image Resolution? A Beginner’s Guide to Pixels, DPI and PPI
Learn what image resolution means, how pixels work, and the difference between DPI and PPI. A simple beginner’s guide with practical examples.
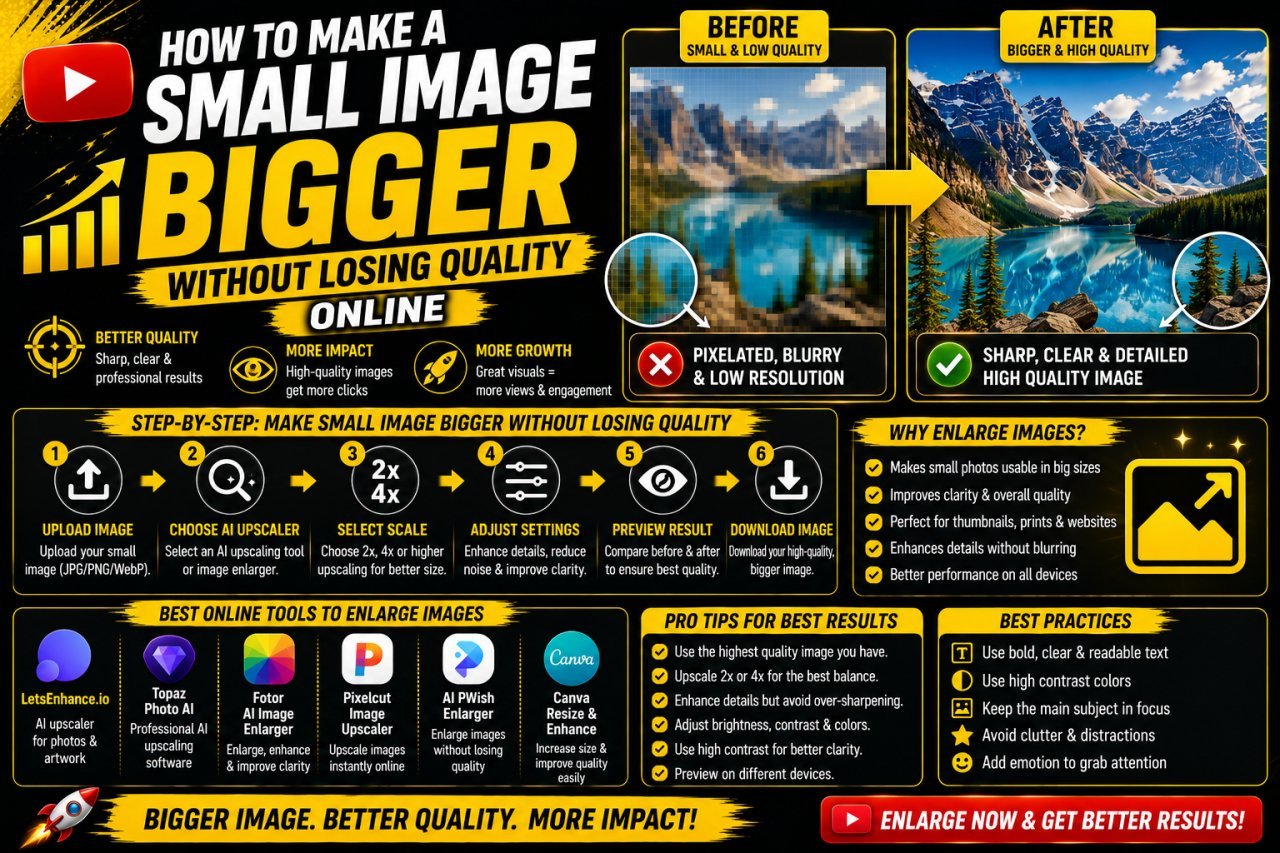
How to Make a Small Image Bigger Without Losing Quality
Learn how to make a small image bigger without losing quality using proper resizing, image upscaling, sharpening, cropping, and export techniques.
How to Crop a Photo to Any Size Without Losing Quality
Learn how to crop a photo to any size without losing quality. Discover the right dimensions, aspect ratios, resolution tips, and simple cropping techniques.